CREATING AN IBM WATSON CONNECTION
This setup is intended to be a minimal setup example to get the Watson IoT connector working. The Watson IoT connector requires the creation of an IBM Cloud account upfront.
Collecting Expected Information
First time generating all informations
Follow these steps in order to generate all the informations you need.
Go to the IBM Watson IoT Dashboard
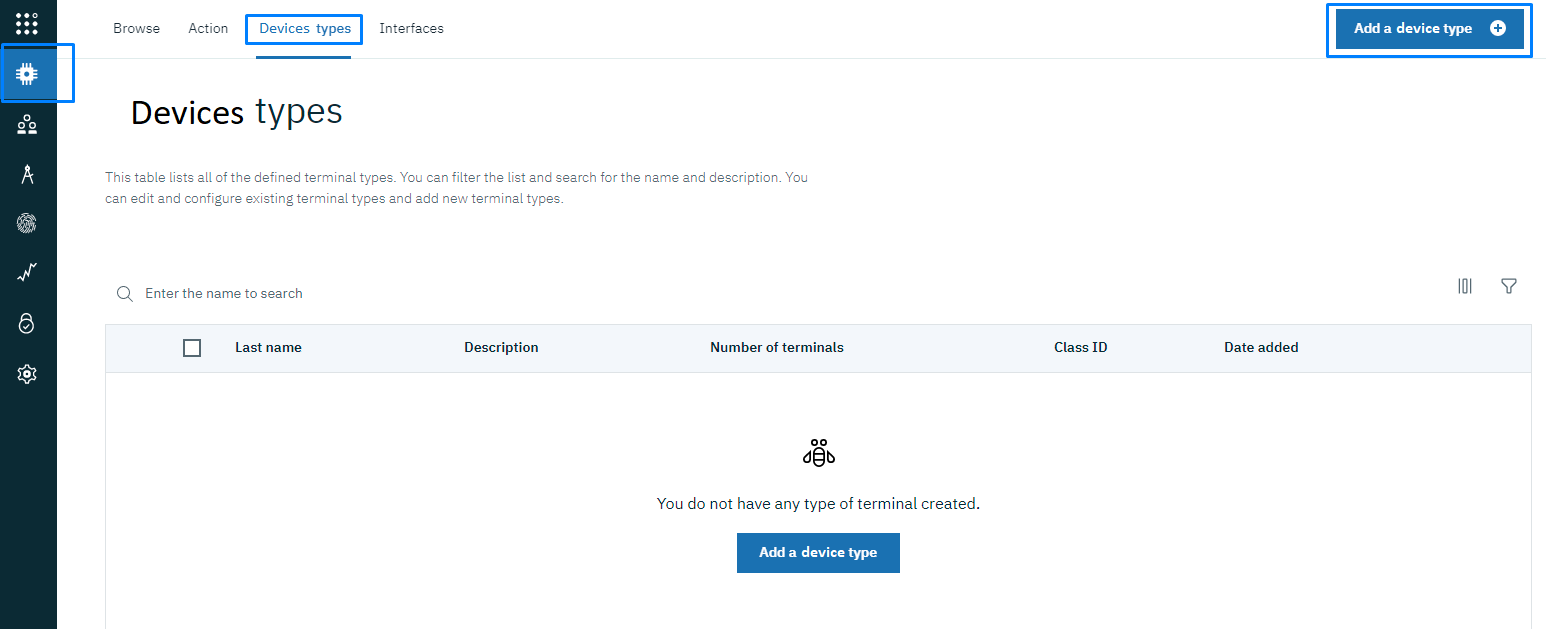
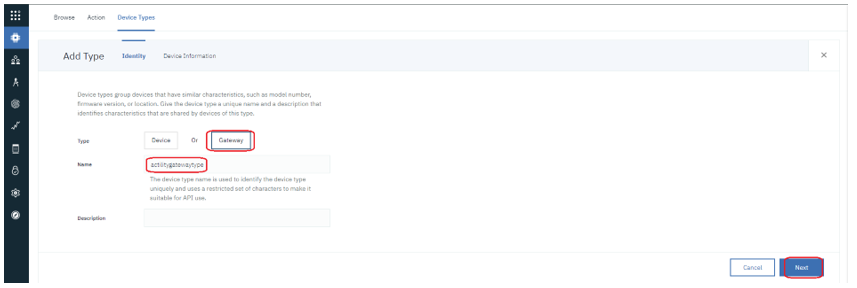
- Click the Devices link in the left menu, then click on the Device Types section, and then click on the Add Device Type button.
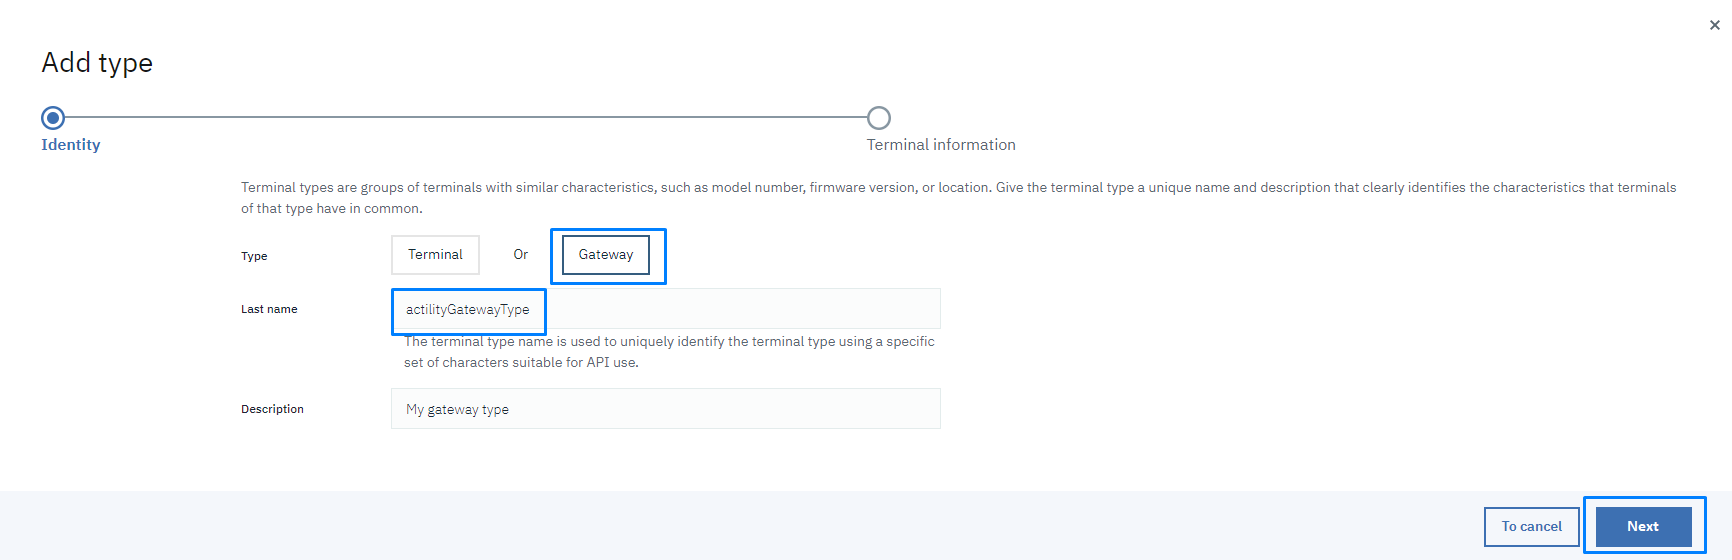
- First, create the Gateway type: fill the Name value, click Next.
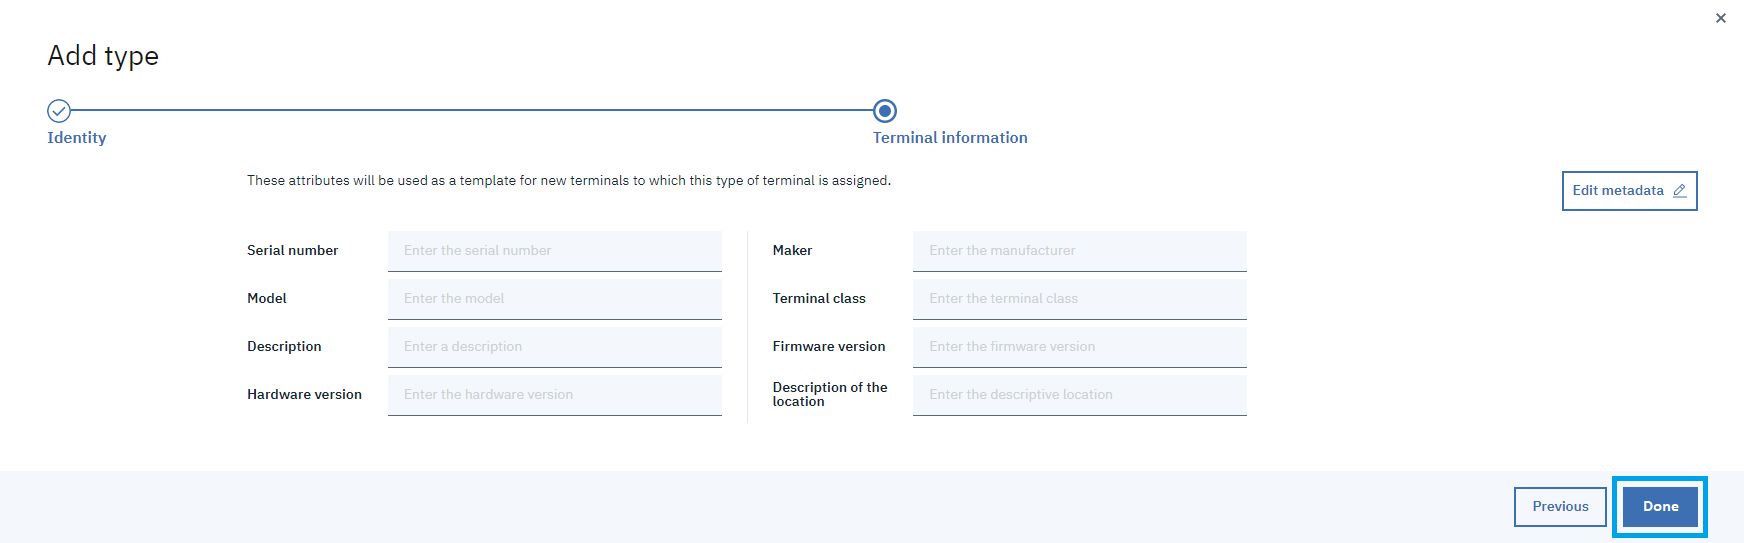
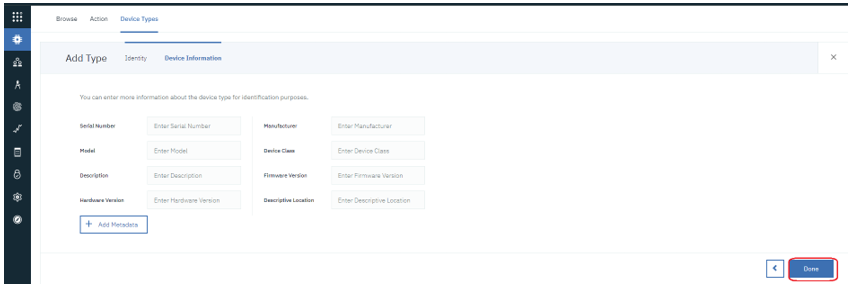
- Click Done to create the gateway Type.
- Repeat the same action to create the Device type.
Mettre un tip note warning be sure to copy these infos or else you will have to regenerate them
Organization ID
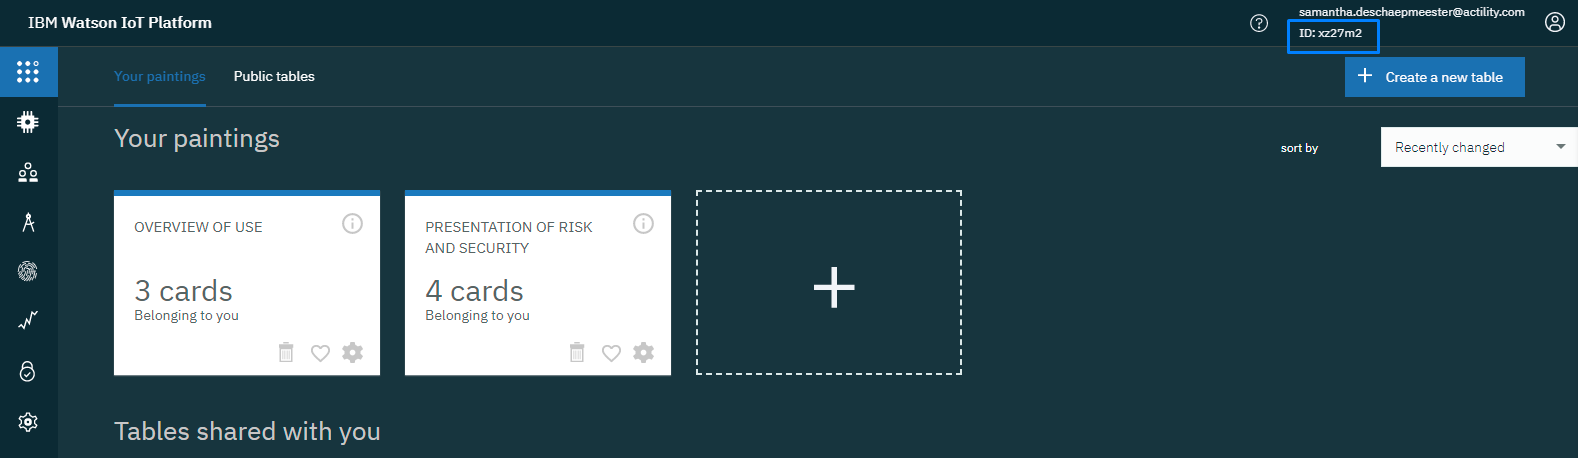
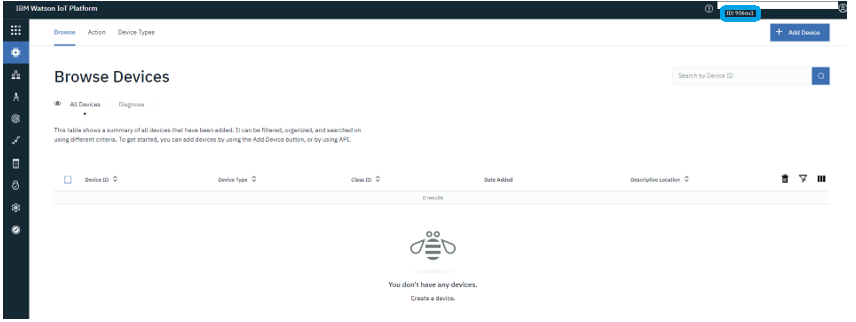
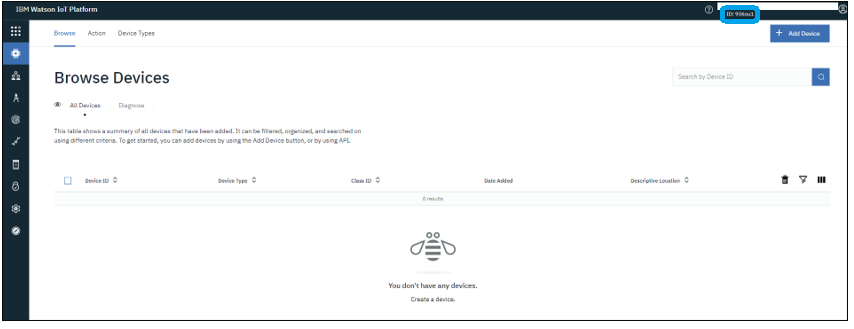
Go to the IBM Watson Iot Platform's dashboard page. You should see the Organization ID in the top right corner.
API Key
On the Watson dashboard right corner or in the url you can find the orgId value: https://936ou1.internetofthings.ibmcloud.com/dashboard/devices/browse
- Click the Devices link in the left menu, then click on the Device Types section, and then click on the Add Device Type button.
- Create first the Gateway type: fill the Name value, click Next and on the next page click Done.
- Repeat the same action for creating the Device type.

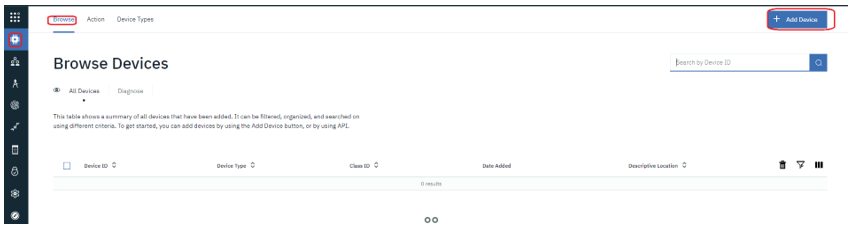
- On the Device Types list you should see the newly created Device types:

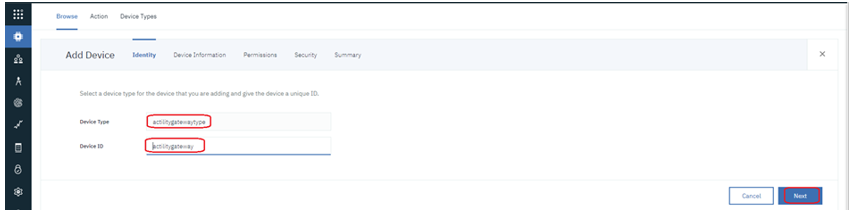
- Create now a Gateway. Go to Device and click Add Device:
- On Identity tab select the gateway type previously created, fill the gateway id and click Next.
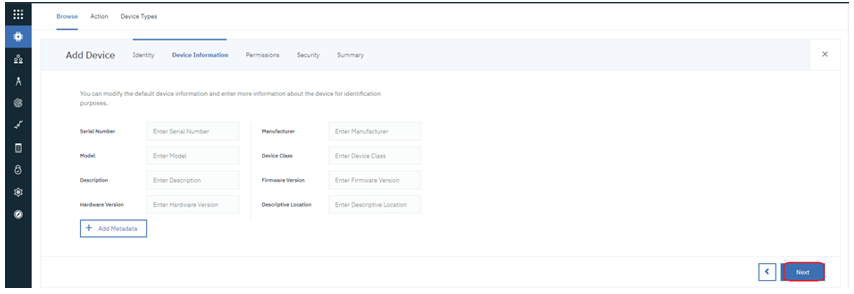
- On the Device information tab click Next.
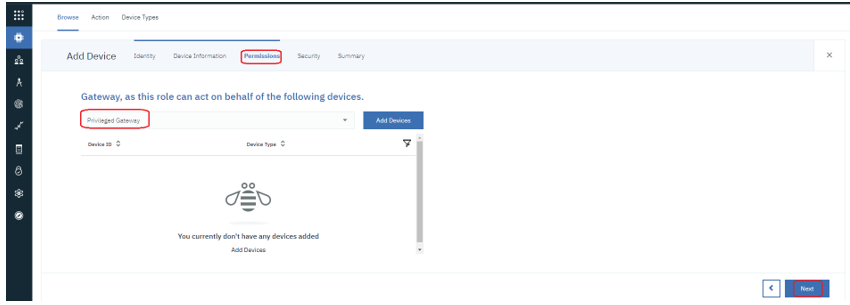
- On the Permissions tab select Privileged Gateway and click Next (read this to understand the difference between Standard and Privileged Gateway):
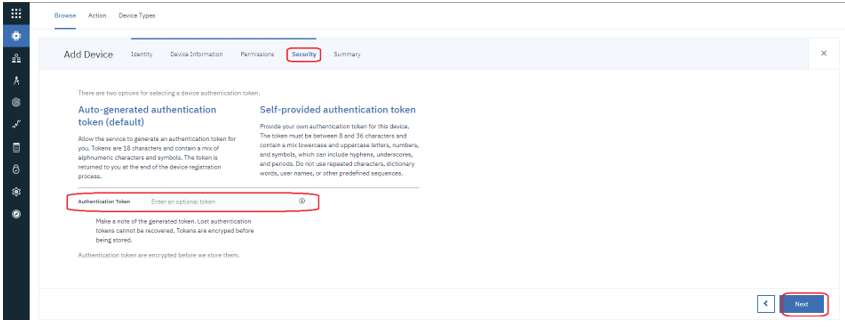
- On the Security tab leave Authentication Token empty to let Watson auto-generate one for you and click Next.
- On Summary tab click Done.
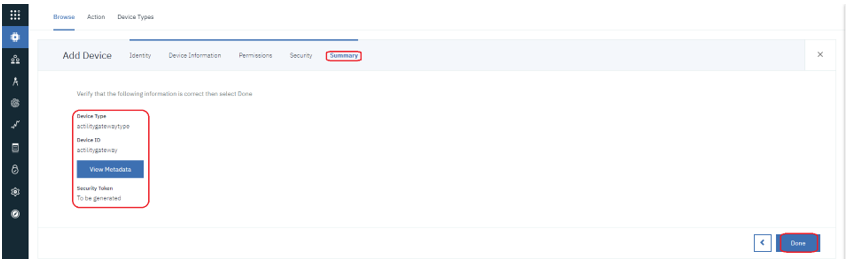
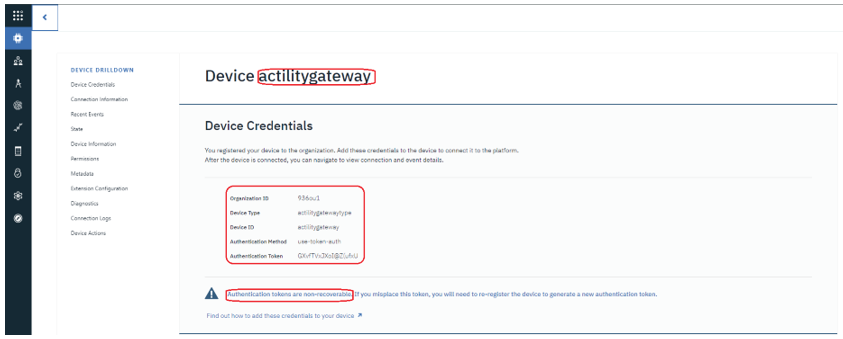
- On the final page you have the Organization ID and all gateway info required for the connection configuration:
- Organization ID is the orgId
- Device ID is the gatewayId
- Device Type is the gatewayType
- Authentication Token is the gatewayToken. Copy and save this token because generated Authentication tokens are non-recoverable.
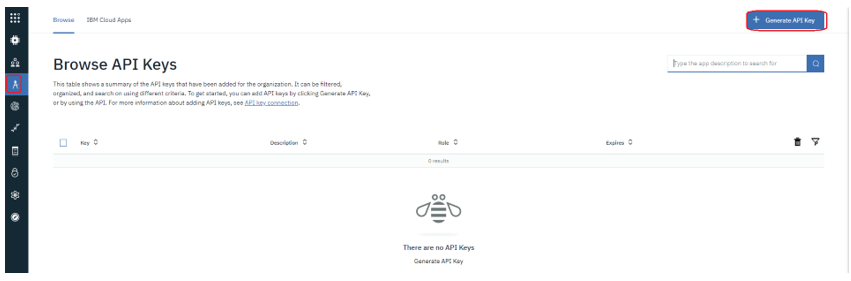
- After this we need to create an API Key/token to be used for listing/registering devices under the gateway Device that we created.
- Select Apps from the left menu and click Generate API Key.
- On the Information tab select a desired API Key Expiration date and click Next:
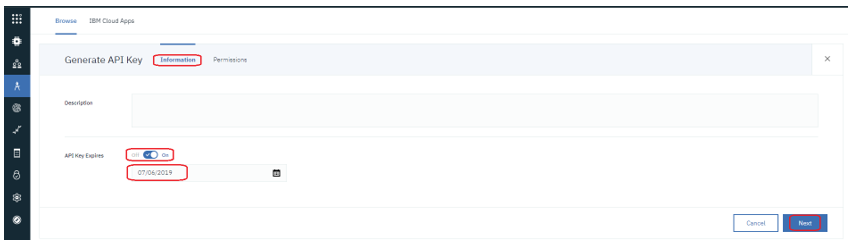
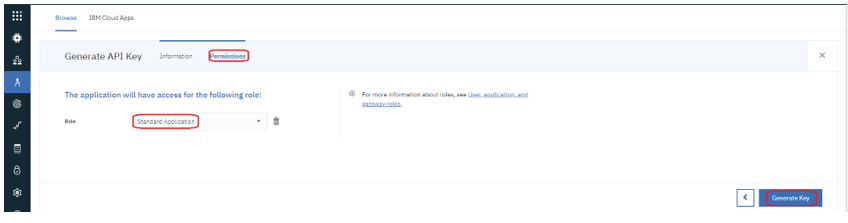
- On the Permissions tab, select Standard Application Role and click Generate Key:
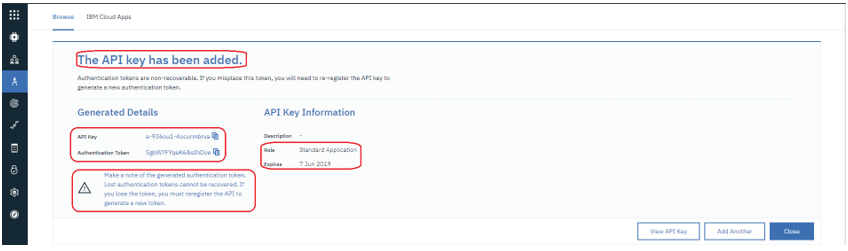
- On the final page you get the generated API Key/Token need it for connection configuration:
- API Key is the apiKey
- Authentication Token is the apiToken. Copy and save this token because generated Authentication tokens are non-recoverable.
Creating an IBM Watson IoT Platform
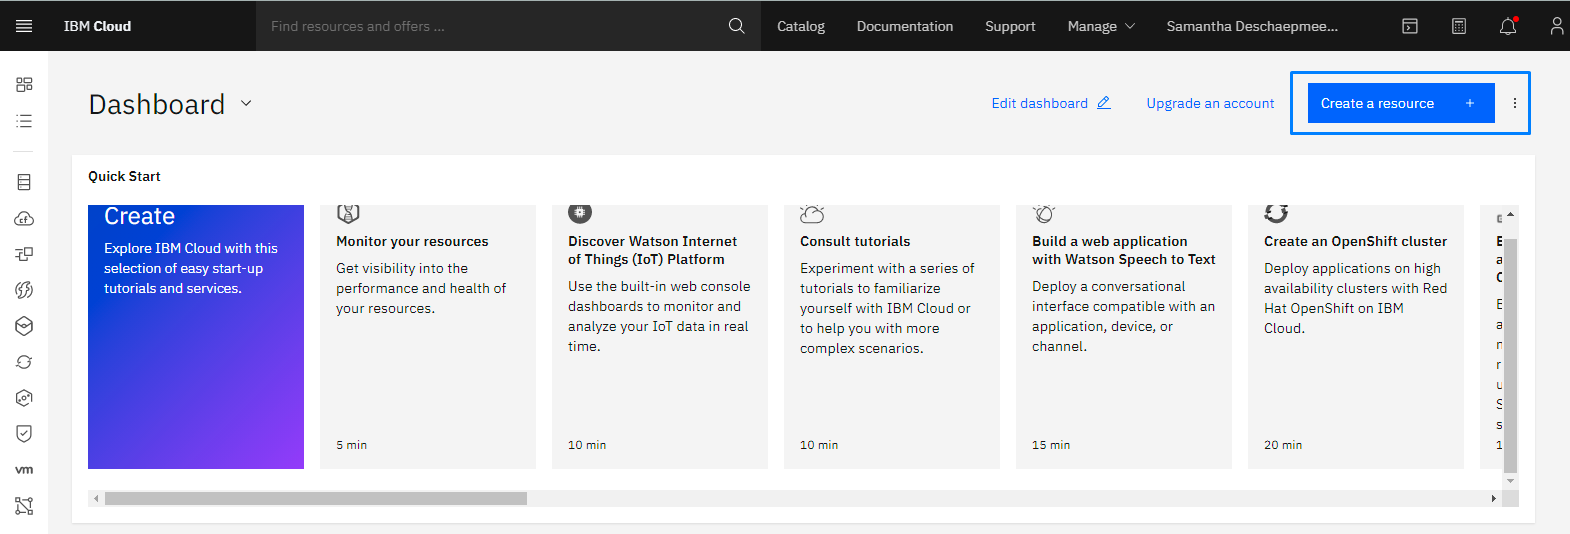
- To create an IBM Watson IoT Platform go to IBM Cloud Dashboard and select Create resource.
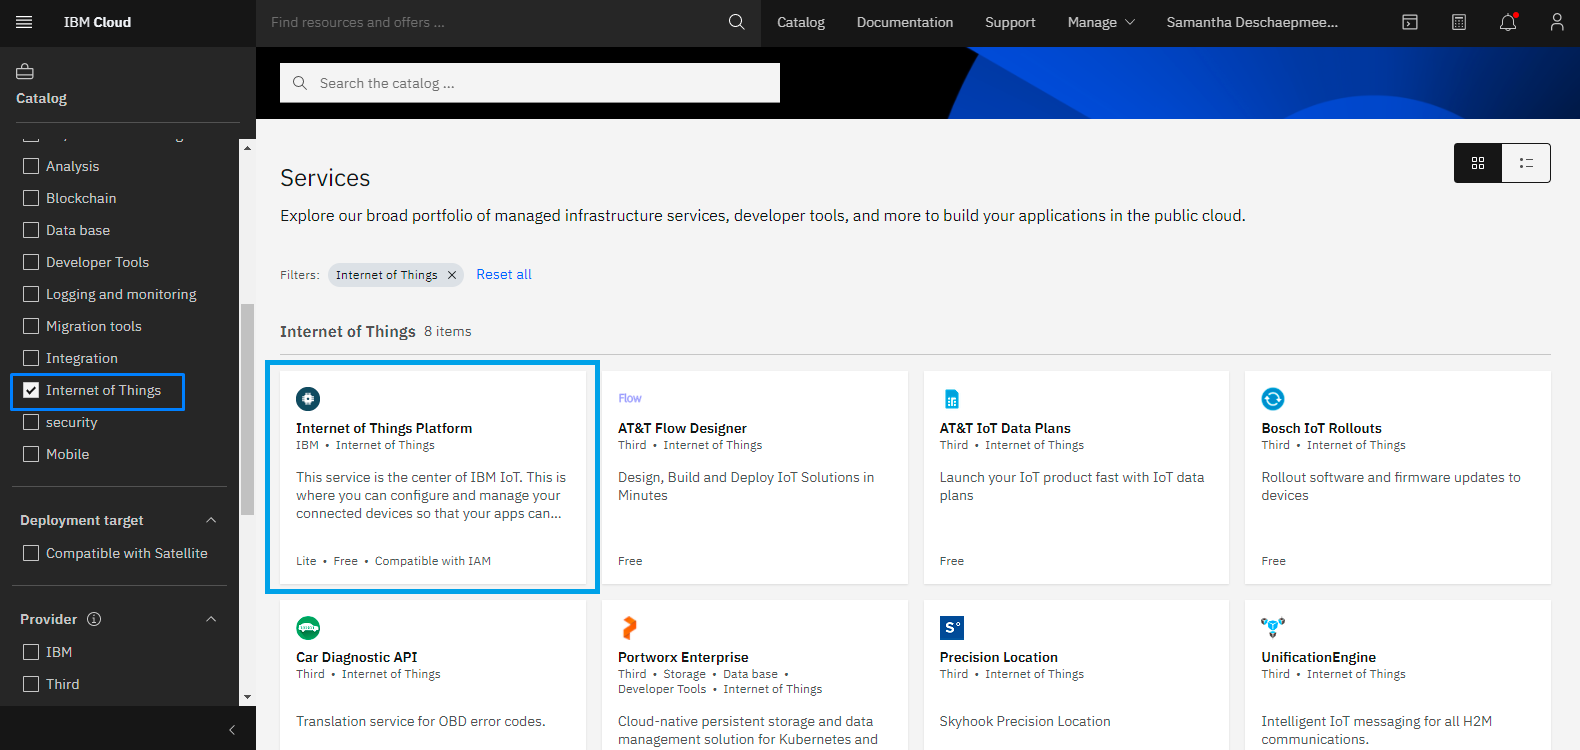
- Select Internet Of Things Platform:
- Select the region to deploy the application

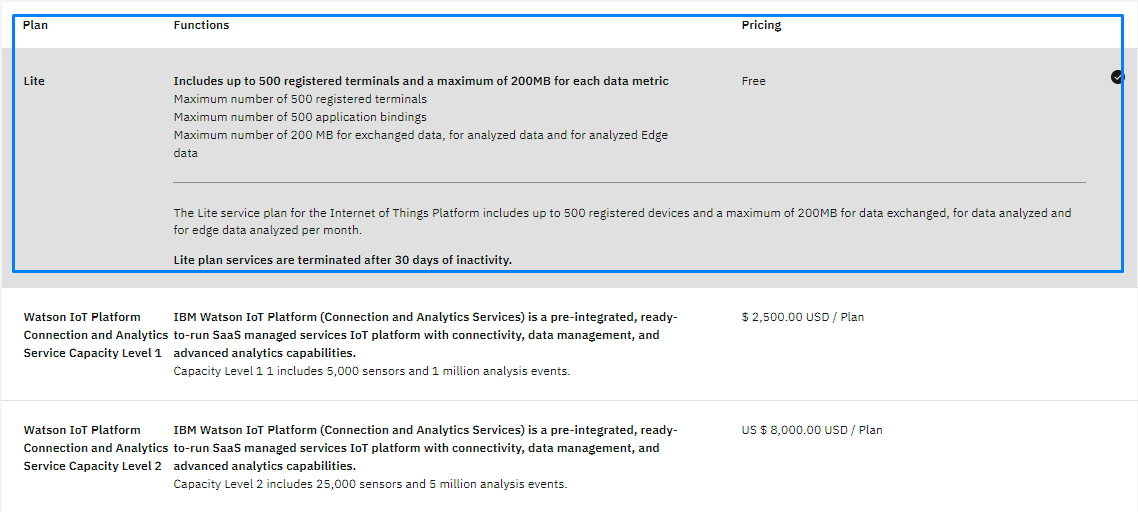
- Select the pricing plan. For a demo, the Lite/free plan should be ok. For production select a paid plan that fits your needs.
- Fill in the service name, select the region to deploy and create the organization/space if needed. After filling the form, click Create.

- Finally, on the next screen, click Launch to start the IoT Platform:
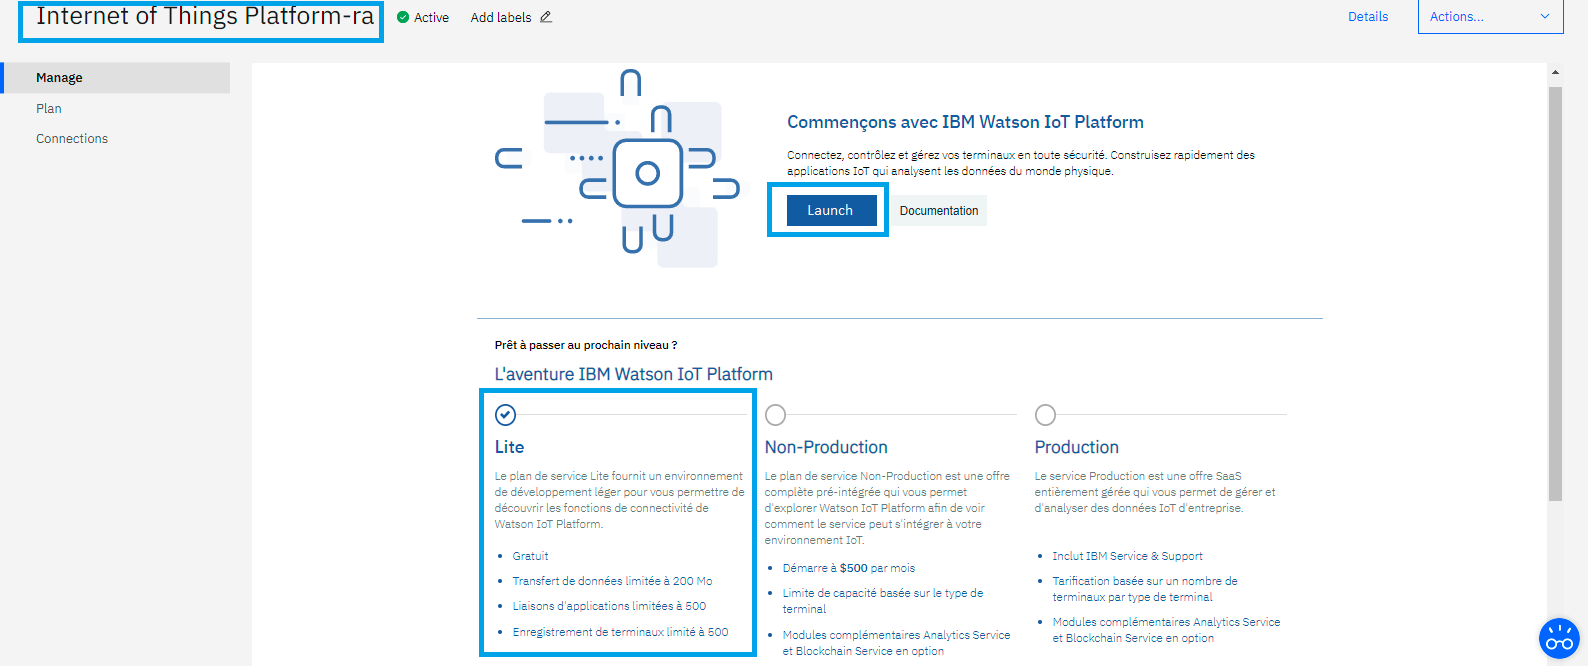
- You will be redirected to the newly created IBM Watson IoT Platform dashboard. Do not forget to copy the organization ID.
Creating a Connection With API
MQTT over TLS is the protocol used by Watson. You need to create the connection prior to creating the flow. The creation of a connection establishes a link from ThingPark Wireless to the cloud provider that you want to associate a Device with. The link can be used to transport any Uplink regardless the DevEUI parameter. To do this, you need to use the following endpoints:
POST/connectionsfor creationPUT/connectionsfor modificationDELETE/connectionsfor deletion
When you update a configuration property on a connection, you must provide the whole configuration properties again.
Example of the creation of a connection.
    POST /connections

{
  "connectorId": "actility-watson-iot",
  "name": "Watson Demo Connection",
  "configuration": {
    "description": "Watson Datacenter",
    "orgId": "936ou1",
    "deviceType": "actilitydevicetype",
    "gatewayType": "actilitygatewaytype",
    "gatewayId": "actilitygateway",
    "gatewayToken": "GXvfTVxJXoI@Z(ufxU",
    "apiKey": "a-936ou1-4ocurmbrva",
    "apiToken": "SgbW?FYqeK6&sIhDoe"
  }
}
The following table lists the expected results of the properties when applied:
| Property | Expected results |
|---|---|
connectorId | Set to actility-watson-iot |
configuration/orgId | Organization id of the Watson IoT account. |
configuration/gatewayId | Id of the Watson IoT gateway used by the connector. |
configuration/gatewayType | Watson IoT gateway type of the Watson IoT gateway used by the connector. |
configuration/gatewayToken | Authentication token of the Watson IoT gateway used by the connector. |
configuration/deviceType | Watson IoT Device type to be associated with the Devices processed by the connector. |
configuration/apiKey | API Key of the Watson IoT application to be associated with the connector. |
configuration/apiToken | Authentication Token of the Watson IoT application to be associated with the connector. |
All properties are not present in this example. You can check the rest of these properties in the common parameters section.
Creating a Connection From UI
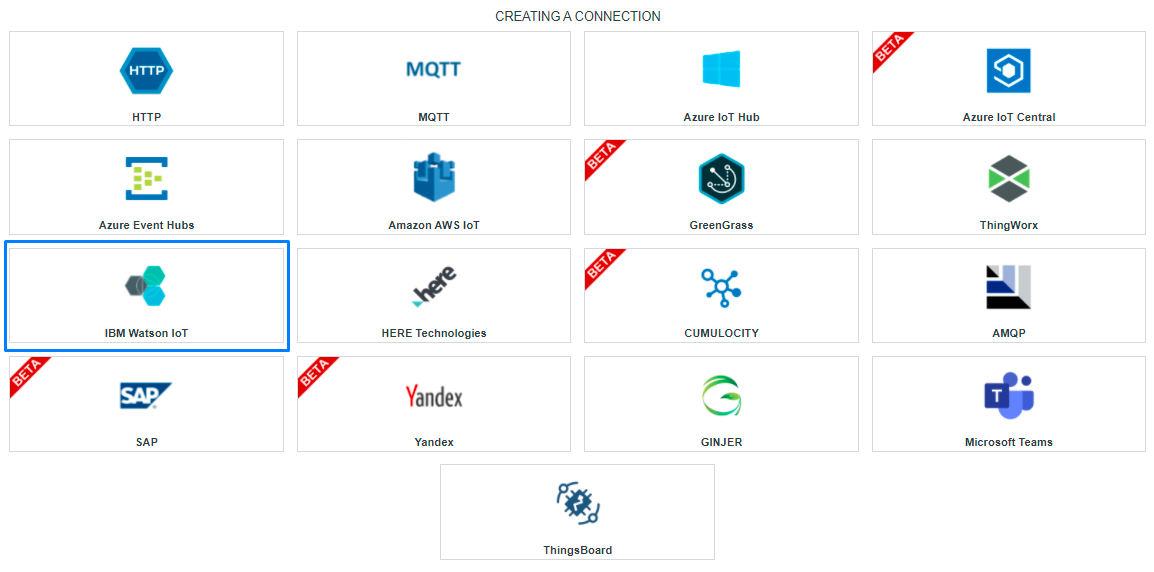
- Click Connections -> Create -> ThingPark X IoT Flow.
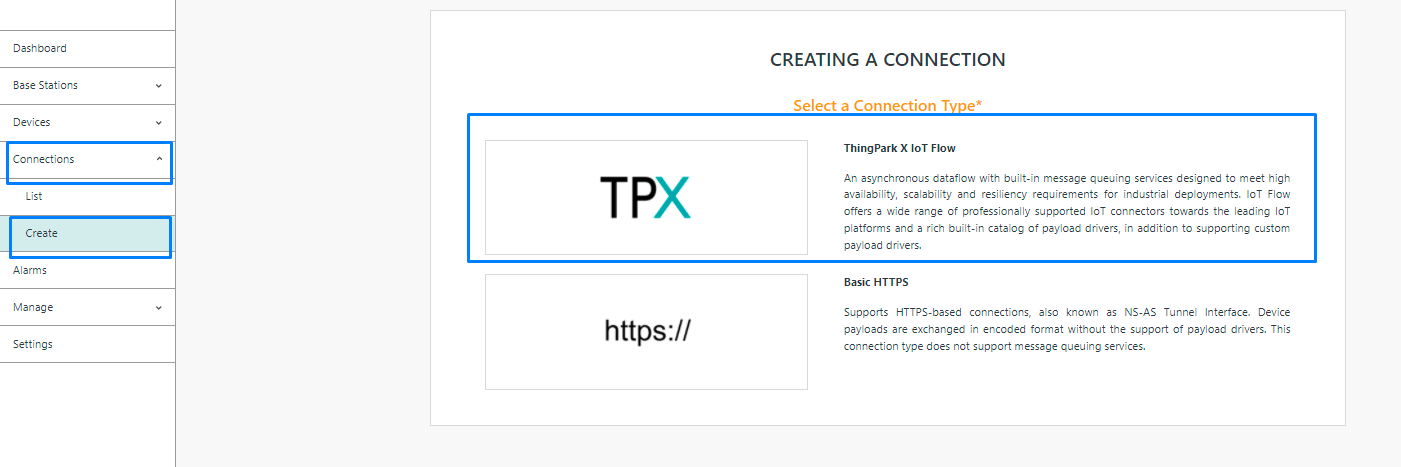
Then, a new page will open. Select the connection type : IBM Watson IoT.
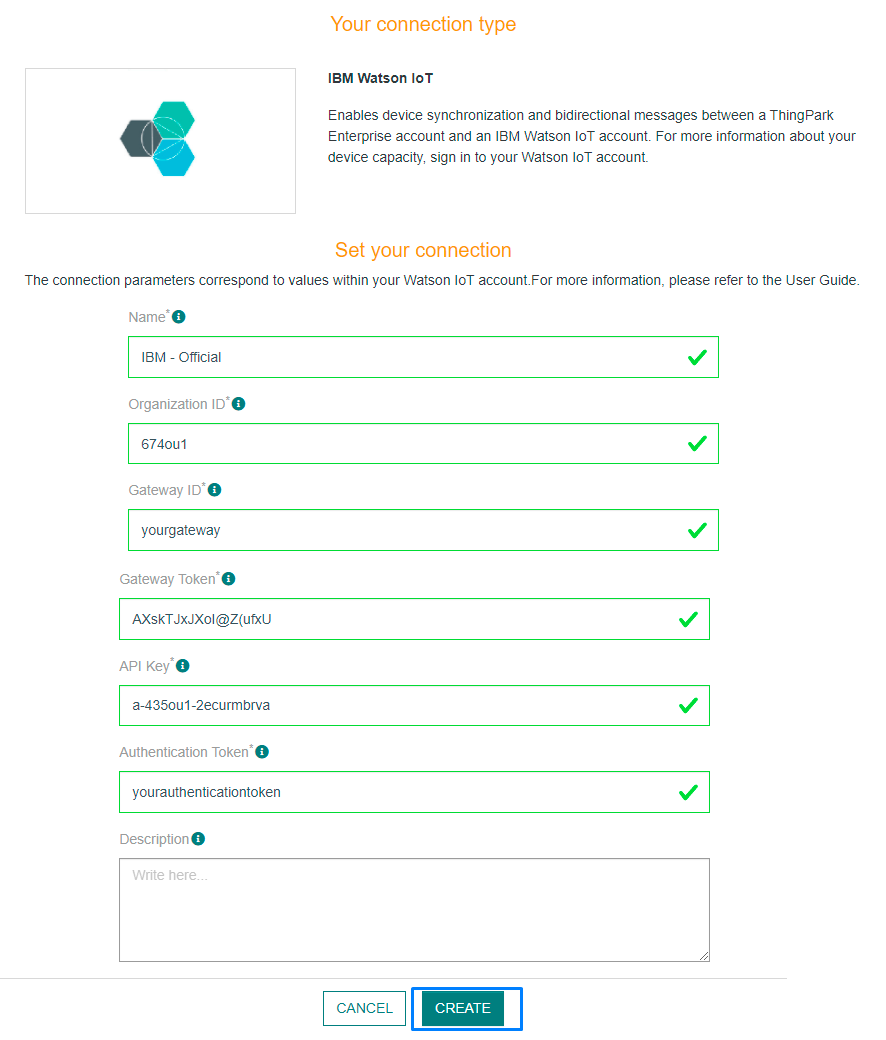
- Fill in the form as in the example below and click on Create.
Limitations
Look on Watson IoT Platform Quotas for choosing a Watson plan that suits your needs. We recommend that you use the Standard plan for production and the lite plan for testing purposes.
Displaying Information to Know if it Worked
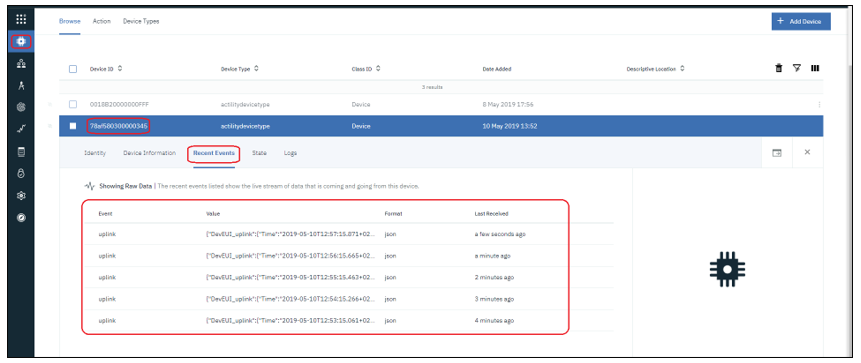
- Go to the Watson dashboard and select Device from the left menu.
- Select the Device that you want to monitor and go to Recent Events tab and wait for uplinks to be displayed. You should see something like this:
Troubleshooting
As for now, there are no detected bugs.