CREATING AN AZURE EVENT HUBS CONNECTION
This setup is intended to be a minimal setup example to get the Azure Event Hubs connector working. The Azure Event Hubs connector requires the creation of an Azure Event Hubs account upfront. This account can be either a free or a paid account. Check Azure Event Hubs pricing and Event hubs limits to decide which subscription fits your needs.
Collecting Expected Information
Parameters required
| UI Field | Description |
|---|---|
| Hostname | The Hostname of your Azure Event hub account. Example: myaccountname.azure-devices.net. |
| Shared access key | The access key from your Azure Event hub. |
| Shared access key name | Name of the access key. |
| Event Hub units | The number of units associated with your Azure Event Hubs account. |
For detailed information on Microsoft Azure Event Hubs configuration and parameters, see the Azure Event Hubs documentation
-
Connect to the Azure Portal.
-
On the main page you should see all the resources that you have created. This looks like the following screen.

-
Select the Event Hubs that you have created, in this case tpx-event-hubs.
-
On the Overview page you should see the Hostname as well as other informations.

- In the menu, click on the Shared access policy under the Settings section.

- Select an existing access or create one. In this example, it is RootManageSharedAccessKey which is your Shared access key name.

- A screen displays on the right side of your screen where you can copy the Primary key which is your Shared access key.
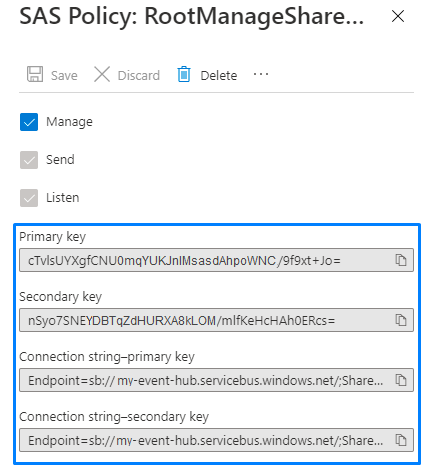
Permissions:
- Manage: This permission is not required.
- Send: This permission is necessary to send uplinks.
- Listen: This permission is optional. You don't need it if you disable the "Downlink enabled" button.
Port
When creating an Azure Event Hubs connection with the UI, you need to provide the hostname which is composed of the name and port used.
The port used changes depending on the protocol used. In this case, you must used the 9093 port because the protocol used is Kafka.
In our example, it means that our full hostname will be my-event-hub.servicebus.windows.net:9093.
| Protocol | Ports | Details |
|---|---|---|
| Kafka | 9093 | See Use Event Hubs from Kafka applications |
Creating a Connection From UI
You must have an active AZURE account prior to creating an Azure Event Hubs connection in ThingPark.
You also need to know the parameters that are required to perform this task. To learn more, check Parameters required for connecting to an Azure Event Hubs platform.
- Click Connections -> Create -> ThingPark X IoT Flow.
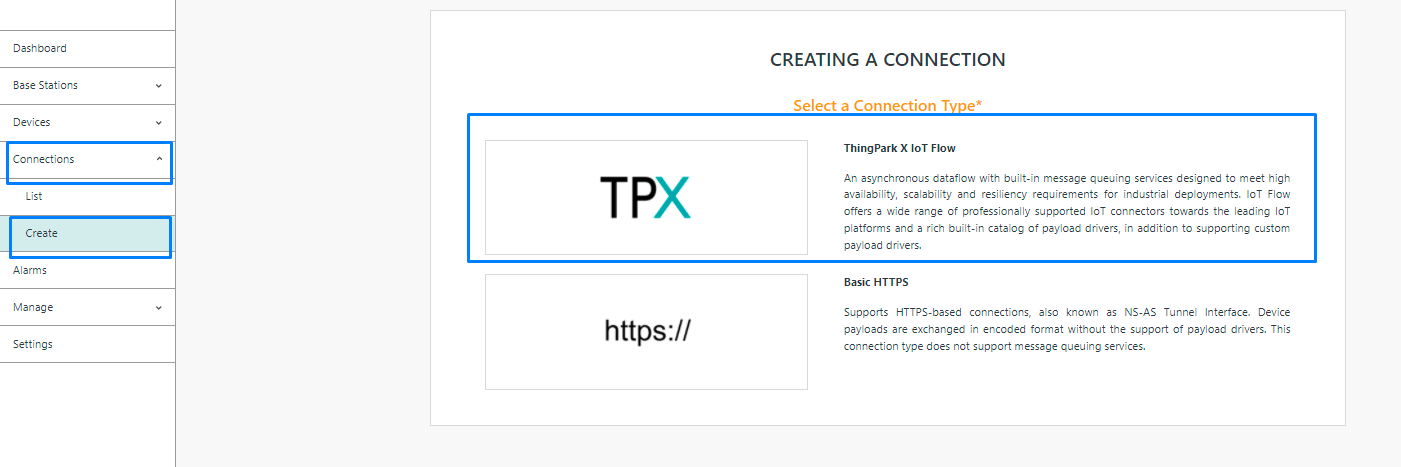
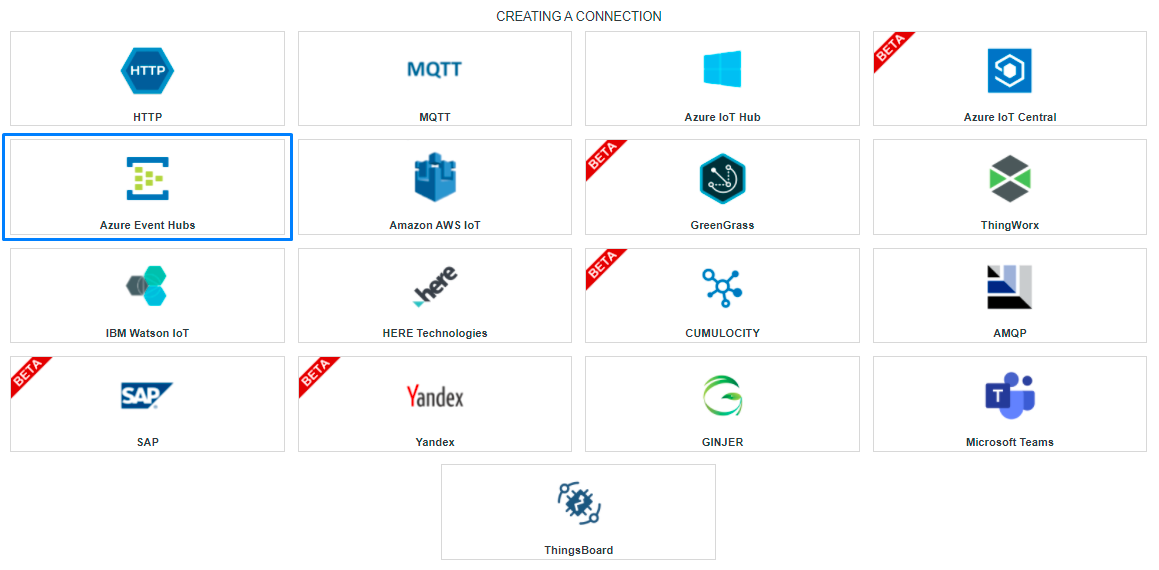
Then, a new page will open. Select the connection type : Azure Event Hubs.
- Fill in the form as in the example below and click on Create.
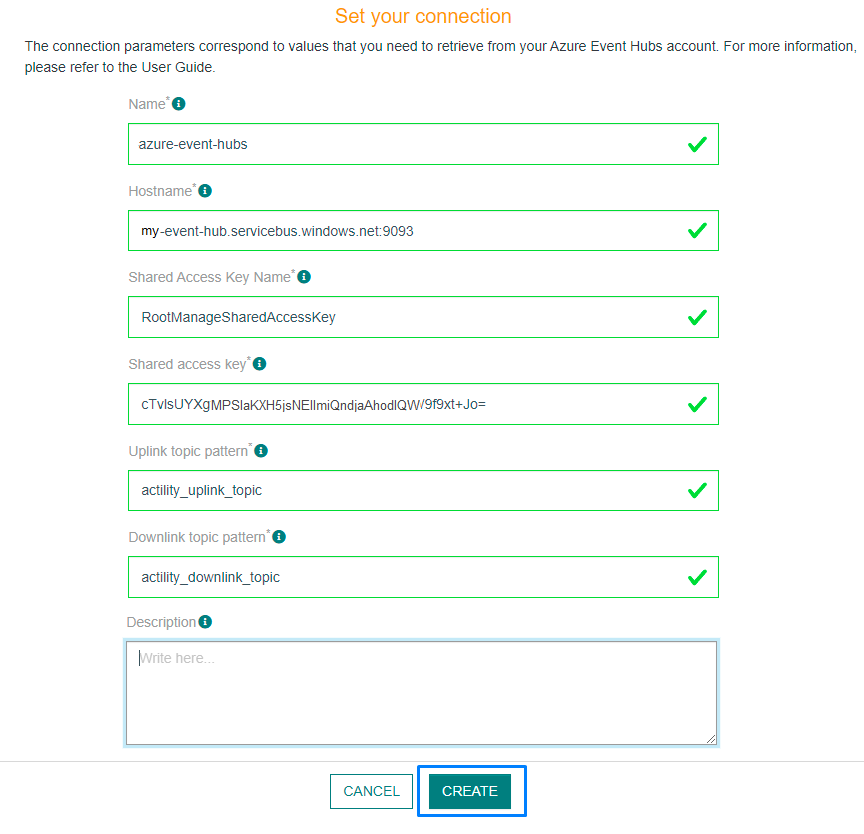
Parameters marked with * are mandatory.
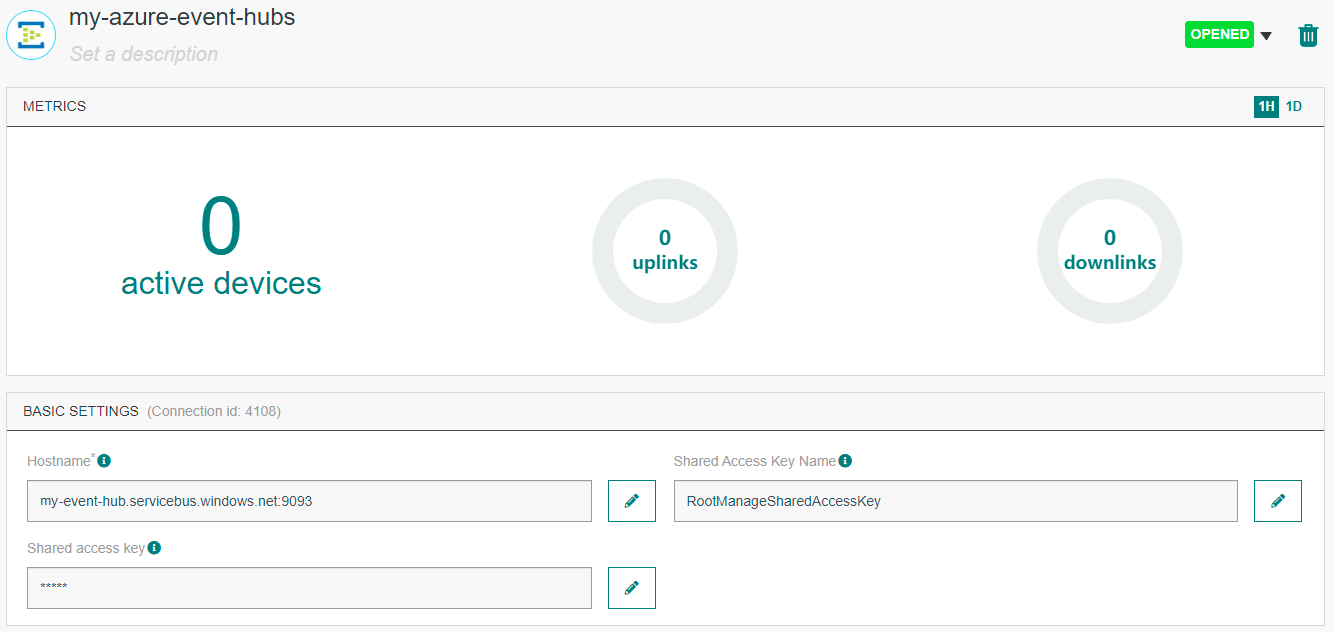
- A notification appears on the upper right side of your screen to confirm that the application has been created.

- After creating the application, you will be redirected to the application details.
Changing the Settings after Creation
You can change the settings parameters such as the email or the password after the creation of the Azure Event Hubs application.
To do this, proceed as follows:
-
Select the Azure Event Hubs application for which you want to change one or several parameters.
-
In the application information dashboard, click on the Edit button corresponding to the parameter you want to change.

- Enter the new value, and click on the Confirm icon.

- The Confirmation window displays,

- A notification will inform you that the parameter is updated.

Creating a Connection With API
The creation of a connection establishes a bidirectional messaging transport link between ThingPark X IoT Flow and the cloud provider. Events and commands from multiple Devices will be multiplexed over this messaging transport link.
To do this, you need to use the Connections group resource:
POST/connectionsto create a new Connection instancePUT/connectionsto update a Connection instanceDELETE/connectionsto delete a Connection instance
We follow the REST-full API pattern, when updating configuration properties for a connection resource. Thus, you must also provide the whole configuration again.
Example for creation of a new connection instance :
POST /connections
{
    "connectorId": "actility-azure-event-hub",
    "name": "My Azure EventHub Connection",
    "configuration": {
        "hostName": "my-event-hub.servicebus.windows.net:9093",
        "sharedAccessKeyName": "RootManageSharedAccessKey",
        "sharedAccessKey": "cTvlsUYXgf....KNX/9f9xt+Jo=",
        "uplinkTopicPattern": "actility_uplink_topic",
        "downlinkTopicPattern": "actility_downlink_topic"
    }
}
| JSON Field | Description |
|---|---|
connectorId | Must be set to actility-azure-event-hub for Azure Event Hubs platform. |
hostName | The Hostname of your Azure IoT Hub account. Example: myaccountname.azure-devices.net |
sharedAccessKeyName | Name of the access key. |
sharedAccessKey | The access key from your Azure hub. |
uplinkTopicPattern | Defines a pattern of topic for the Uplink. |
downlinkTopicPattern | Defines a pattern of topic for the Downlink. |
eventHubUnits | The number of units associated with your Azure Event Hubs account. |
All properties are not present in this example. You can check the rest of these properties in the common parameters section.
Limitations
The subscription choose must have the Apache Kafka option.
The Basic tier subscription is not supported for the moment.
See Subscriptions plan
If you detect throughput limitations or increased latency, you can increase the number of partitions for your topics, whether for uplinks or downlinks. A single partition per topic can be estimated to handle around 1500 messages per minute, although this is only an approximation and may vary depending on the selected region.
See here the documentation concerning Azure Event Hubs limitations.
Troubleshooting
Please refer to the documentation for more informations.
Consumer group limit
Event Hubs has a limit of 40 throughput units per Event Hub. When you attempt to create more, you receive a QuotaExceededException.
If you're having trouble configuring your Azure Event Hubs account, you can read the frequently asked questions
Connection uplink lost
Sometimes, the following error message can appear:
error - Connection uplink lost: Uplink lost: Error reading field 'auth_bytes': Bytes size -1 cannot be negative
This may indicate that you have written a wrong hostname, so you should check it to make sure there isn't any typo in it.
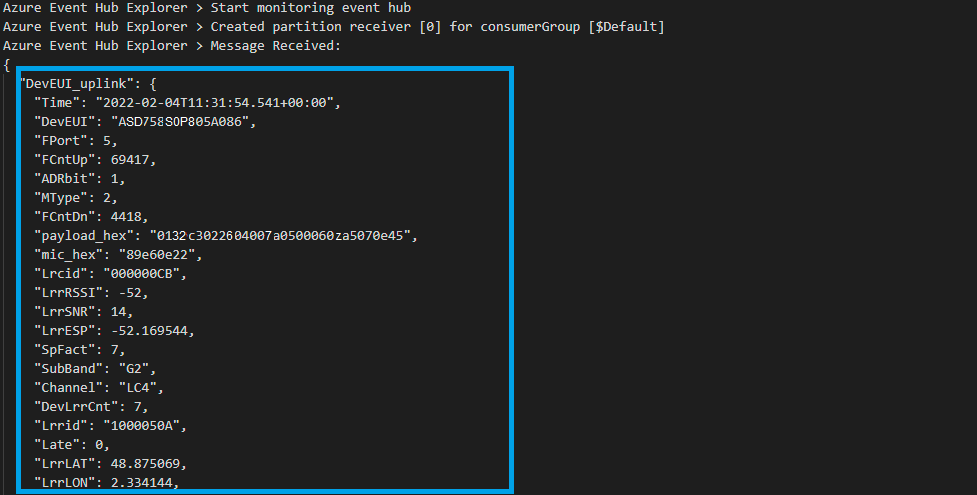
Displaying information to know if it worked
In order to display the informations concerning your connection, you can use a Visual Studio Code extension or use the Azure Cli.
Visual Studio Code
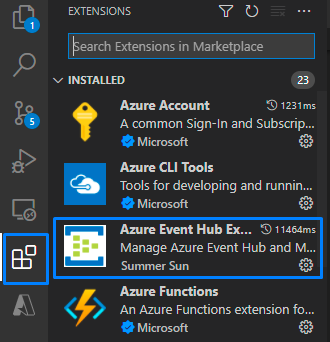
- Open Visual Studio Code and click on the extension menu.
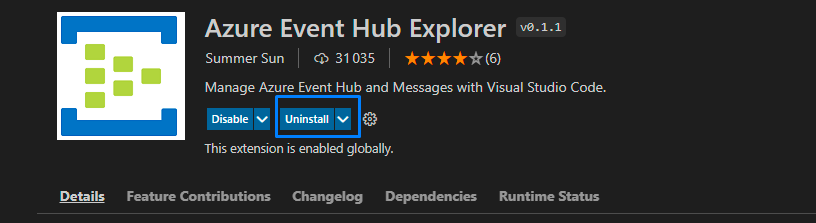
- Search for the Azure Event Hub Explorer extension and install it so you can test your connection.
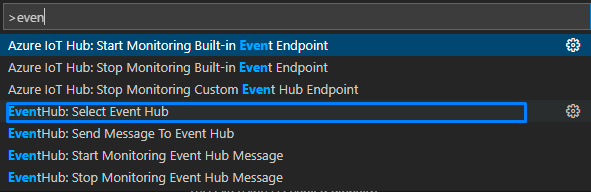
- Click on View -> Open a command palette.

- Enter and select EventHub: Select Event Hub.
- You will need to select the right subscription. Select the one corresponding to your Uplink topic pattern. For this examplen, it is custo_uplink_hub.

- Click again on View -> Open a command palette and select EventHub: Start Monitoring Event Hub Message.

- You should see the upcomming messages in the output console.