CREATING AN OPC-UA CONNECTION
The OPC-UA connector is available only on Thingpark Entreprise OCP version
The creation of a connection establishes a unidirectional from your devices and gateways to an embedded OPC-UA server. Uplinks from devices are decoded and automatically mapped to OPC-UA namespace node values, gateways statistics are also exposed to this embedded OPC-UA server. You can connect to the embedded OPC-UA server and query the namespace node values via their own OPC-UA client implementations. Aliases are also supported for publish values on existing nodeId.
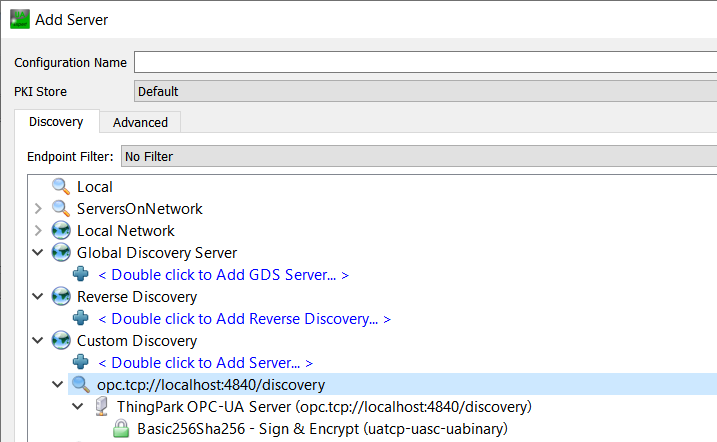
This OPC-UA server contain a discovery mechanism. It's good practice to provide a discovery-specific endpoint with no security.
It's required practice if all regular endpoints have security configured. Usage of the "/discovery" suffix is defined by OPC UA Part 6:
Each OPC UA Server Application implements the Discovery Service Set. If the OPC UA Server requires a different address for this Endpoint it shall create the address by appending the path "/discovery" to its base address.
Overview
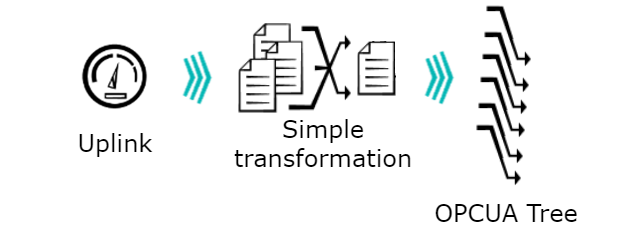
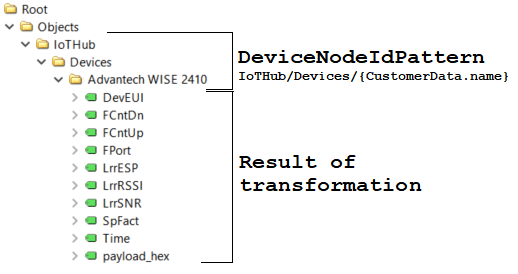
deviceNodeIdPattern.
You can scope each transformation by model of device for obtain the expected structure and naming convention.
Creating a Connection From UI
You need to know parameters required to perform this task. To learn more, check the Parameters required for connecting to an OPC-UA platform below in this topic.
- Click Connections -> Create -> ThingPark X IoT Flow.
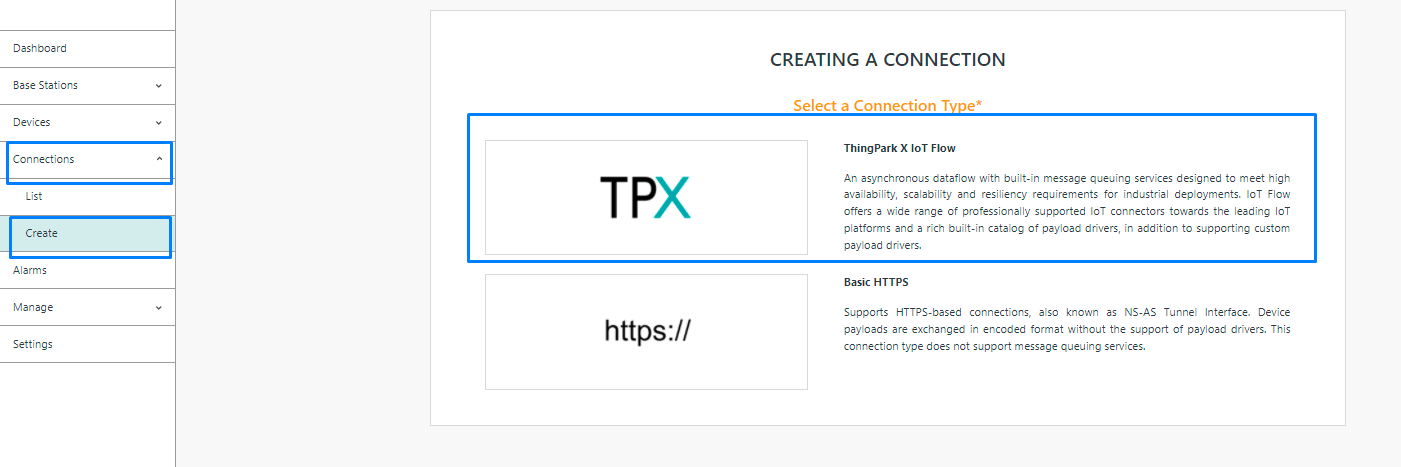
Then, a new page will open. Select the connection type : OPCUA.

- Fill in the form as in the example below and click on Create.
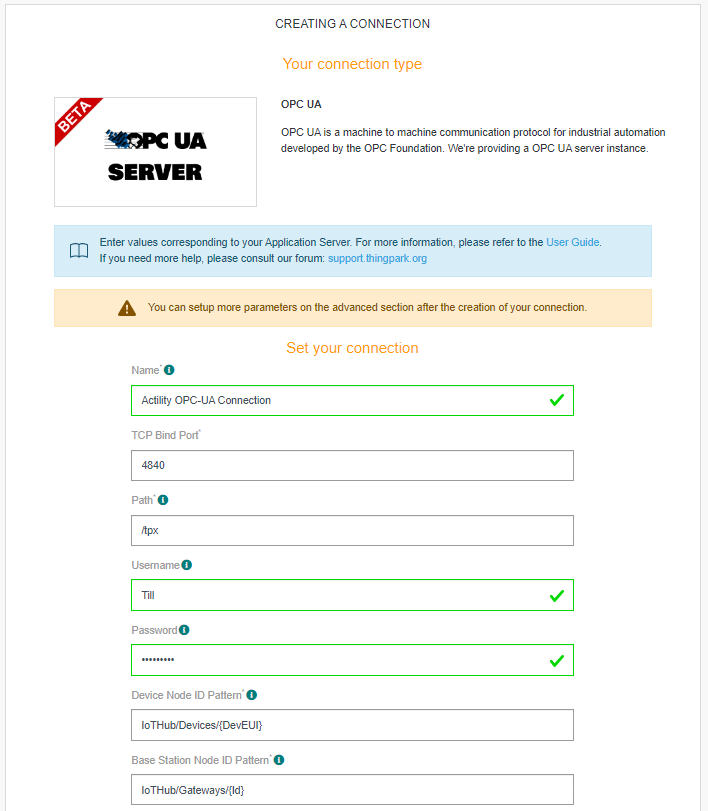
Parameters marked with * are mandatory.
- A notification appears on the upper right side of your screen to confirm that the application has been created.

- After creating the application, you will be redirected to the application details.
Changing the Settings after Creation You can change the settings parameters such as the destination URL or the Headers after the creation of the OPCUA application.
To do this, proceed as follows:
-
Select the OPC-UA application for which you want to change one or several parameters.
-
In the application information dashboard, click on the Edit icon corresponding to the parameter you want to change.
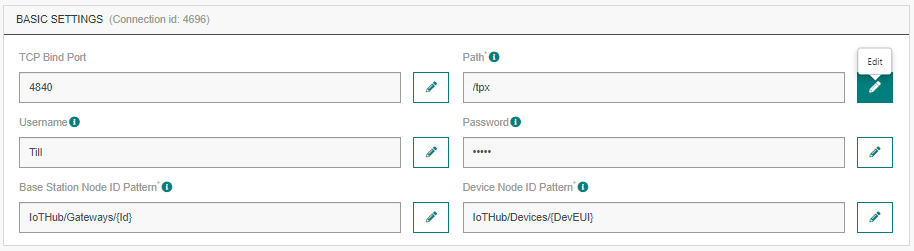
- Enter the new value, and click on the Confirm icon.
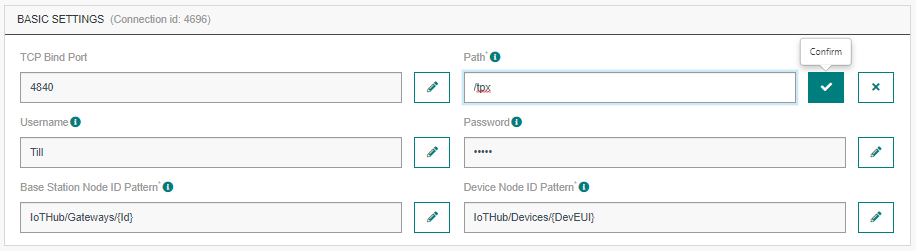
- The Confirmation window displays,

- A notification will inform you that the parameter is updated.

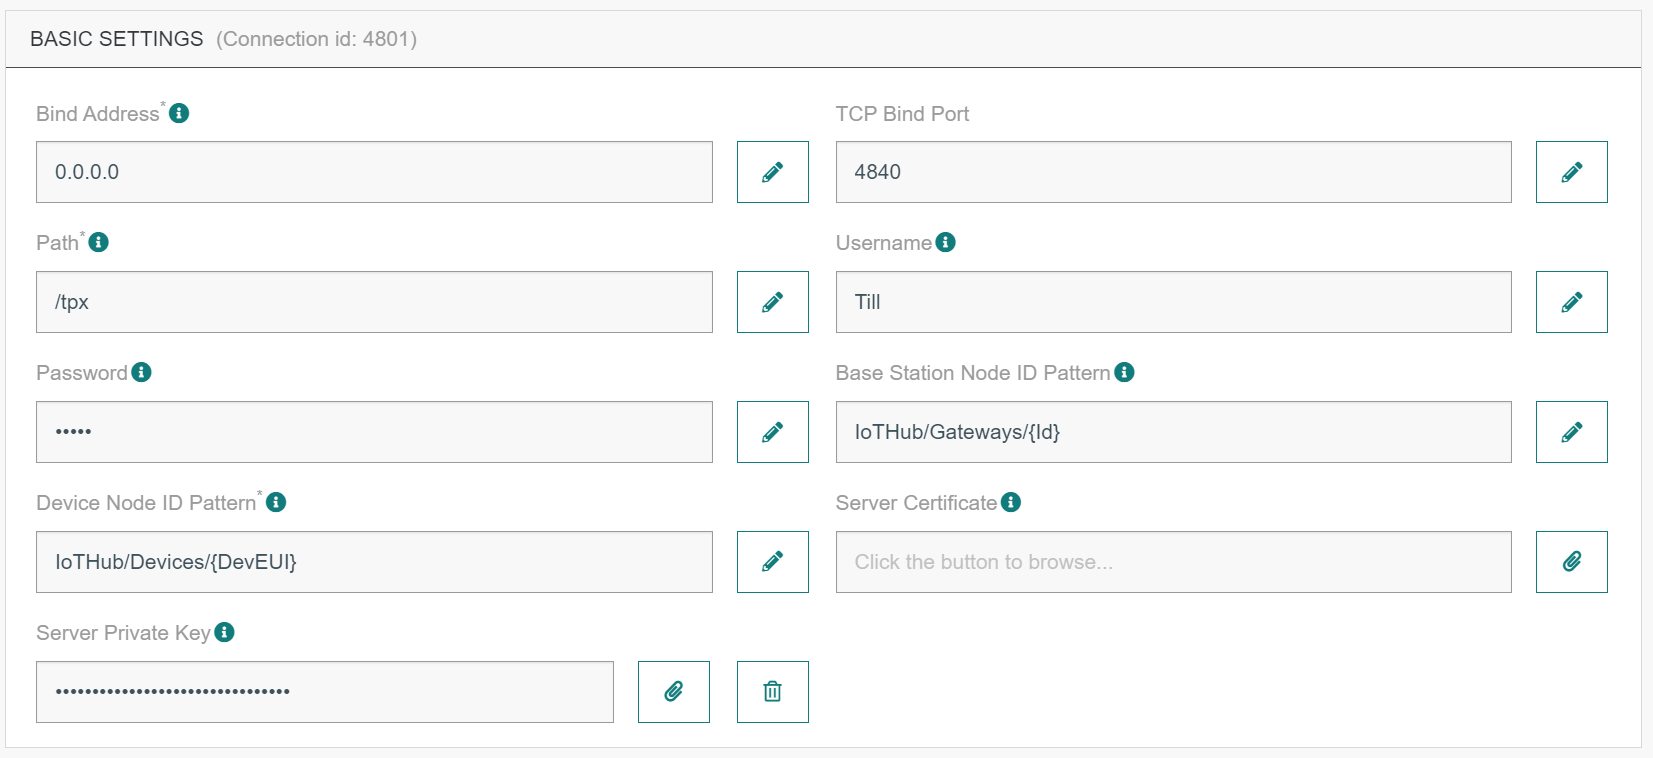
Basic settings

| Field | Description |
|---|---|
Bind Address | The IP address on which the embedded OPC-UA server will bind on in case the server has multiple network interfaces. |
TCP Bind Port | The port on which the embedded OPC-UA server listens to for the TCP transport profile (4840 to 4845 allowed) |
Path | The baseURI for accessing embedded the OPC-UA server. |
Username | Username used for basic authentication to the OPC-UA server. |
Password | Password used for basic authentication to the OPC-UA server. |
Base Station Node ID Pattern | Pattern used for publication of all gateway informations. |
Device Node ID Pattern | Pattern used for publication of all device informations. |
Server Certificate | Certificate used to secure the TCP communication. |
Server Private Key | Private key of the server certificate. |
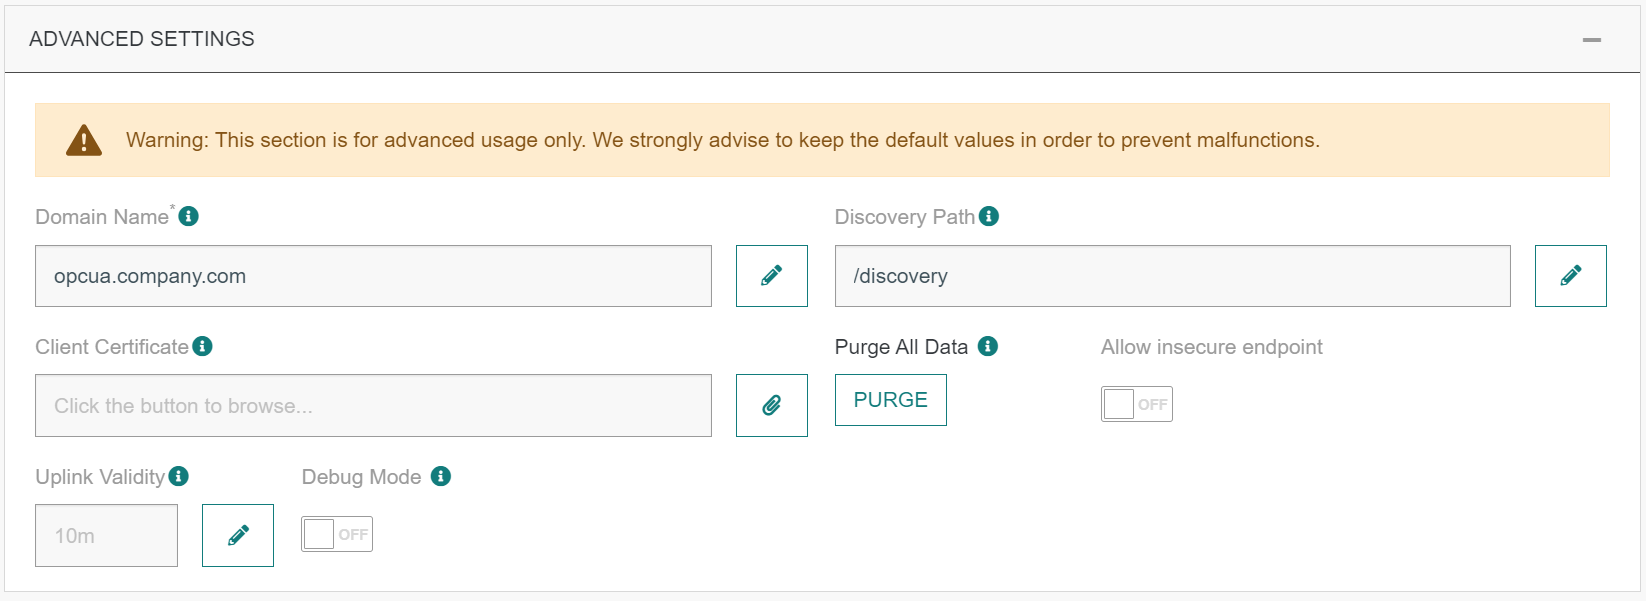
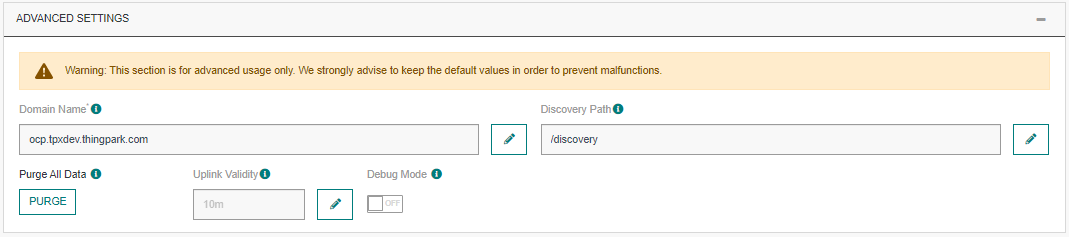
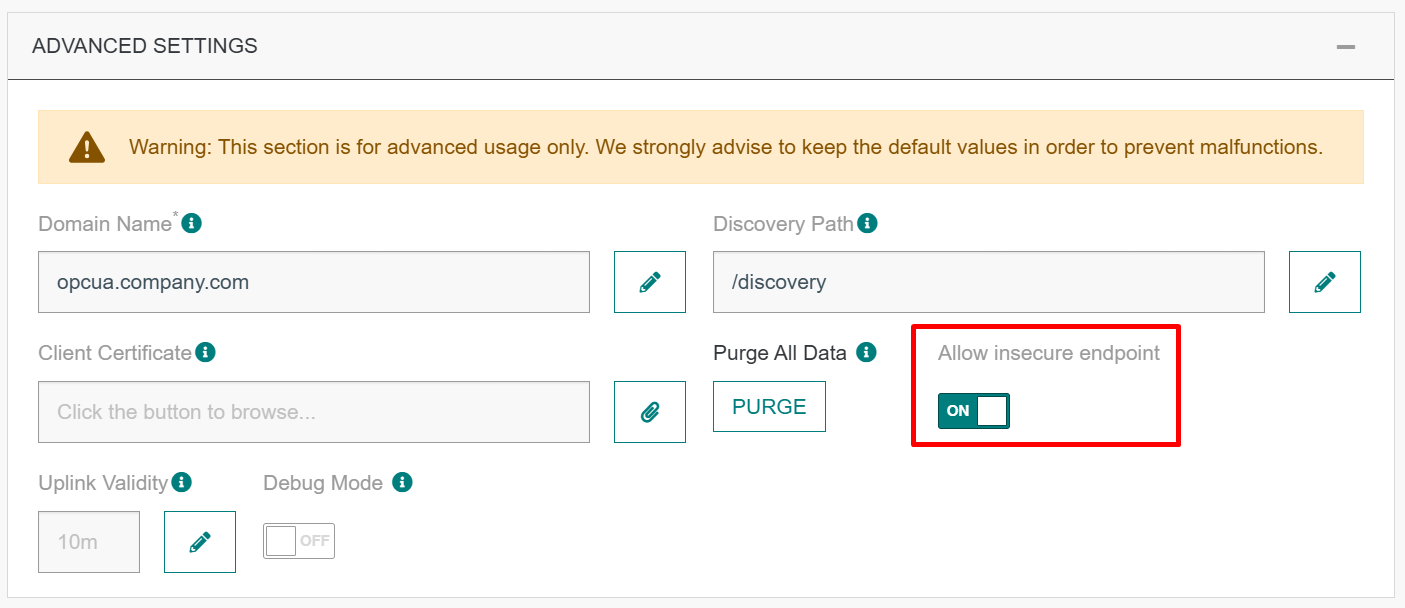
Advanced settings
| Field | Description |
|---|---|
Domain Name | Domain name representing the OPC-UA server for the connector. If not sure, give the same IP than the bindAddress. |
Discovery Path | Represent the endpointUrl for the discovery feature of OCP-UA server. The value /discovery still recommanded by default. |
Client Certificate | Certificate used to limit the access to a specific client. |
Purge All Data | Very old data could persist on a cache. A purge clean all old datas. |
Allow insecure endpoint | If checked, insecure endpoint will also be opened along with secure endpoint. |
Uplink Validity | If set with a value (for instance, 1m), uplinks older than the set validity, will not be sent to the cloud service, and an alarm event is saved in the events’ log. When connections have not started or have downtimes, uplinks are accumulating. Most of these uplinks expire before connections get up again. Examples: 60m, 12h, 3d12h60m |
Debug | Option used for obtain more logs from your connection. The Debug mode is automatically switched off after 2 days. |
Client certificate
If you set the Client certificate on the connection setup, only the client with this certificate is authorized to establish a connection. This certificate should come from the client and be provided with the PEM format. Example with UAExpert :
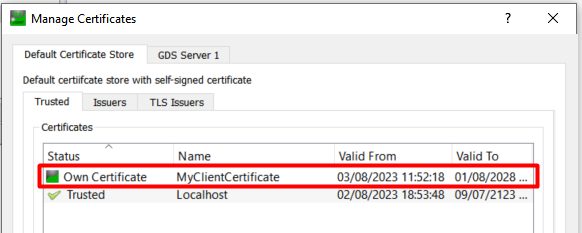
openssl x509 -inform der -in uaexpert.der -out uaexpert.pem
Server certificate
If you set the Server certificate on the connection setup, you secure the TCP communication. You can generate a Server certificate on PEM format using OpenSSL.
openssl req -x509 -newkey rsa:4096 -keyout opcua_server_pk.pem -out opcua_server_cert.pem -sha256 -days 36500 -nodes -subj "/C=FR/ST=IleDeFrance/L=Paris/O=Actility/OU=R&D/CN=Localhost" -extensions san -config <(echo '[req]'; echo 'distinguished_name=req'; echo '[san]'; echo 'subjectAltName=URI:urn:actility:tpx:iot-flow:opcua-server,DNS:localhost')
The certificate should contain a subjectAltName with the application URI and DNS. Eg. URI:urn:actility:tpx:iot-flow:opcua-server,DNS:localhost
Aliases
OPC-UA connection support aliases of node Ids. Just fill the panel named "Alias rules" with the original path and the expected path.

Devices alarms
Devices could send alarm messages to OPCUA when no data have been received during a while. These alarms impact the data quality of the related OCPUA nodes, the data quality come "Uncertain" but after receiving a fresh value, the quality back to "Good".
Persistence & Purge
Each minute, the OPC-UA connection store localy values of all nodeIds. When the connection restart, all values are restored with a data quality at "Uncertain" but after receiving a fresh value, the quality back to "Good".
Due to the persistence mechanism, an old value cannot be destroy. A purge button on the "Advanced settings" panel help to purge all data.
Discovery feature
The OCPUA connector support the discovery feature. You just need be sure to set the domain name.
Limitations
- TCP port range is limited from 4840 to 4845.
- OPCUA Server accept only one client connection if you use a client certificate.
- OPCUA Server don't support authentication based on certificates.
- OPCUA Server support only TCP connection, HTTPS protocol is not supported.
- OPCUA Server Security Policy is limited to
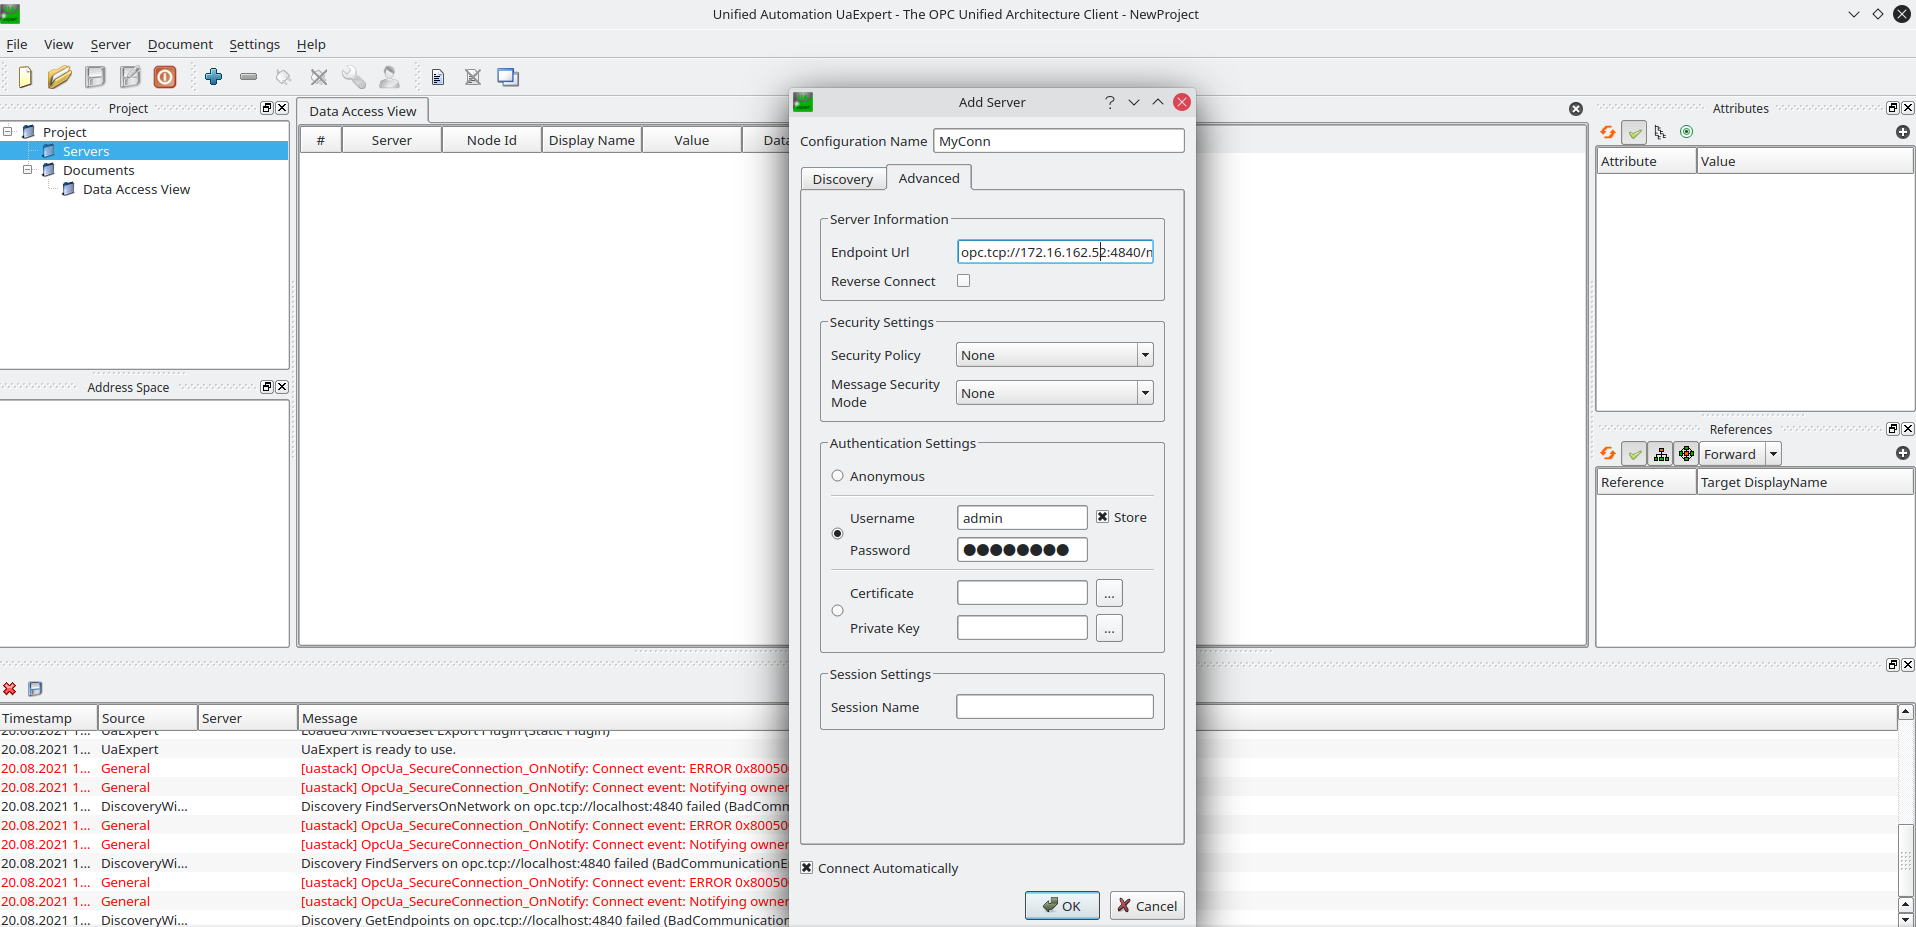
Basic256Sha256with Message Security Mode toSign&Encryptif a Server certificate is provided, otherwise no security is required. - When UAExpert is used as an OPCUA Client GUI tool, a server private key and a server certificate must be provided in the connection configuration, otherwise UAExpert fails to connect to the OPCUA Server. Another OPCUA Client GUI tool, FreeOpcUa does not require to provide a server certificate. However, FreeOpcUa does not have username/password authentication option, so the username and password fields in the connection configuration must be set to blank.
- The number of items that can be monitored on the server is limited only by CPU and RAM usage. Some clients impose their own limits on the number of items that can be monitored; in such cases, it is possible to open several sessions in parallel on the same server. For example, the OPC UA Eclipse Milo client is limited to monitoring 10K items.
- On a TPE OCP Segment XL with Tpx-IoT-Flow 1.8.x, the OPC UA connector memory is limited to 1.3 GB. The maximum number of monitored items is 10K. Up to 500K nodes can be written to the OPC UA server. If you want to increase the number of monitored items, RAM and CPU requirements must be re-evaluated.
Creating a Connection With API
To do this, you need to use the Connections group resource:
POST/connectionsto create a new Connection instancePUT/connectionsto update a Connection instanceDELETE/connectionsto delete a Connection instance
We follow the REST-full API pattern, when updating configuration properties for a connection resource. Thus, you must also provide the whole configuration again.
Example for creation of a new connection instance :
POST /connections
{
    "connectorId": "actility-opcua-iot",
    "name": "Actility OPC-UA Connection",
    "configuration": {
      "bindAddress": "0.0.0.0",
      "domainName": "opcua.company.com",
      "discoveryPath": "/discovery",
      "tcpBindPort": 4840,
      "path": "/tpx",
      "username": "Till",
      "password": "Lindemann",
      "purgeNamespace": false,
      "openBothSecureAndInsecureEndpoints": false,
      "deviceNodeIdPattern": "IoTHub/Devices/{DevEUI}",
      "baseStationNodeIdPattern": "IoTHub/Gateways/{Id}",
      "aliases": [
        {
          "path": "IoTHub/Devices/A81758FFFE04F27E/temperature",
          "mappedPath": "AliasTemperature/Alias/Tag0001"
        },
        {
          "path": "IoTHub/Devices/A81758FFFE04F27E/humidity",
          "mappedPath": "AliasHumidity/Tag0002"
        },
        {
          "path": "IoTHub/Devices/A81758FFFE04F27E/light",
          "mappedPath": "Light/Alias/Tag0003"
        }
      ],
      "clientCertificate": "-----BEGIN CERTIFICATE-----MIIEyzCCA7O ... 5z0SXZIjpQ==-----END CERTIFICATE-----",
      "serverCertificate": "-----BEGIN CERTIFICATE-----MIIEnTCCA ... DLnhn-----END CERTIFICATE-----",
      "serverPrivateKey": "-----BEGIN PRIVATE KEY-----MIIEvQIB ... 1ROtDV8=-----END PRIVATE KEY-----"
    }
}
All properties are not present in this example. You can check the rest of these properties in the common parameters section.
Displaying information to know if it worked
-
Download and install an OPC-UA client, for example UA-Expert.
-
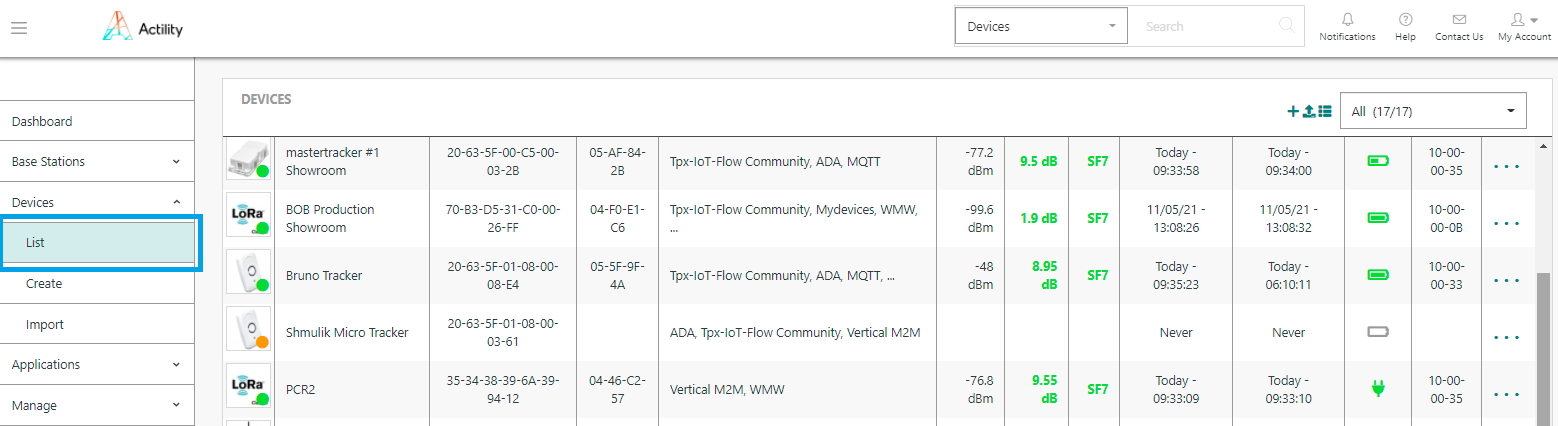
Go to the Devices List section, and click on the device you want to affect to your OPC-UA application.
- When you are on the device's details page, click on Add an application.
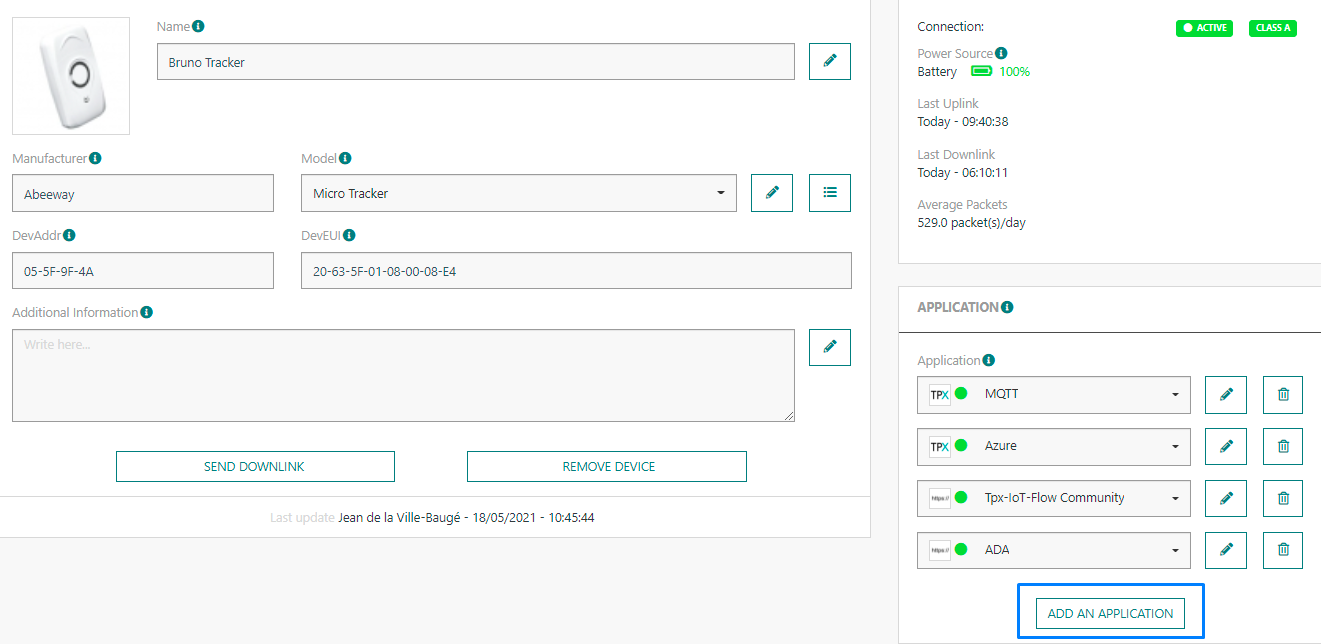
- Select your OPC-UA application and click on the Confirm icon.
- A notification appears to confirm that the application has been added to the device.

- Connect to the embedded OPC-UA namespace via the OPC-UA client you downloaded from the configured address
- You can then browse the contents of the embedded OPC-UA namespace to verify whether the namespace is updated/populated according the the defined DevEUIs and mapping rules configuration of your connection.
How To Connect With Kepware

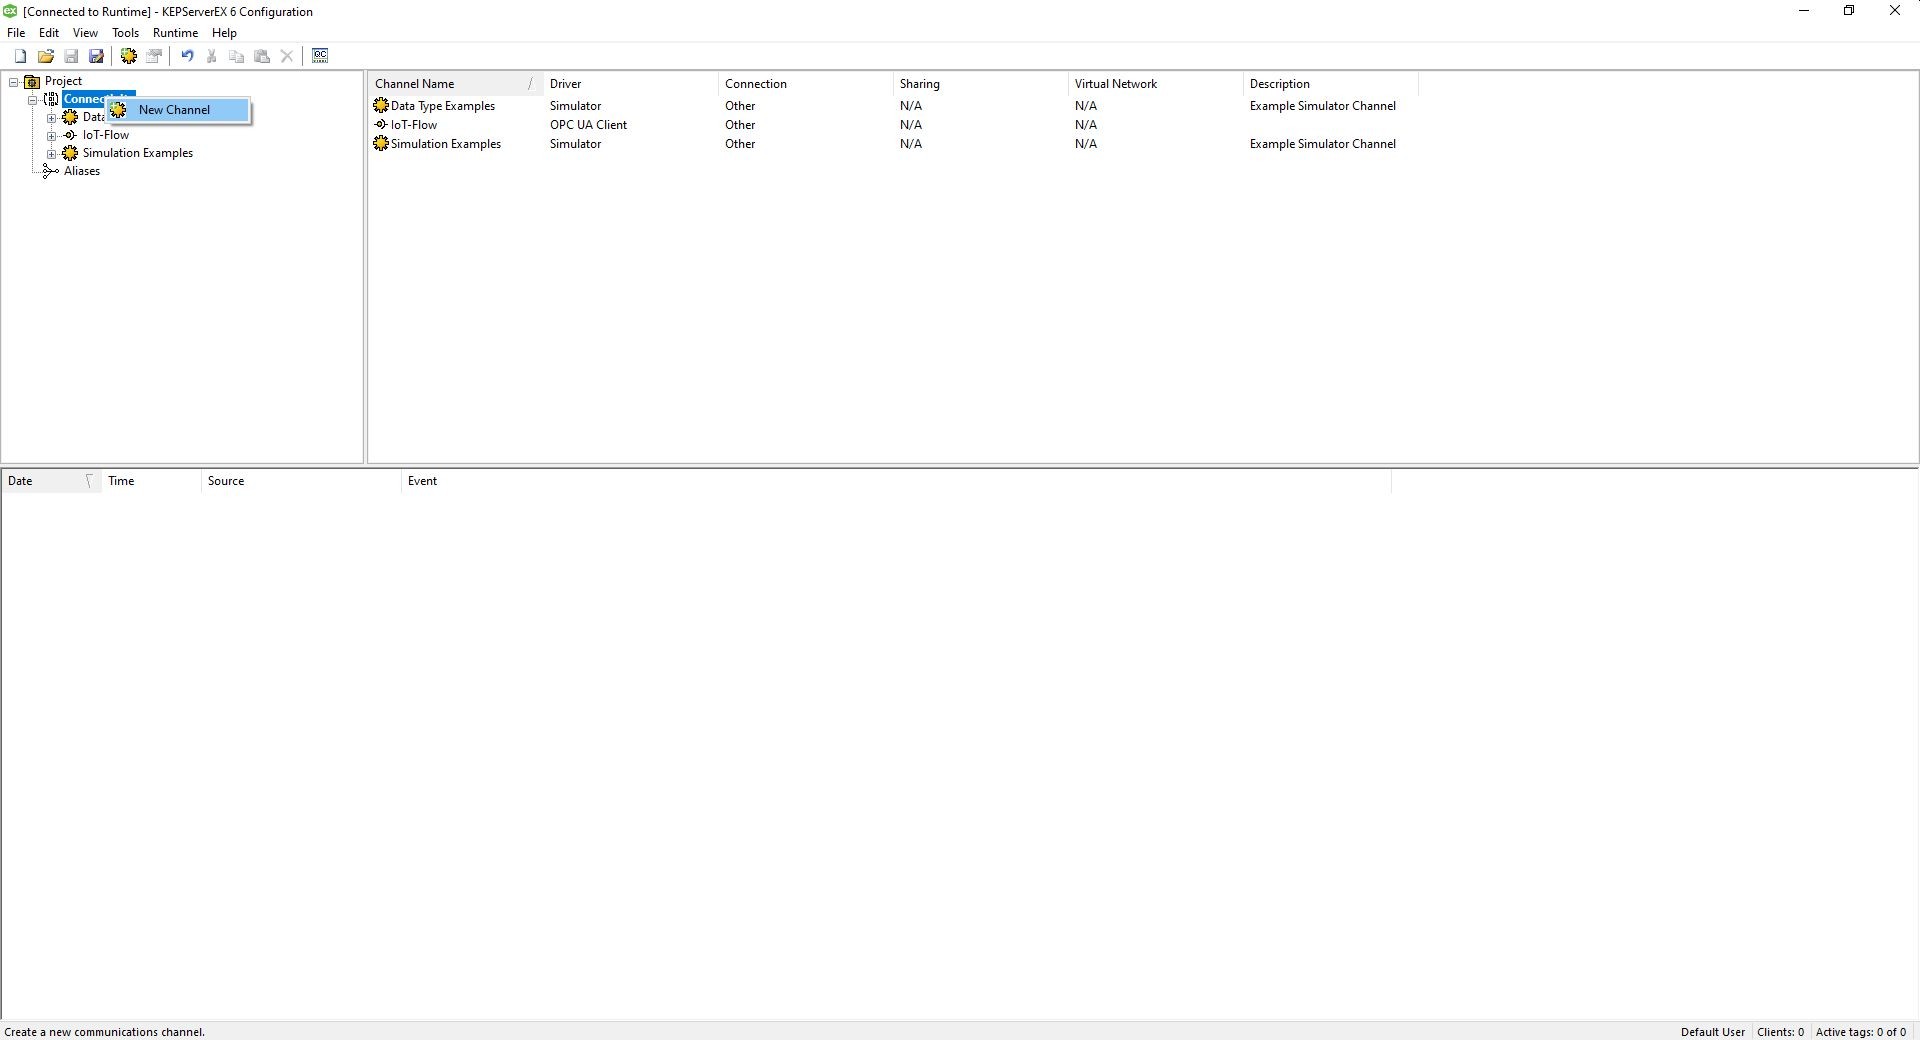
- To connect to the OPCUA Server via Kepware, you need to create a new Channel from the KepServerEX Configuration window. Right click to the Project -> Connectivity and select New Channel
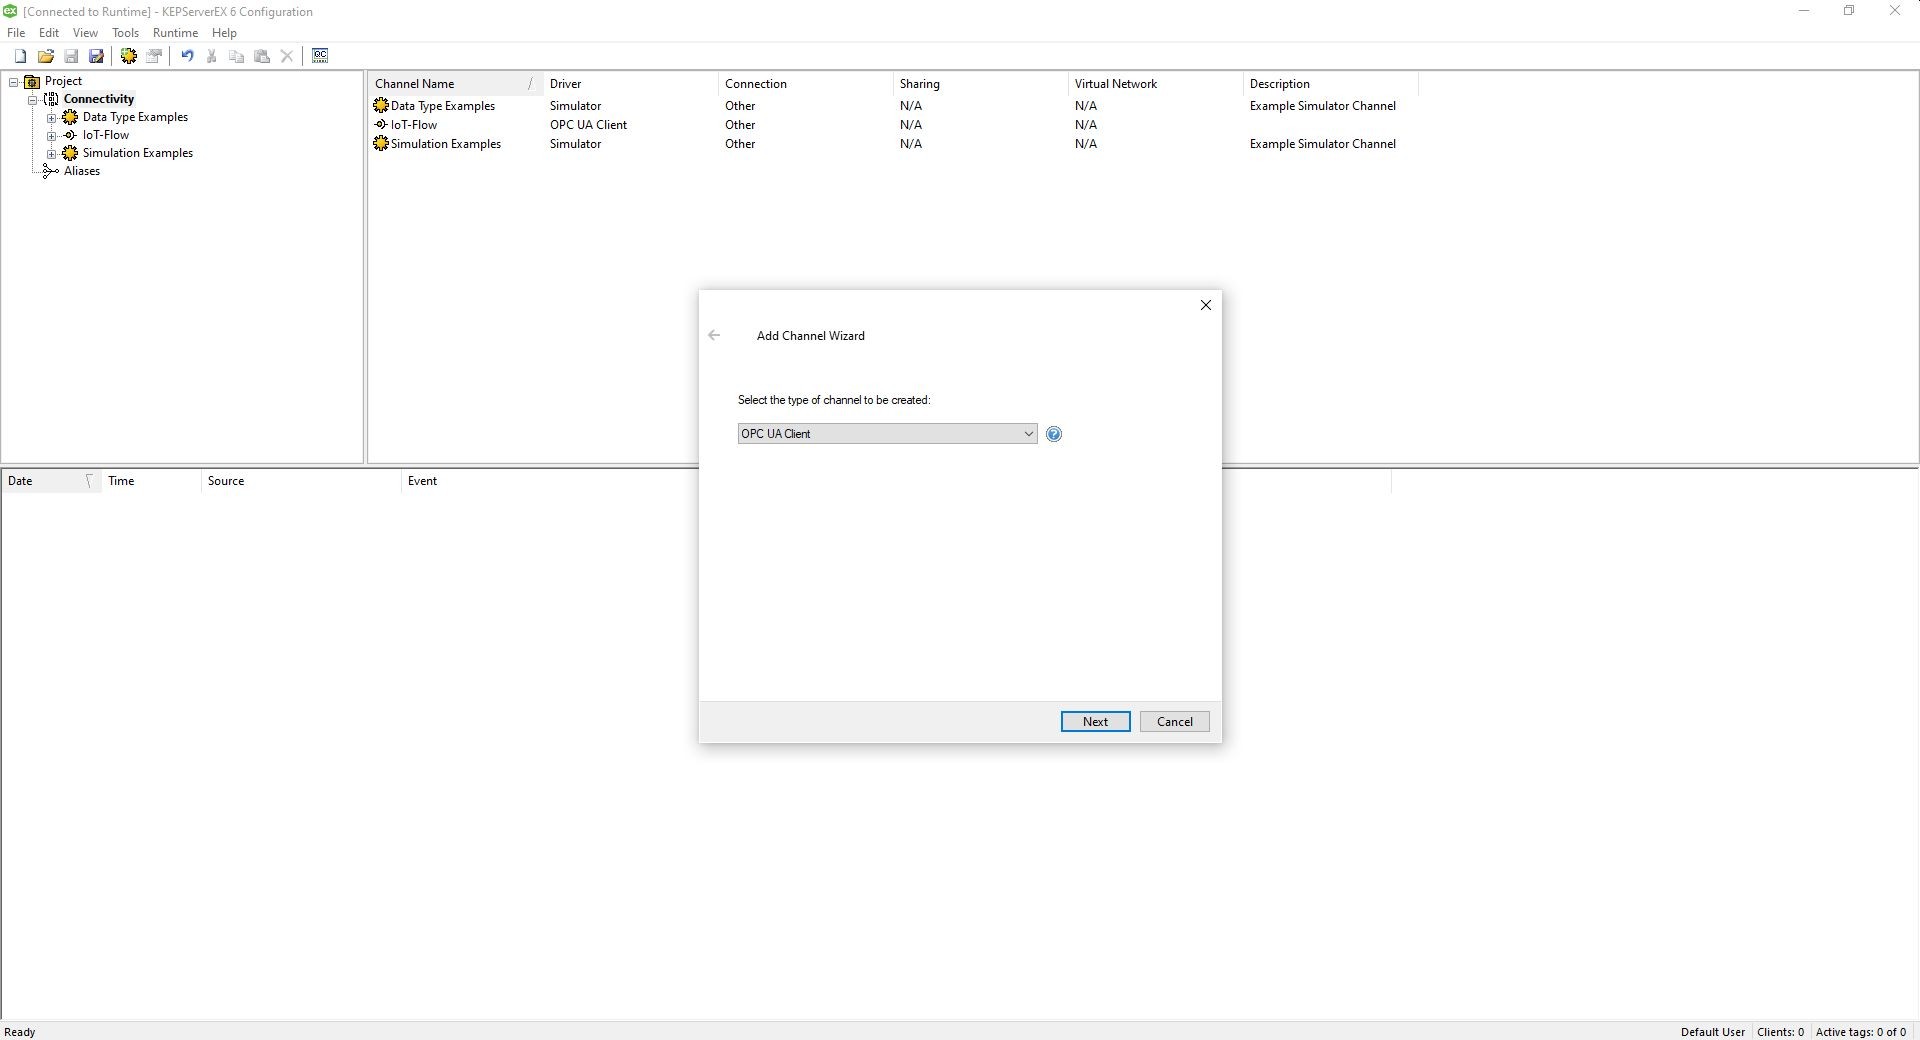
- Select OPCUA Client from the dropdown as the type of the channel.
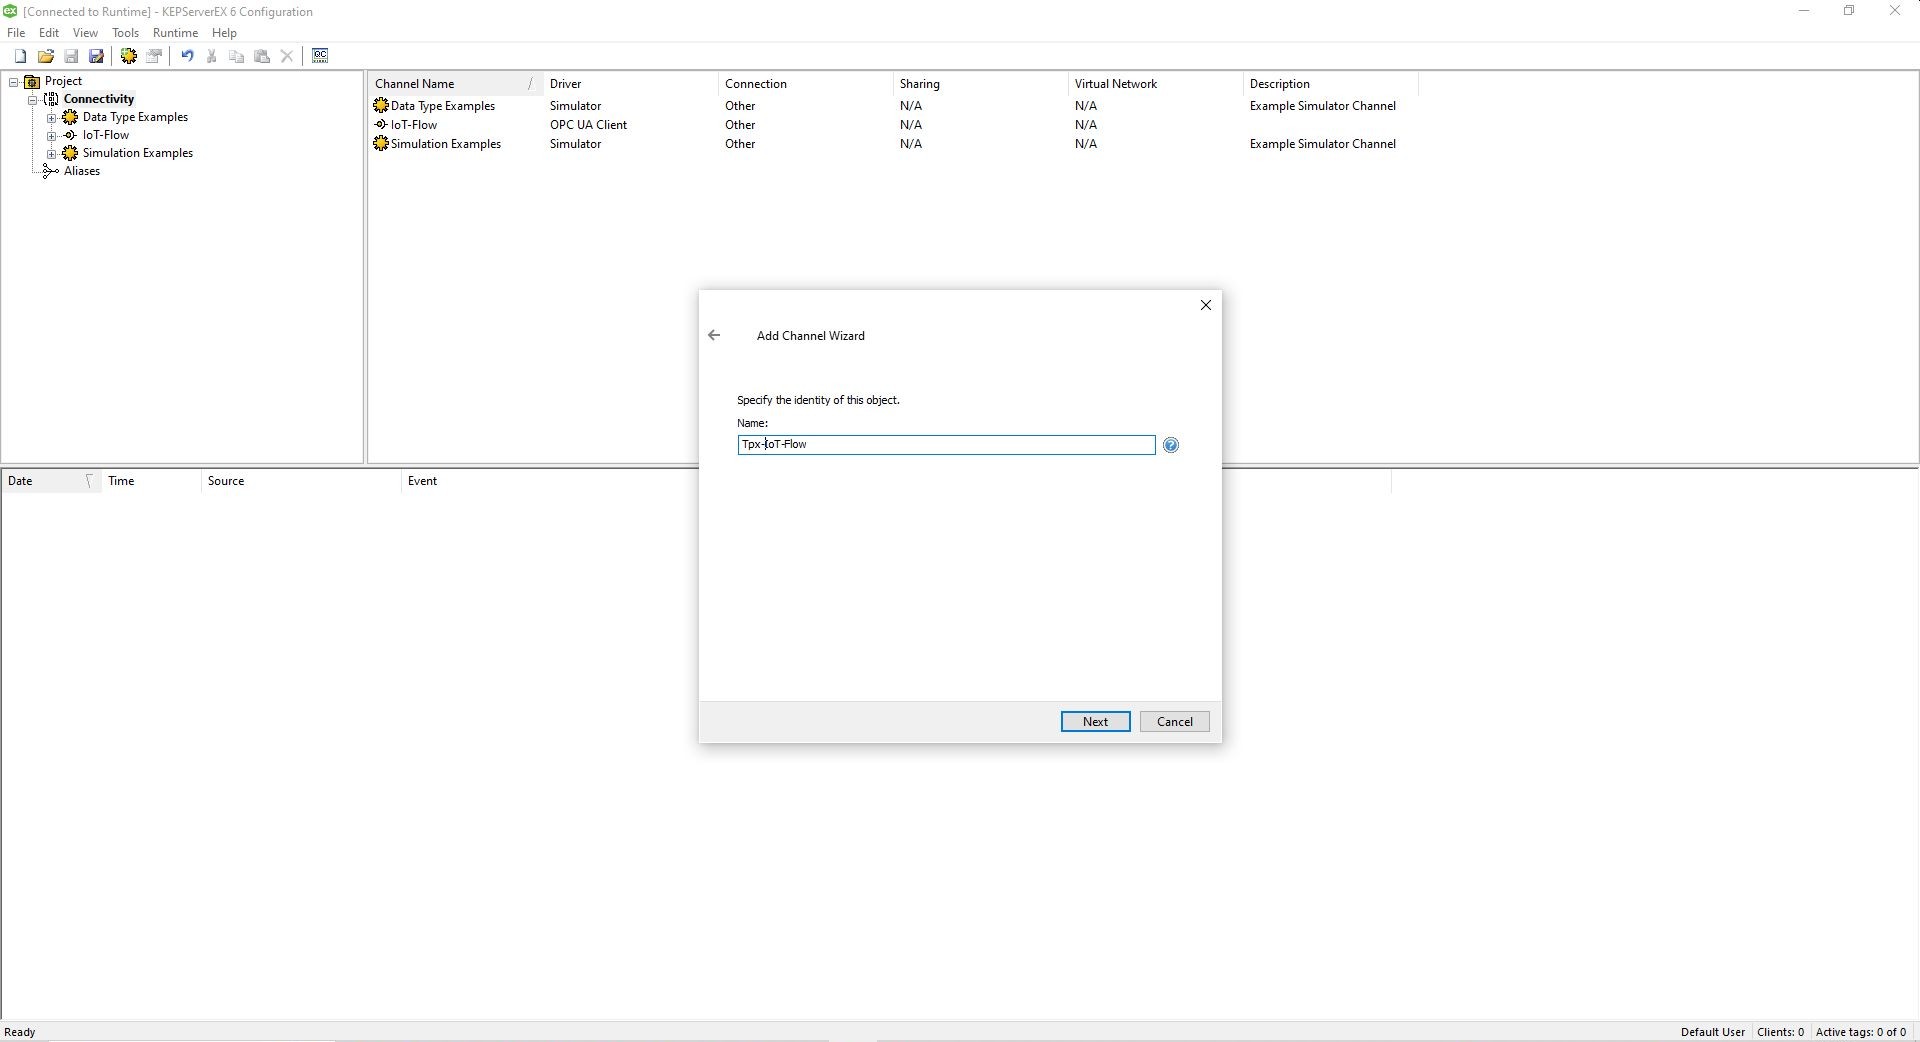
- Give a name to the new channel that will be created.
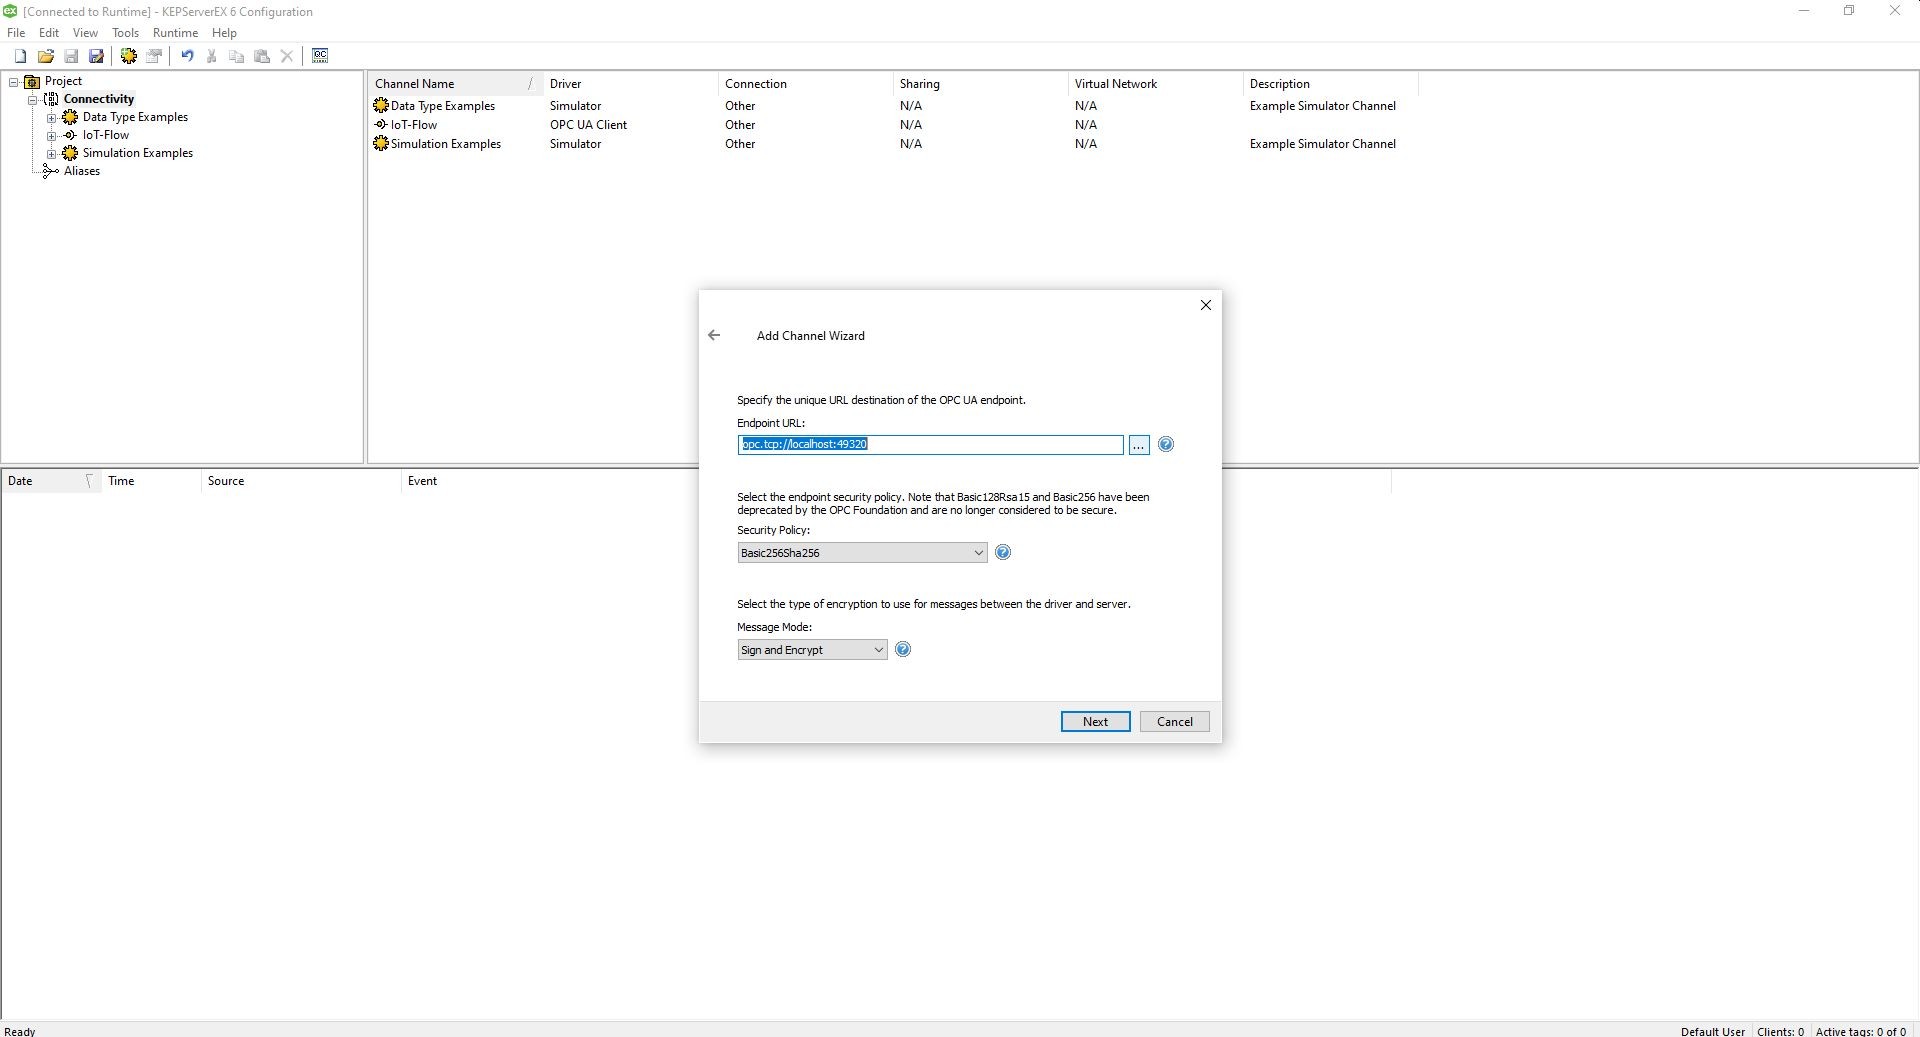
- To let Kepware discover the OPC-UA Server's endpoints, click the '...' next to the Endpoint URL textbox.
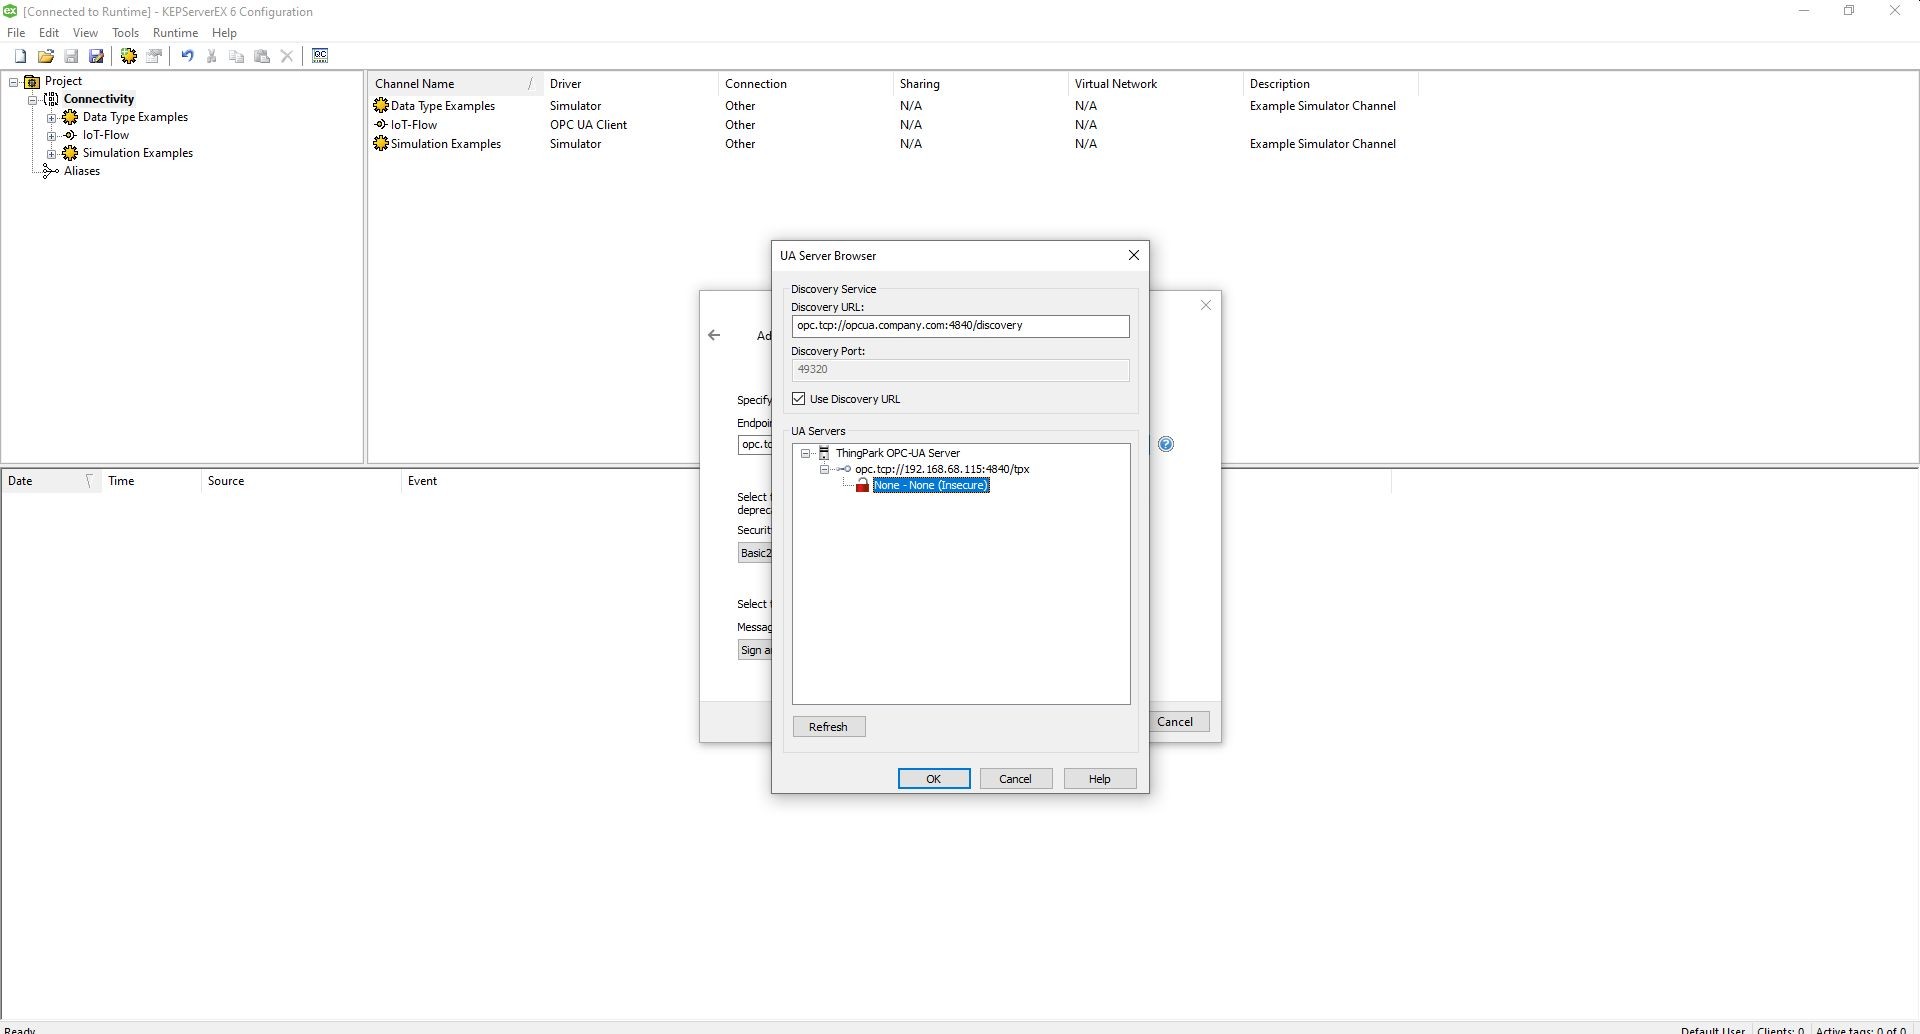
- Enter the discovery url of the OPC-UA Server to the Discovery URL field. Use the domain name, hostname or the IP address of the OPCUA server as the domain name. This must be the same value as the domainName property of the OPC-UA Connector Configuration. Also check the Use Discovery URL checkbox if the Discovery URL field is not enabled. Under the UA Servers section, the available OPCUA Connection endpoints will be listed. You can select the suitable endpoint that you want to connect to.
Be aware of the domain name or IP Address of the OPC-UA Server when providing a discovery URL. This must match the actual domain name or IP Address of the OPC-UA Server.
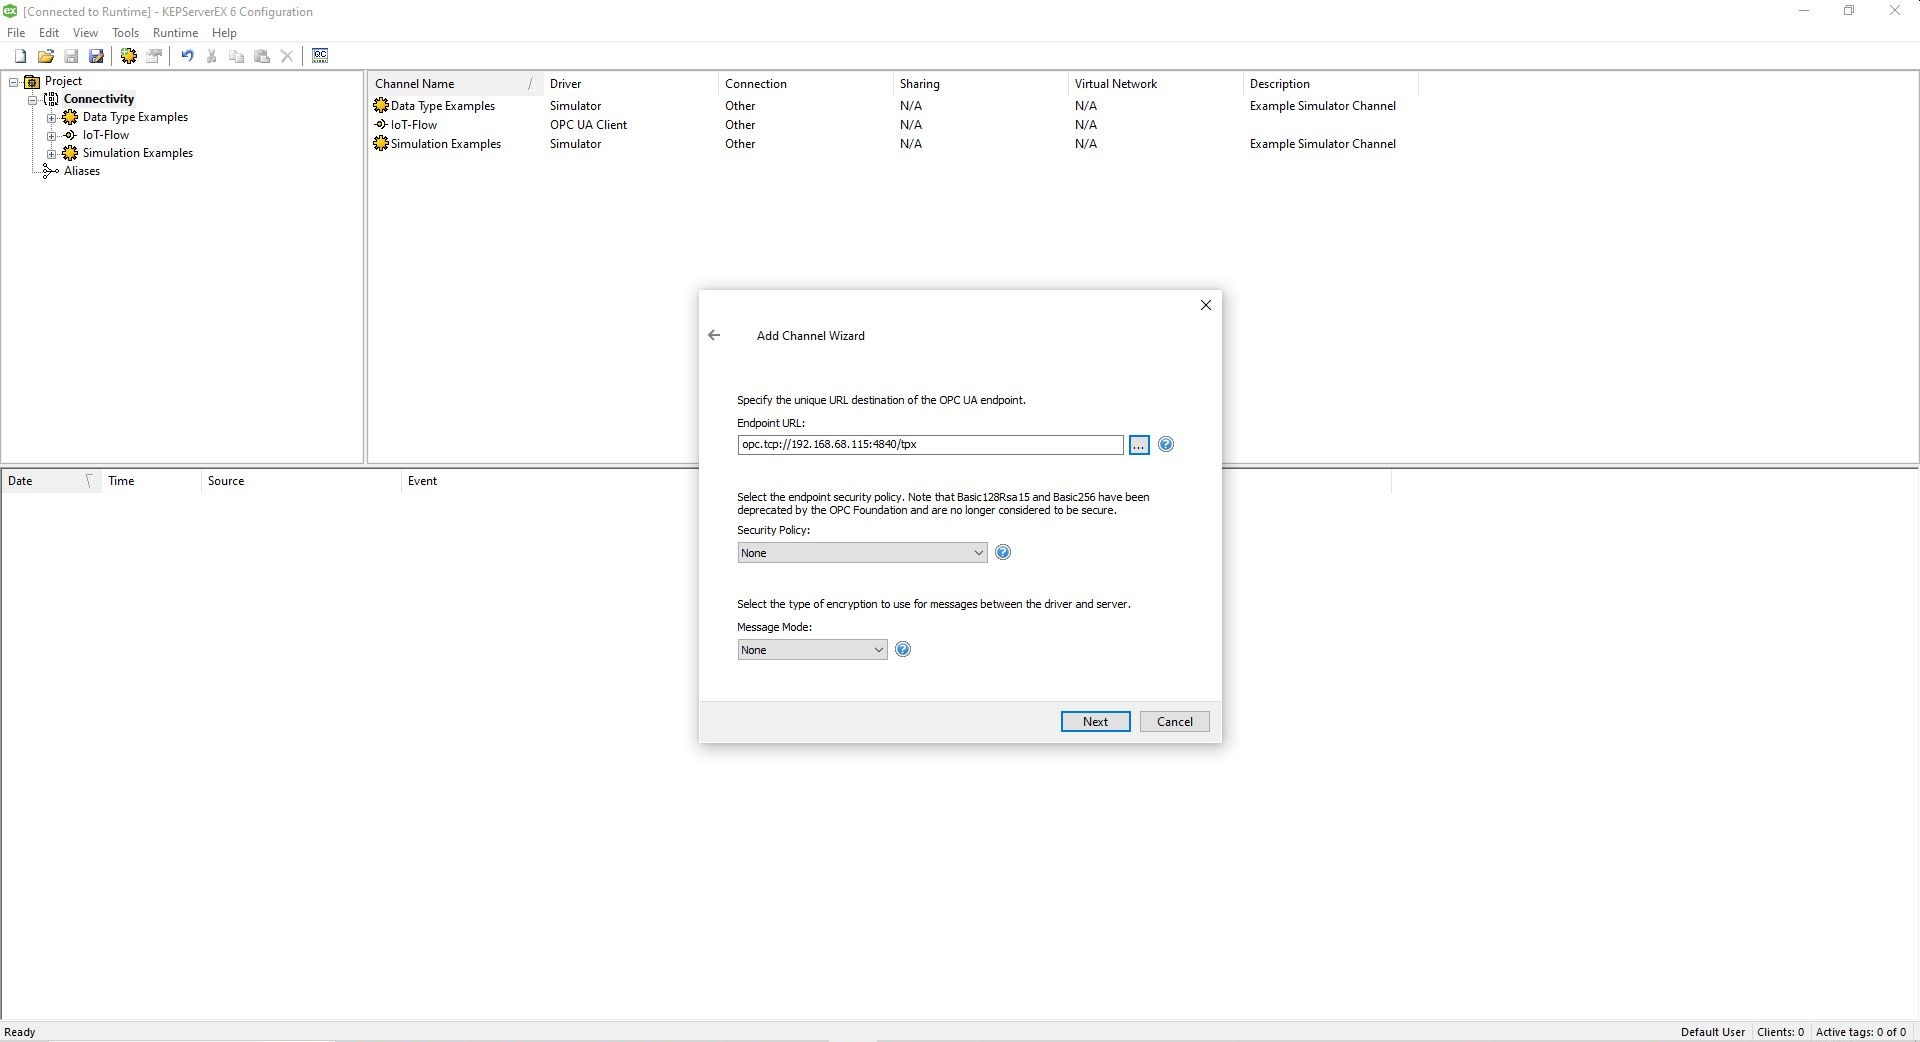
- Select the Security Policy supported by the OPC-UA Server. For embedded OPC-UA Server, if a server certificate is specified in the OPC-UA Connector Configuration, then Security Policy must be
Basic256Sha256. If a server certificate is not specified, then it must be set asNone. Leave the Message Mode field as None.
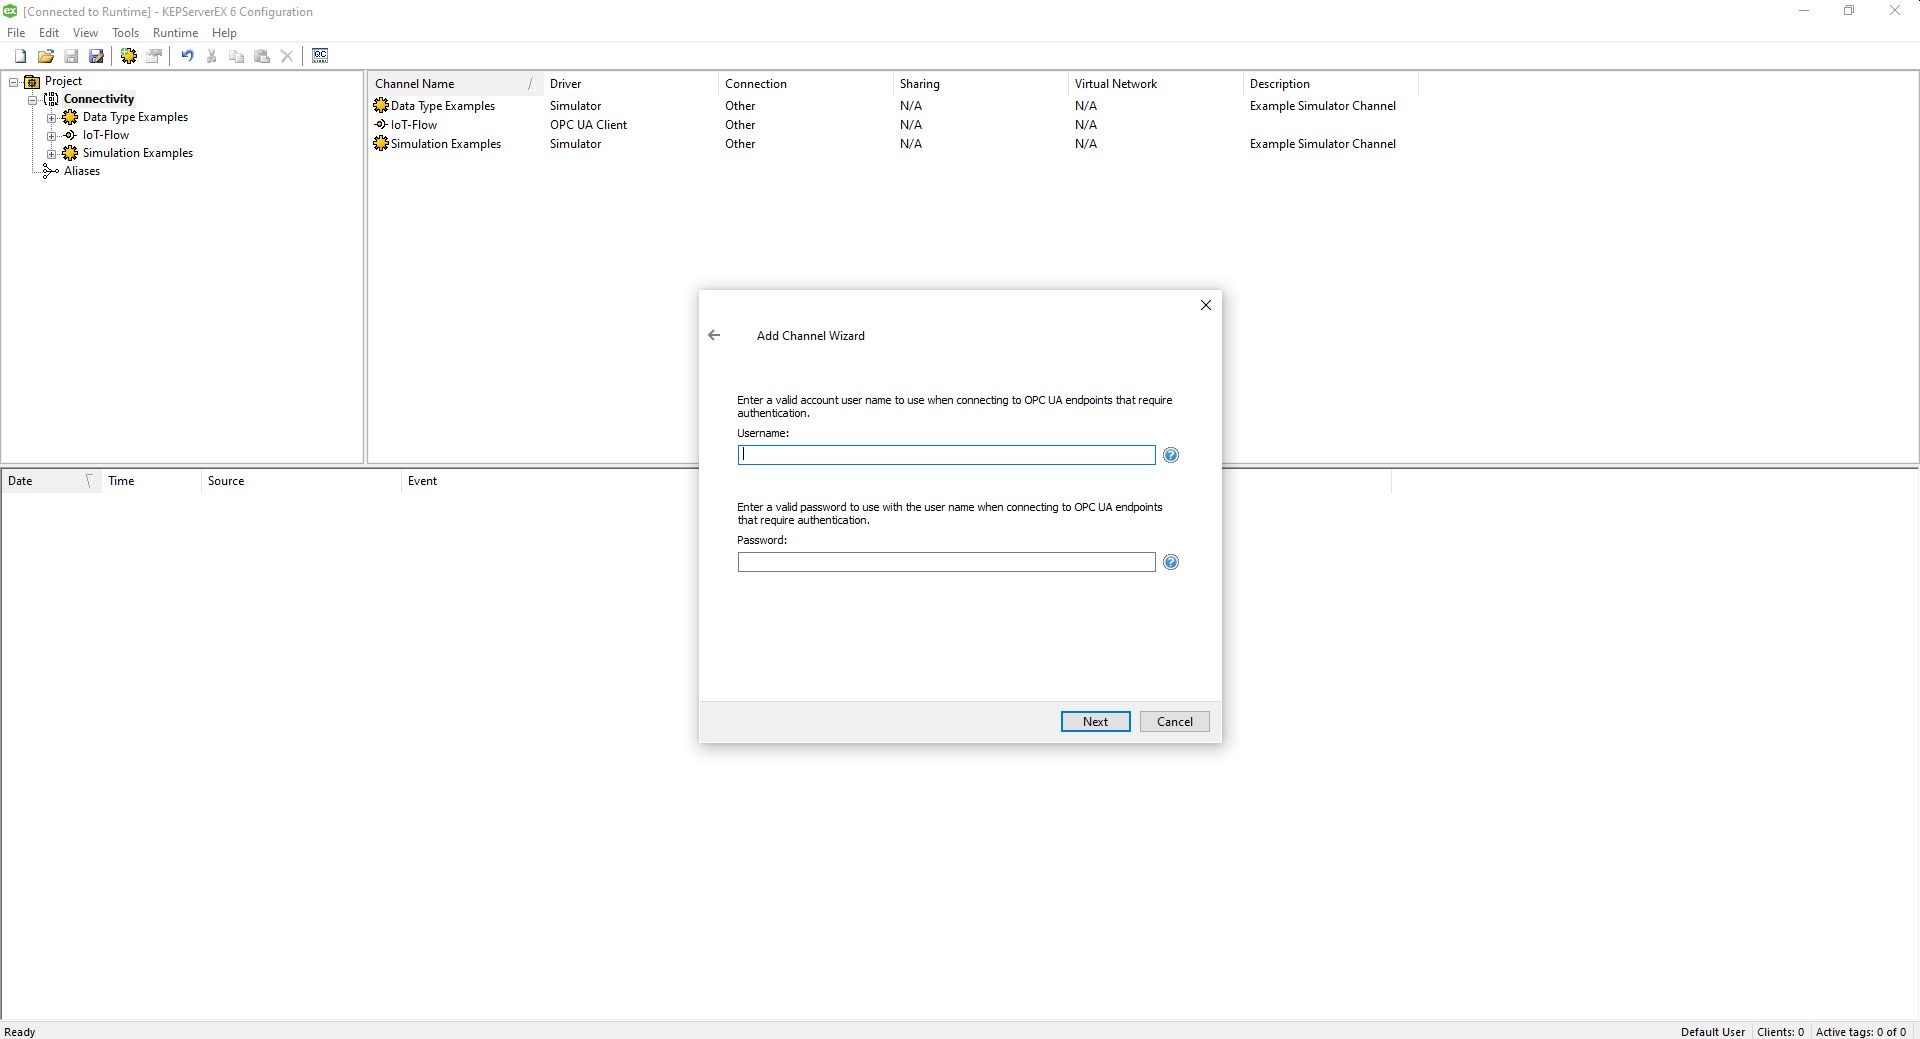
- Provide the username and password required for autentication to the OPC-UA Server. For embedded OPC-UA Server, if username and password are specified in the OPC-UA Connector Configuration, then those must be used. If a username and password are not provided in the connector configuration, then leave them empty as authentication to the OPC-UA server is not required. Click Next and the channel will be created.
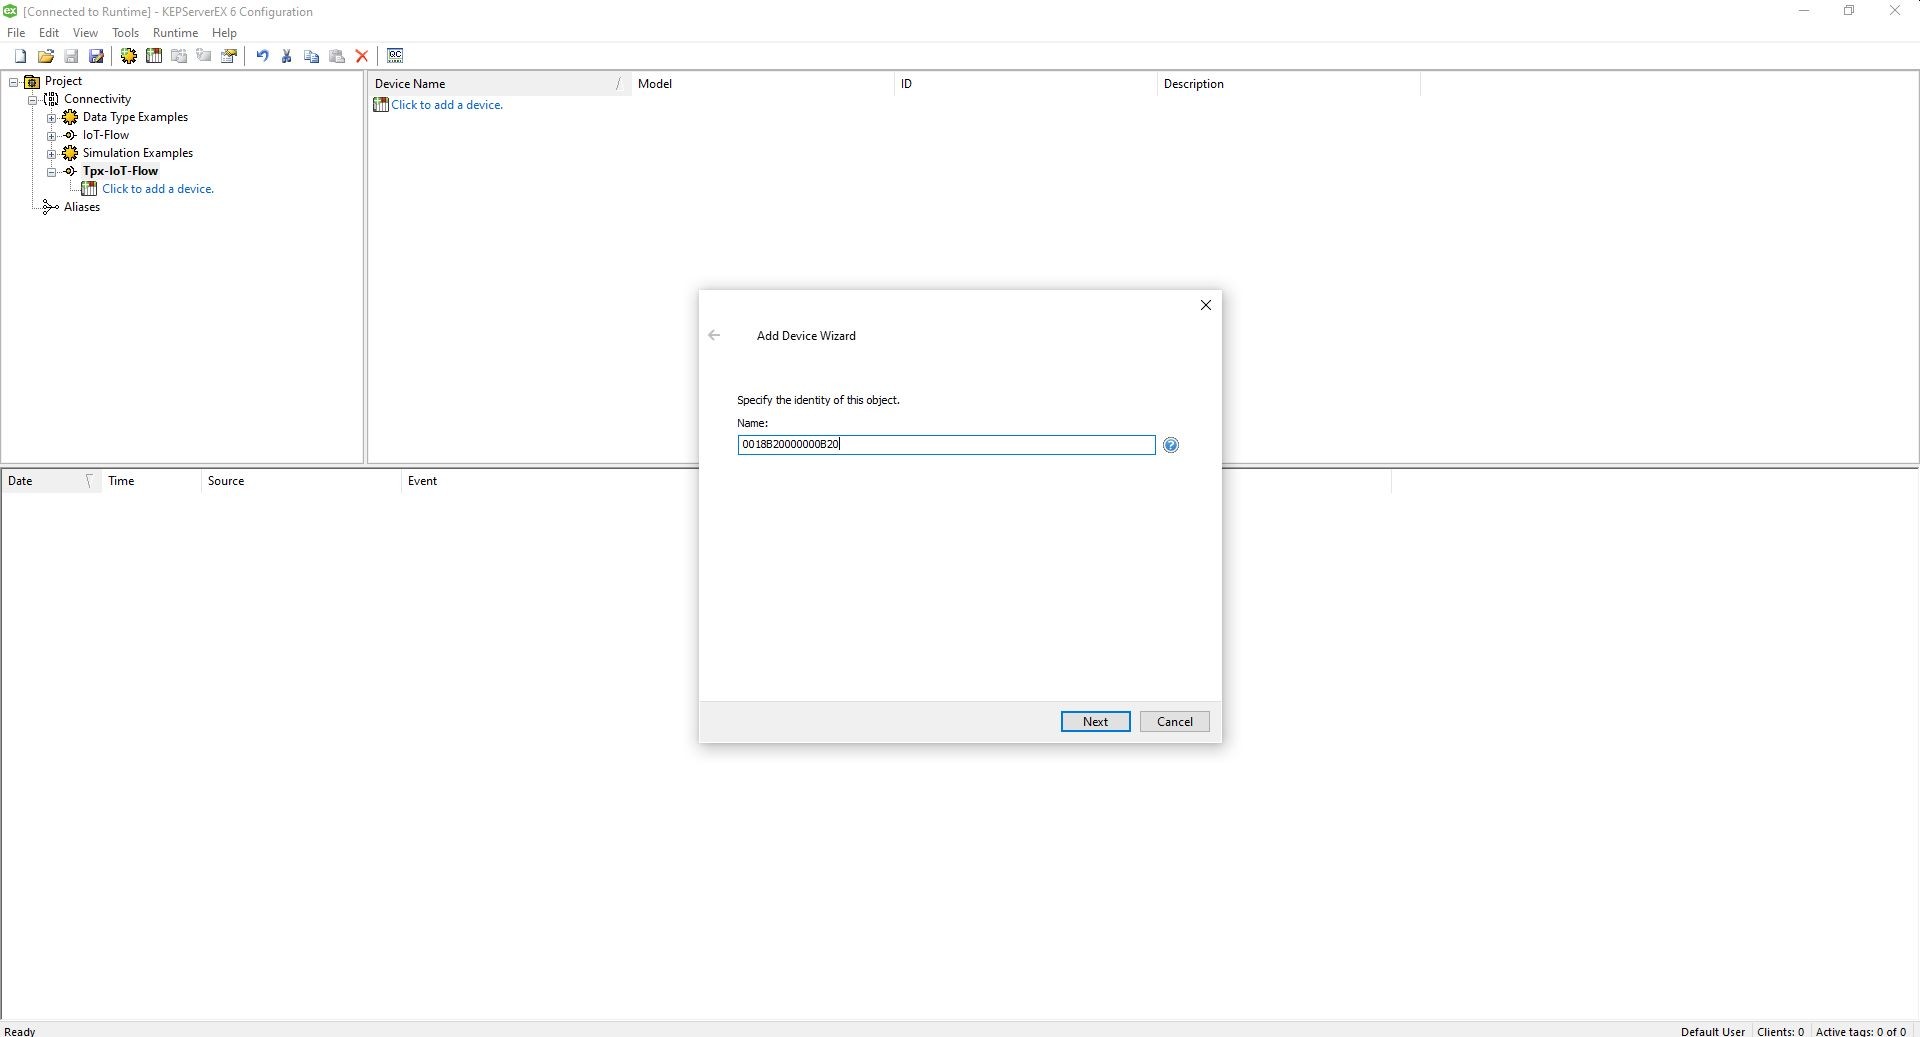
- Now, on the newly created channel on the project tree, click the link to add a new device. The Add Device wizard opens. Enter a device name, such as the DevEUI of the device. Click Next.
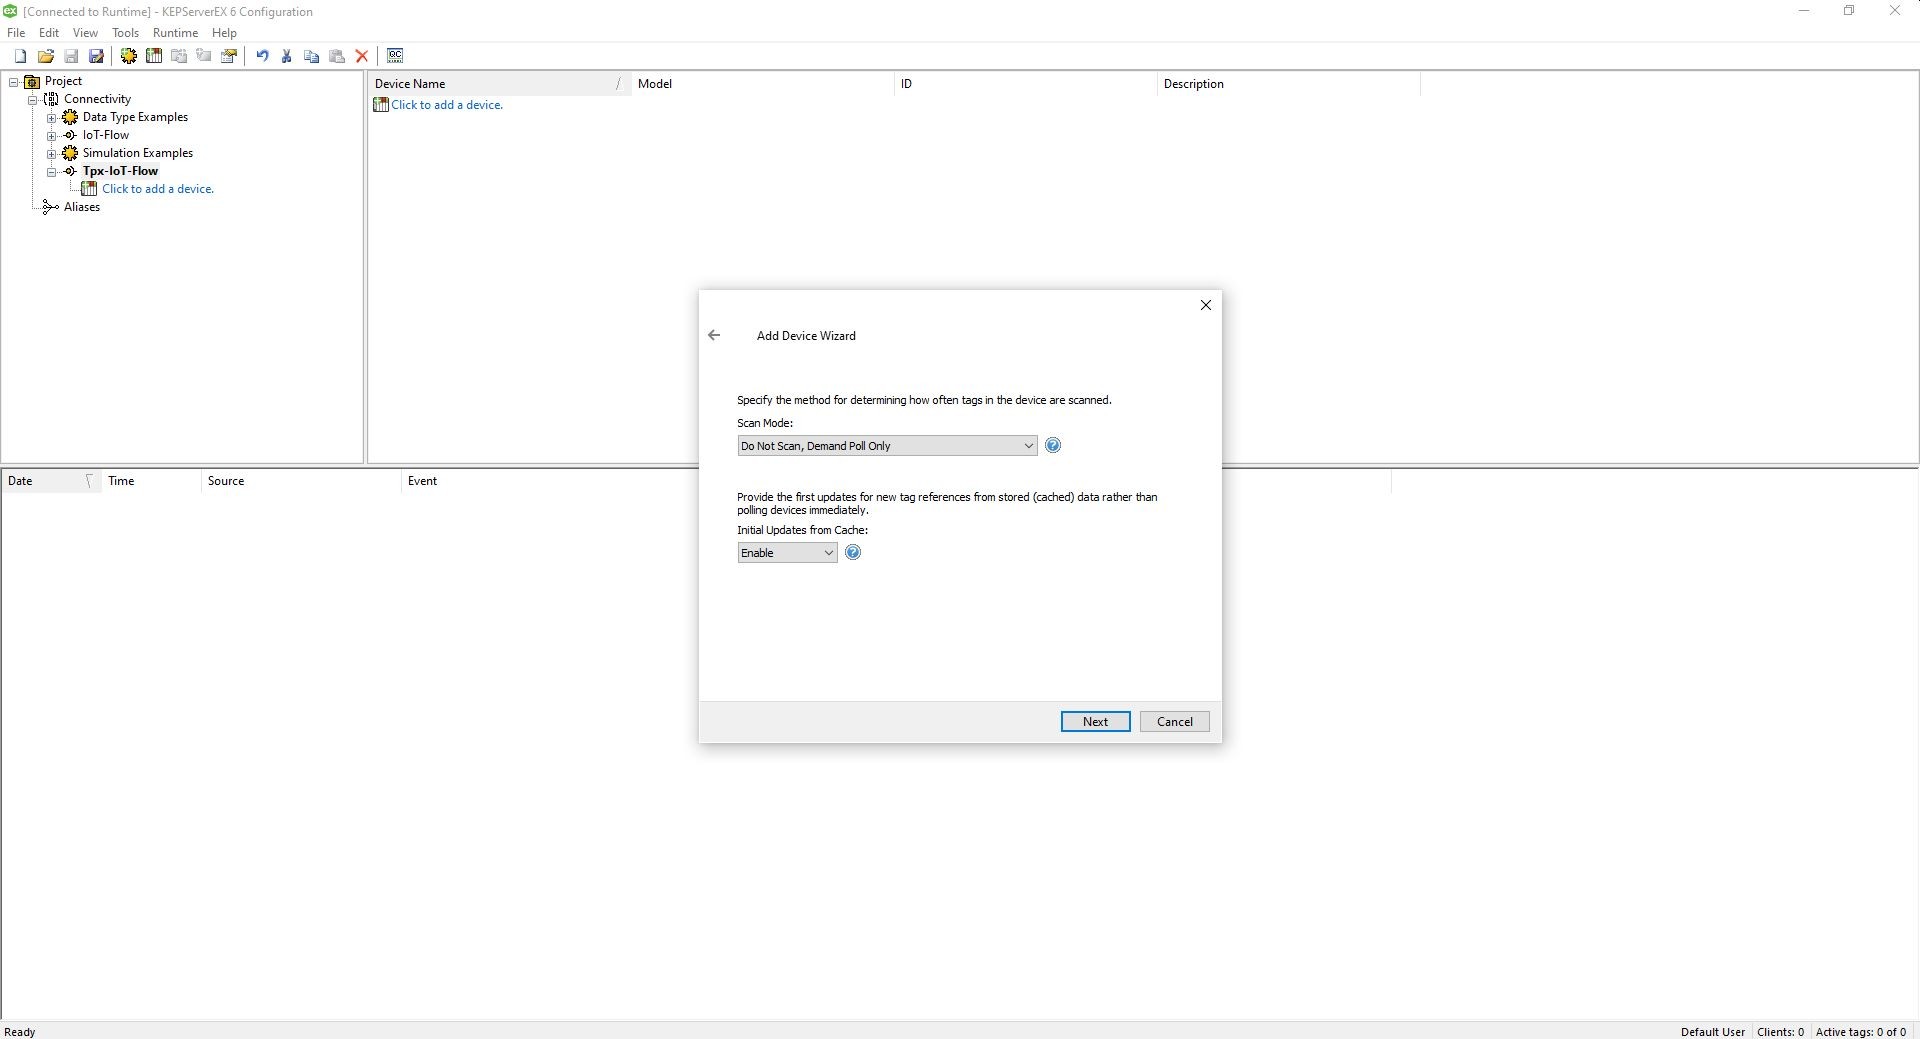
- Select the scan mode you want and also the preference for fetching of initial updates.
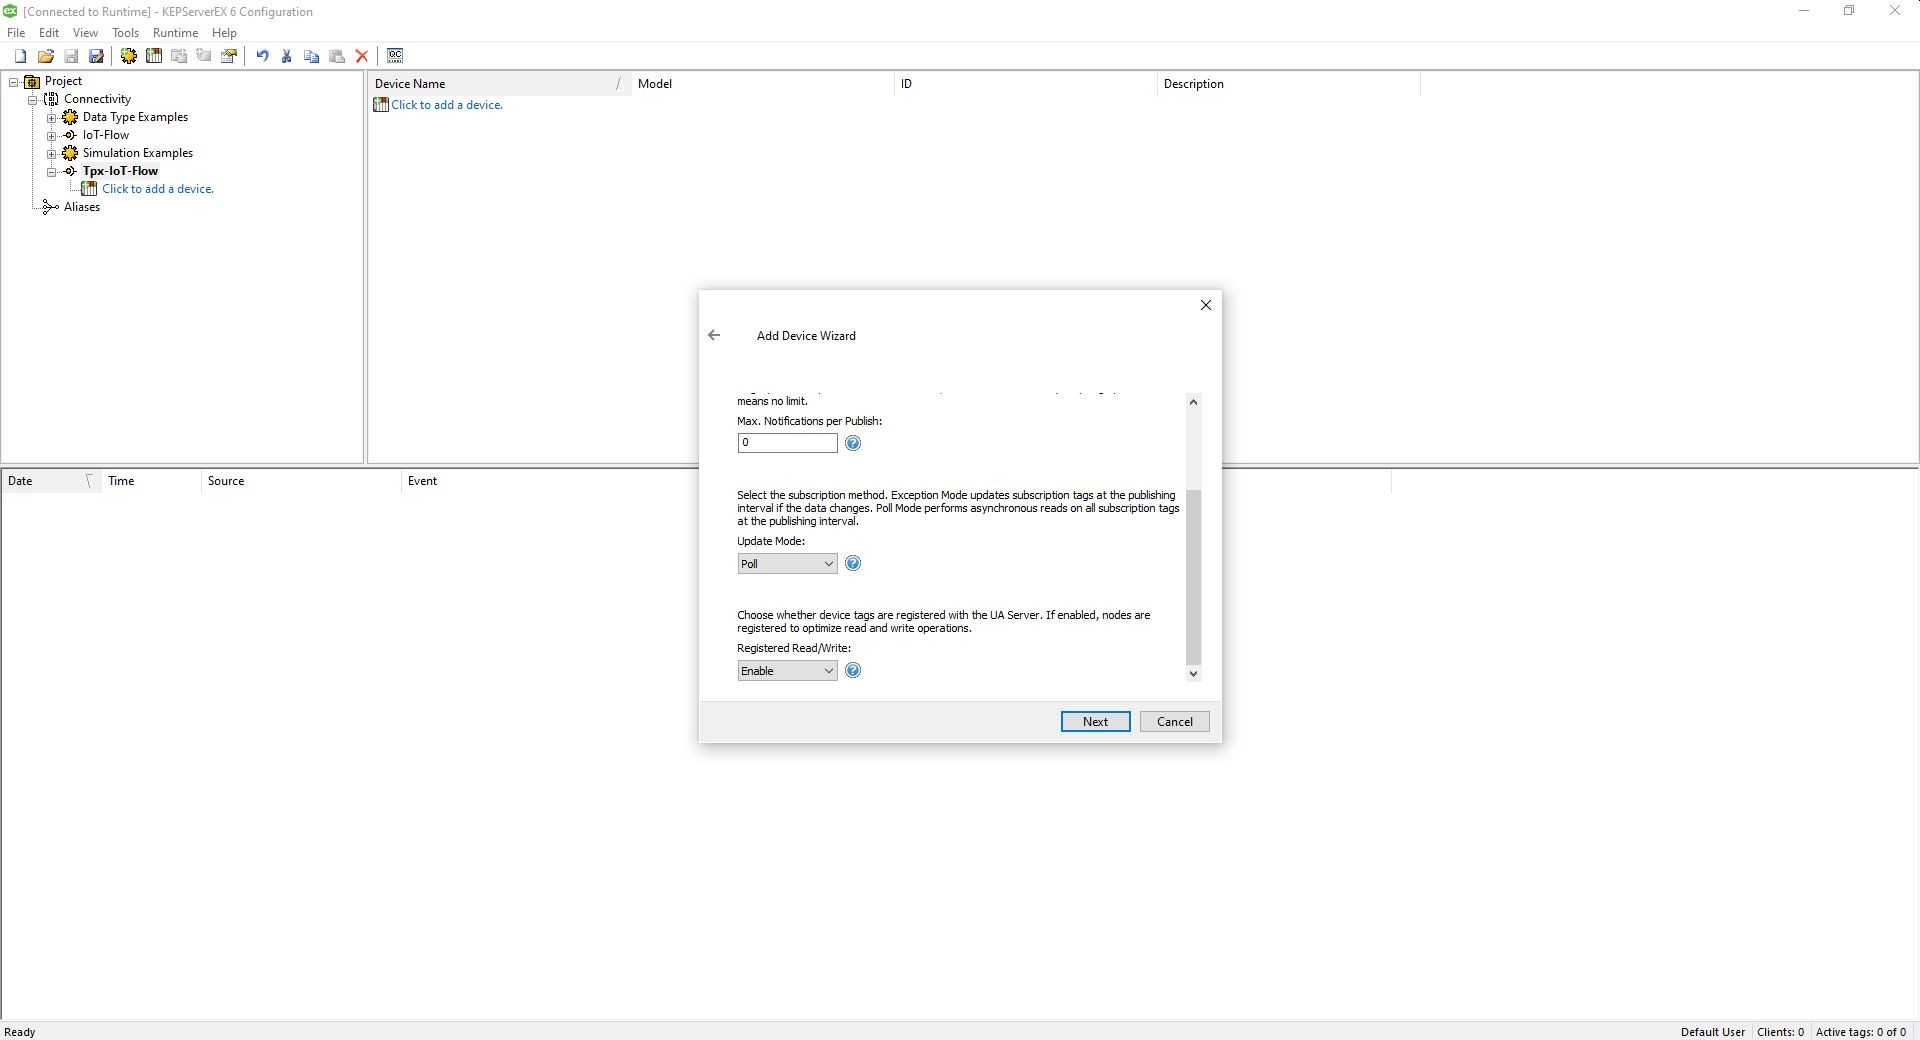
- Select Poll as the update mode and select Enable for Registered Read/Write
- On the next screen click the Select Import Items button.
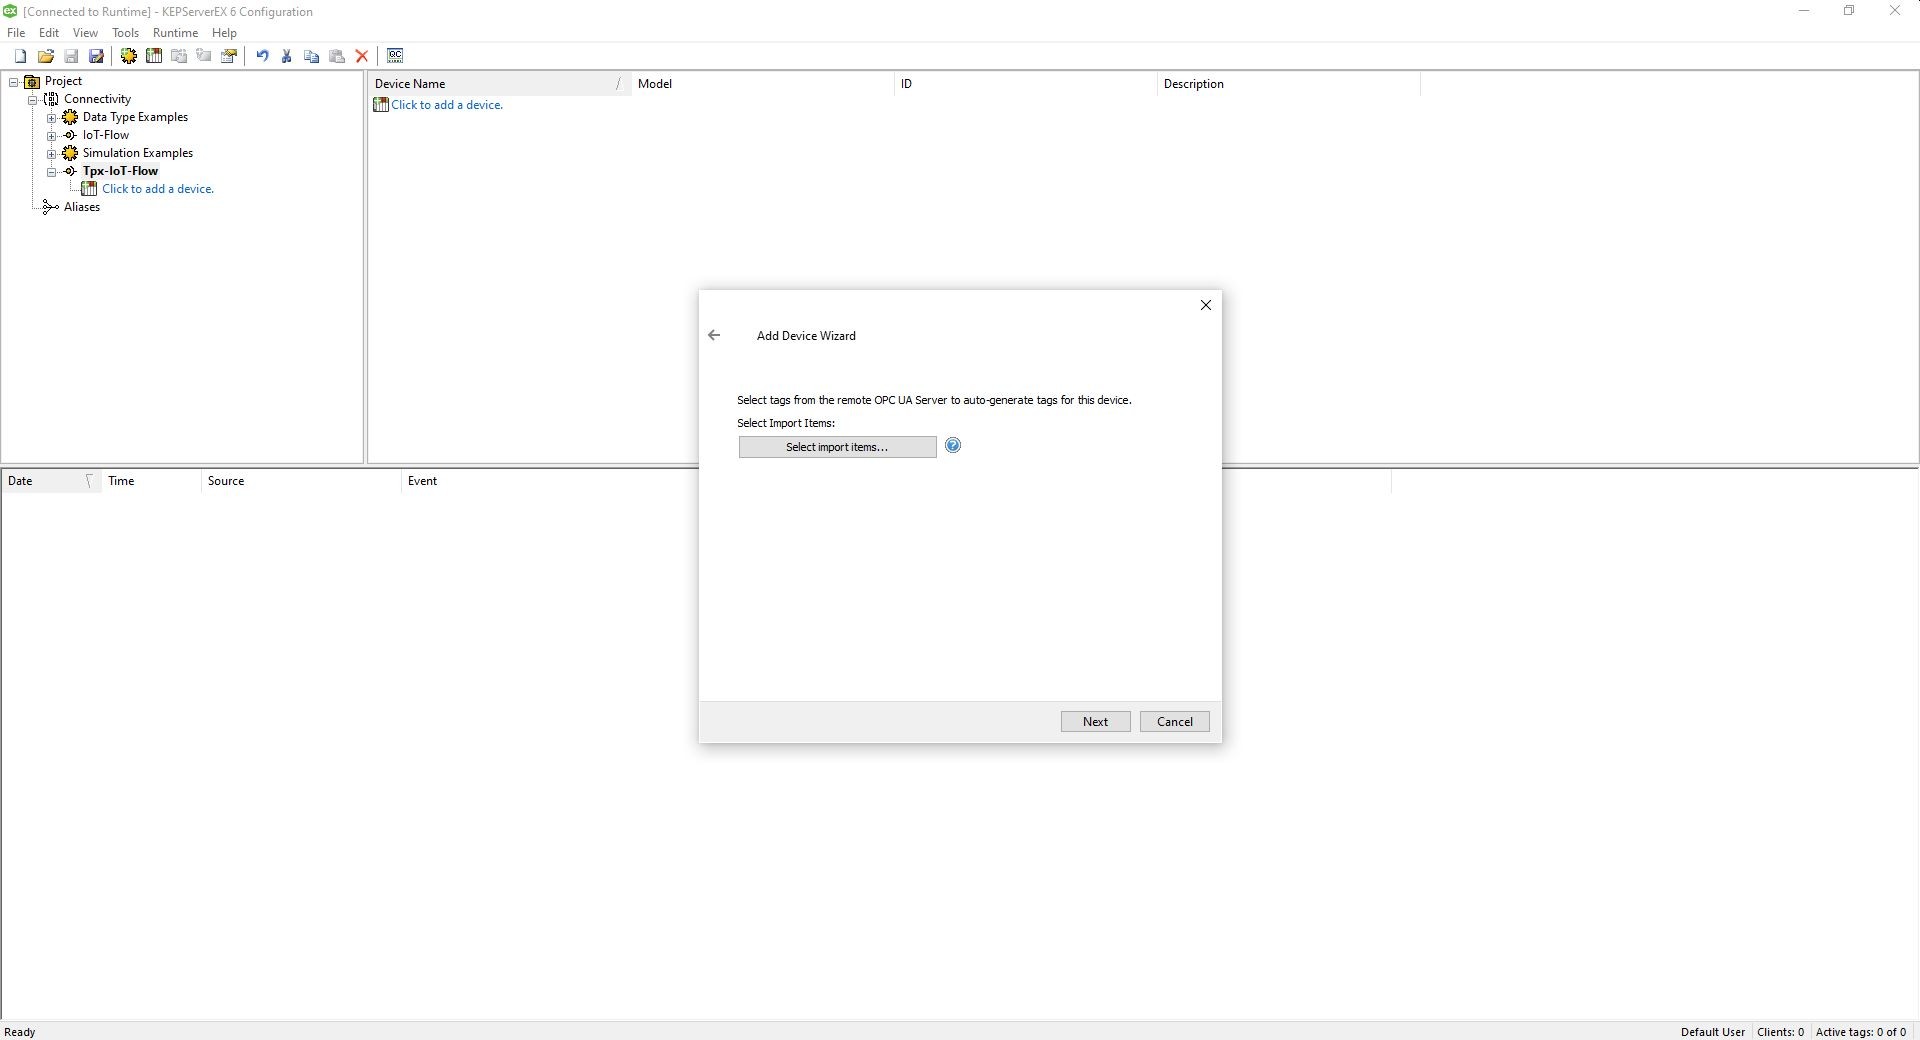
- Browse the OPC-UA Server's namespace tree and select the branches that belong to the Device and Properties you want to observe, click Add Branches button to select them. After the selections are finished, click OK.

Take care to enable the advanced option Allow insecure endpoint, dataFeed need it.
If you use credentials, you need have a Server Certificate.
How To Connect With dataFeed

- To connect to the OPCUA Server via dataFeed, you need to create a new Session.
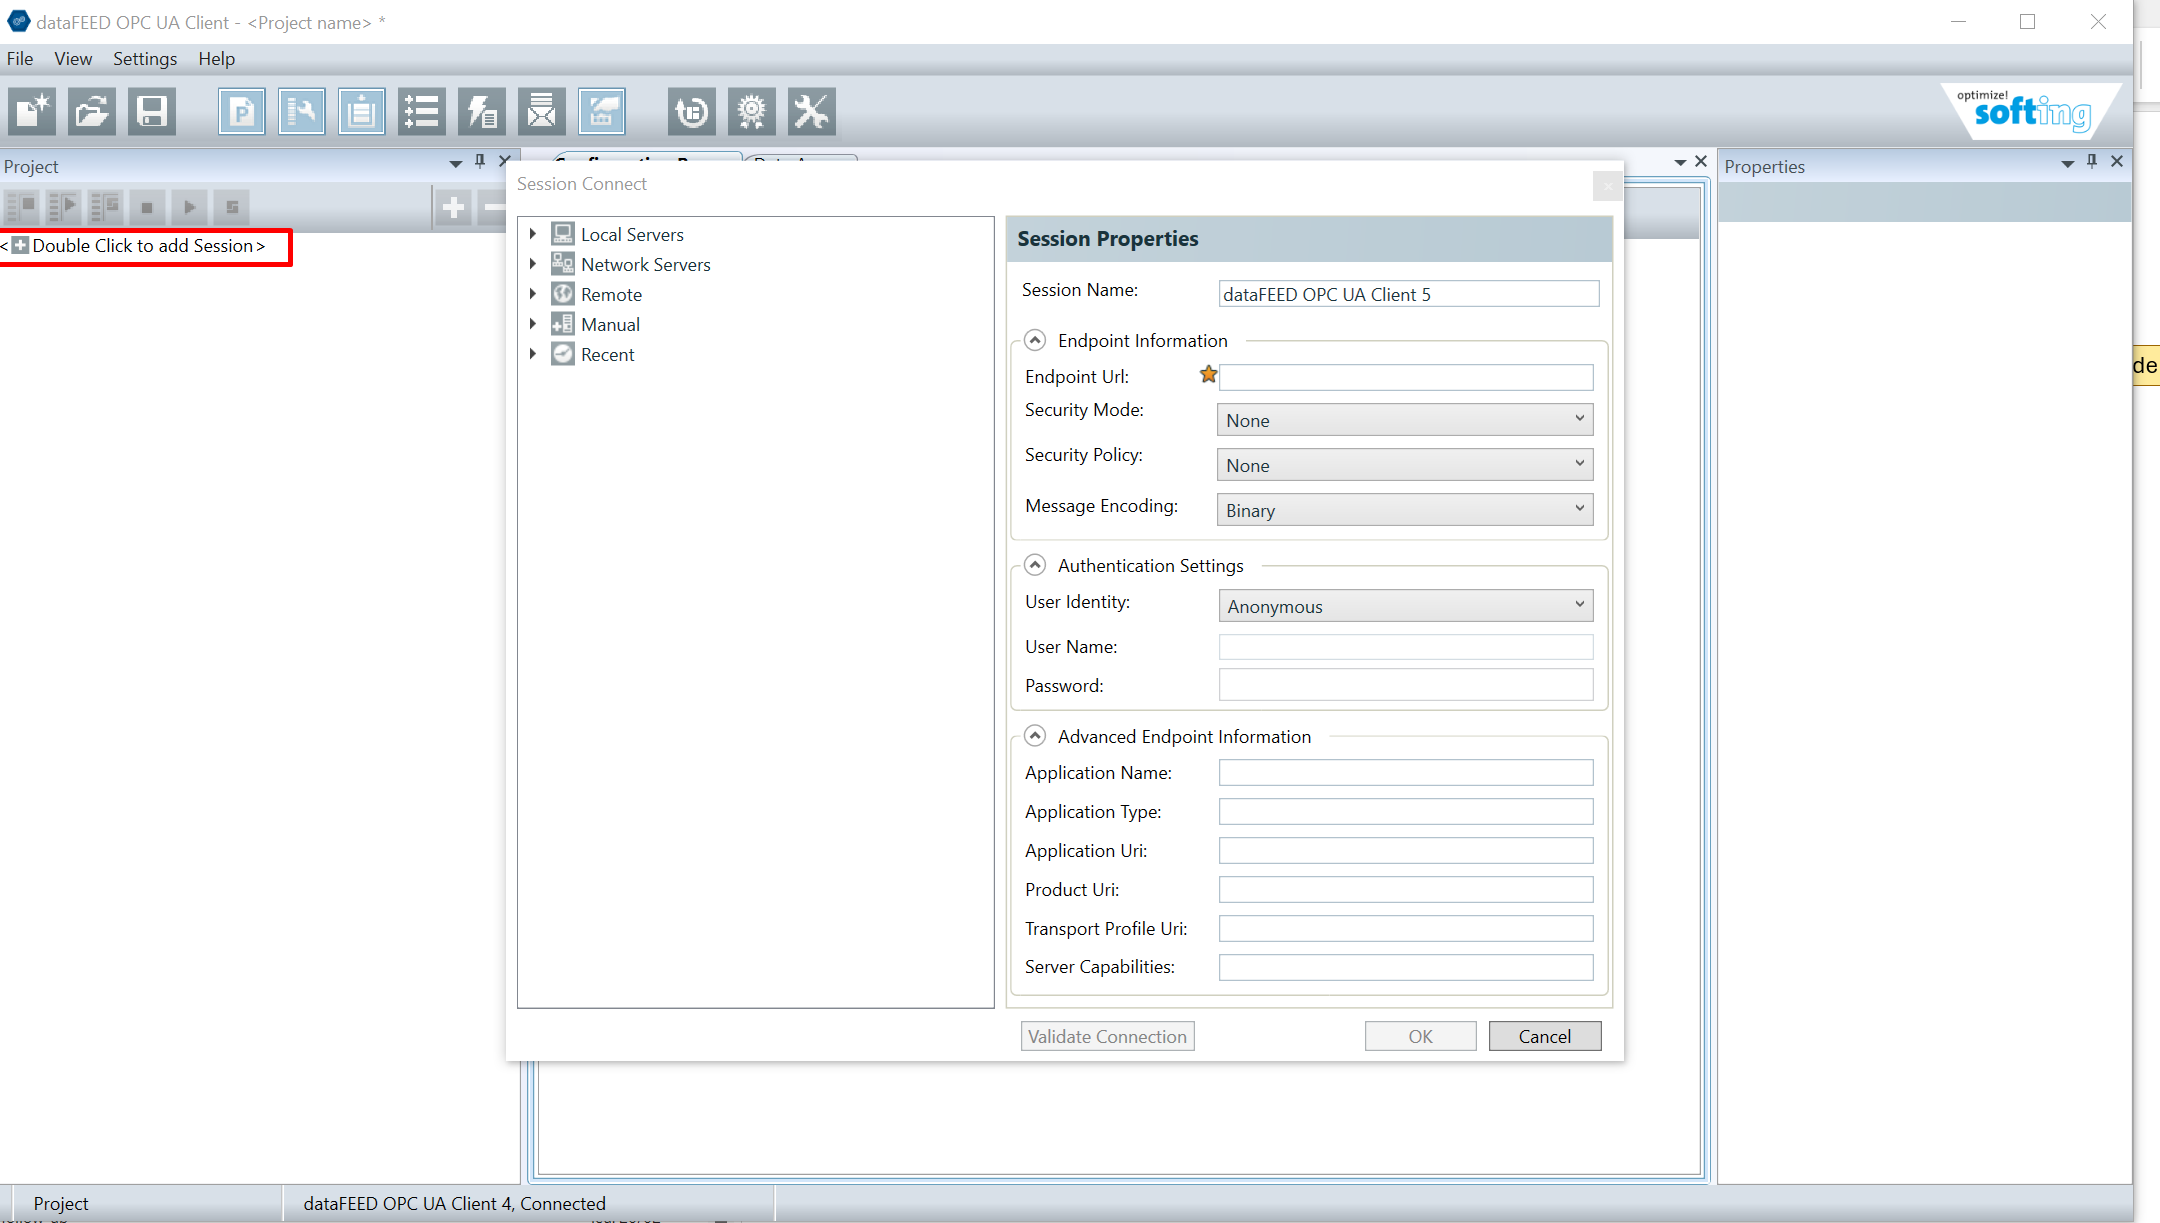
- Enter the discovery url of the OPC-UA Server to the Discovery URL field. Use the domain name, hostname or the IP address of the OPCUA server as the domain name. This must be the same value as the domainName property of the OPC-UA Connector Configuration.
Select the Security Mode & Policy supported by the OPC-UA Server. For embedded OPC-UA Server, if a server certificate is specified in the OPC-UA Connector Configuration, then Security Mode must be
SignAndEncrypt, the Security Policy must beBasic256Sha256. If a server certificate is not specified, then both must be set asNone.
If username and password are specified in the OPC-UA Connector Configuration, then those must be used by select . If a username and password are not provided in the connector configuration, then let the field User Identity to Anonymous.
Be aware of the domain name or IP Address of the OPC-UA Server. This must match the actual domain name or IP Address of the OPC-UA Server.

- Now, click on validate.
Take care to enable the advanced option Allow insecure endpoint, dataFeed need it.
If you use credentials, you need have a Server Certificate.
Structure of the OPC-UA Namespace
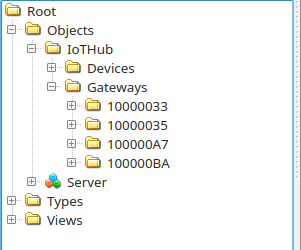
OPC-UA namespace is organized into a folder hierarchy. The top (root) folder of the namespace is named IoTHub;
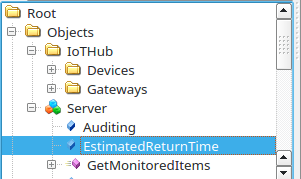
Under the IotHub folder, there are two folders called Devices and Gateways.
- Devices folder holds the devices that have received uplink packets.
- Gateways folder holds the base stations.
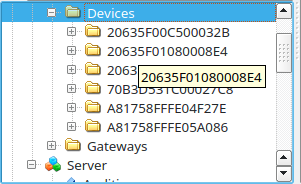
Devices Folder
When a device receives an uplink packet first time, a folder with that deviceEui name is created under the Devices.
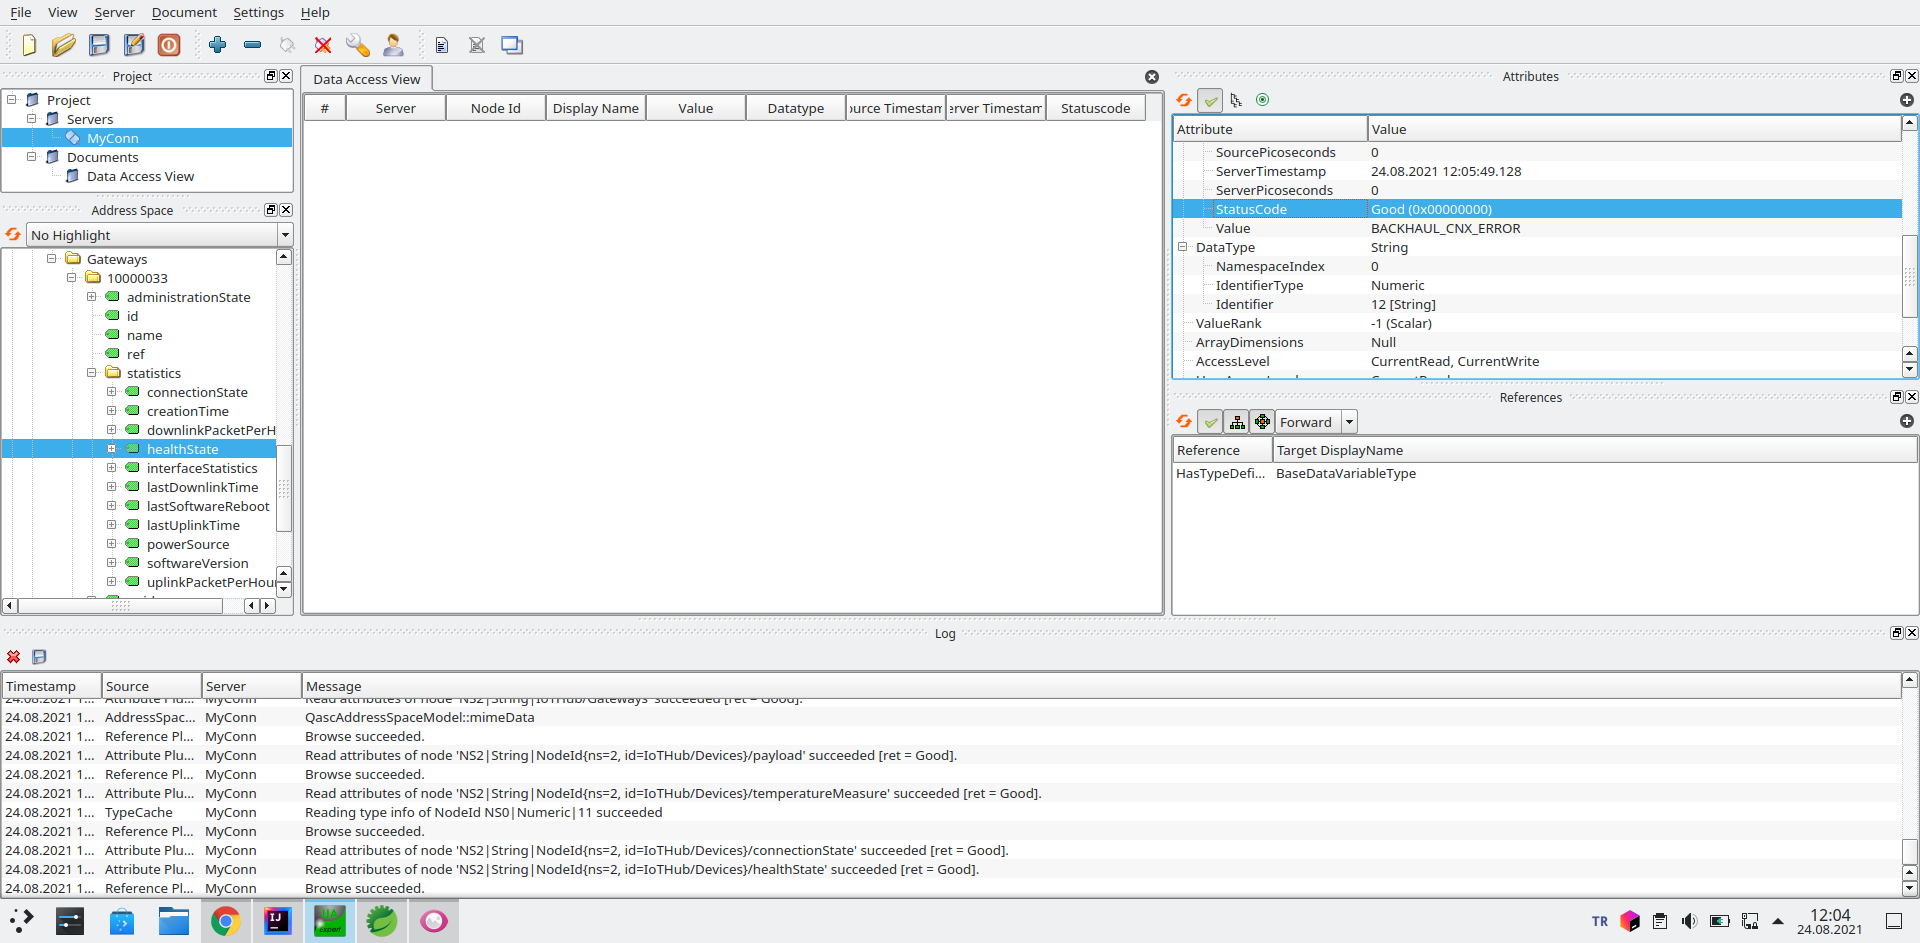
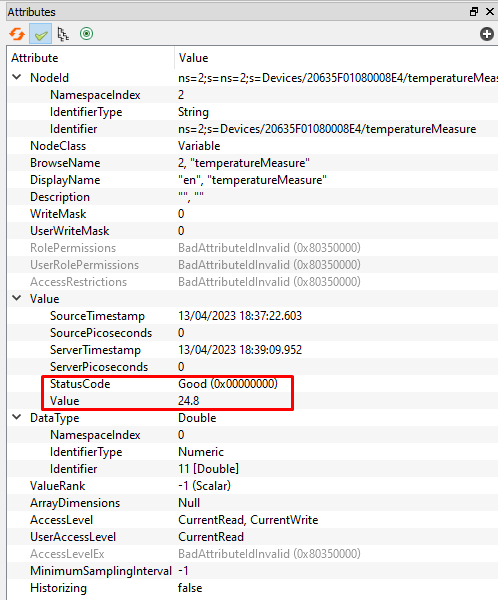
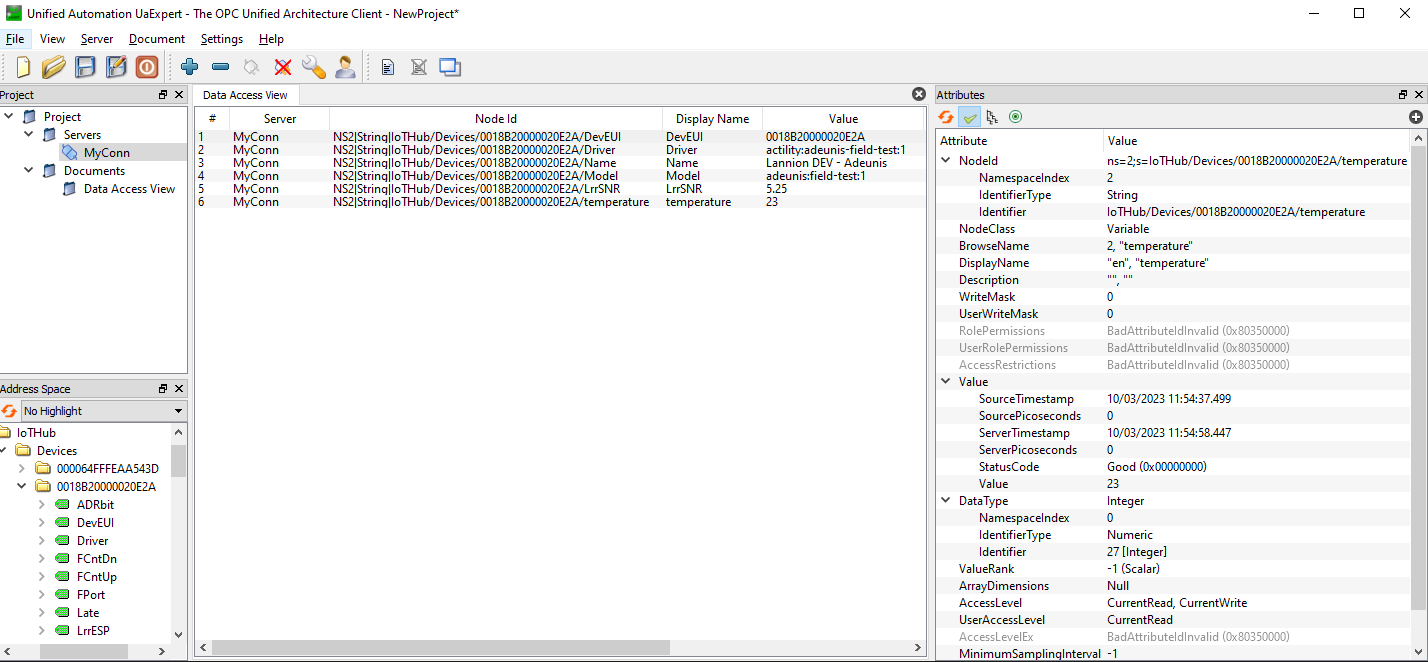
When you expand a device subfolder, you can see the device attributes listed;
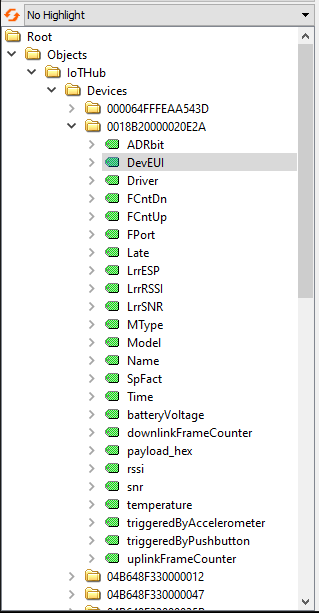
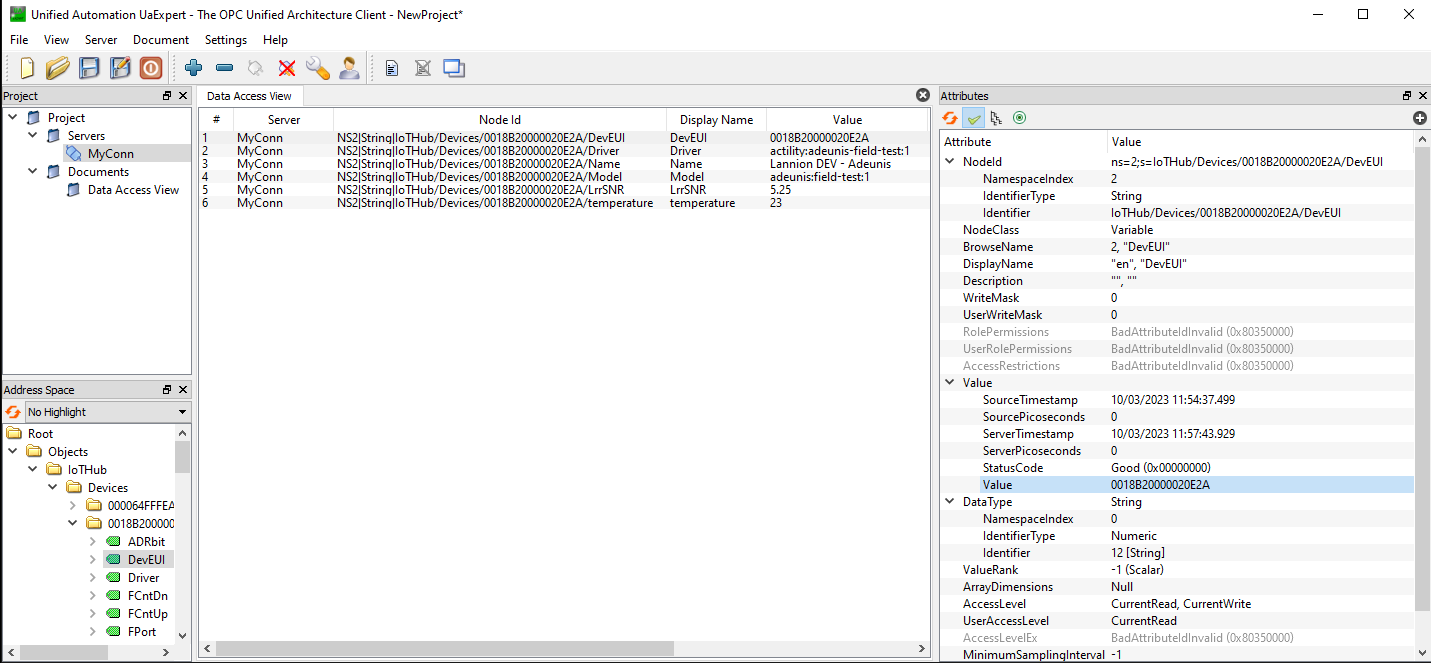
When you click on an attribute, you can see the type and value of the attribute (and many other information not specified here) from the Attributes tab on the right panel of your OPC-UA client.
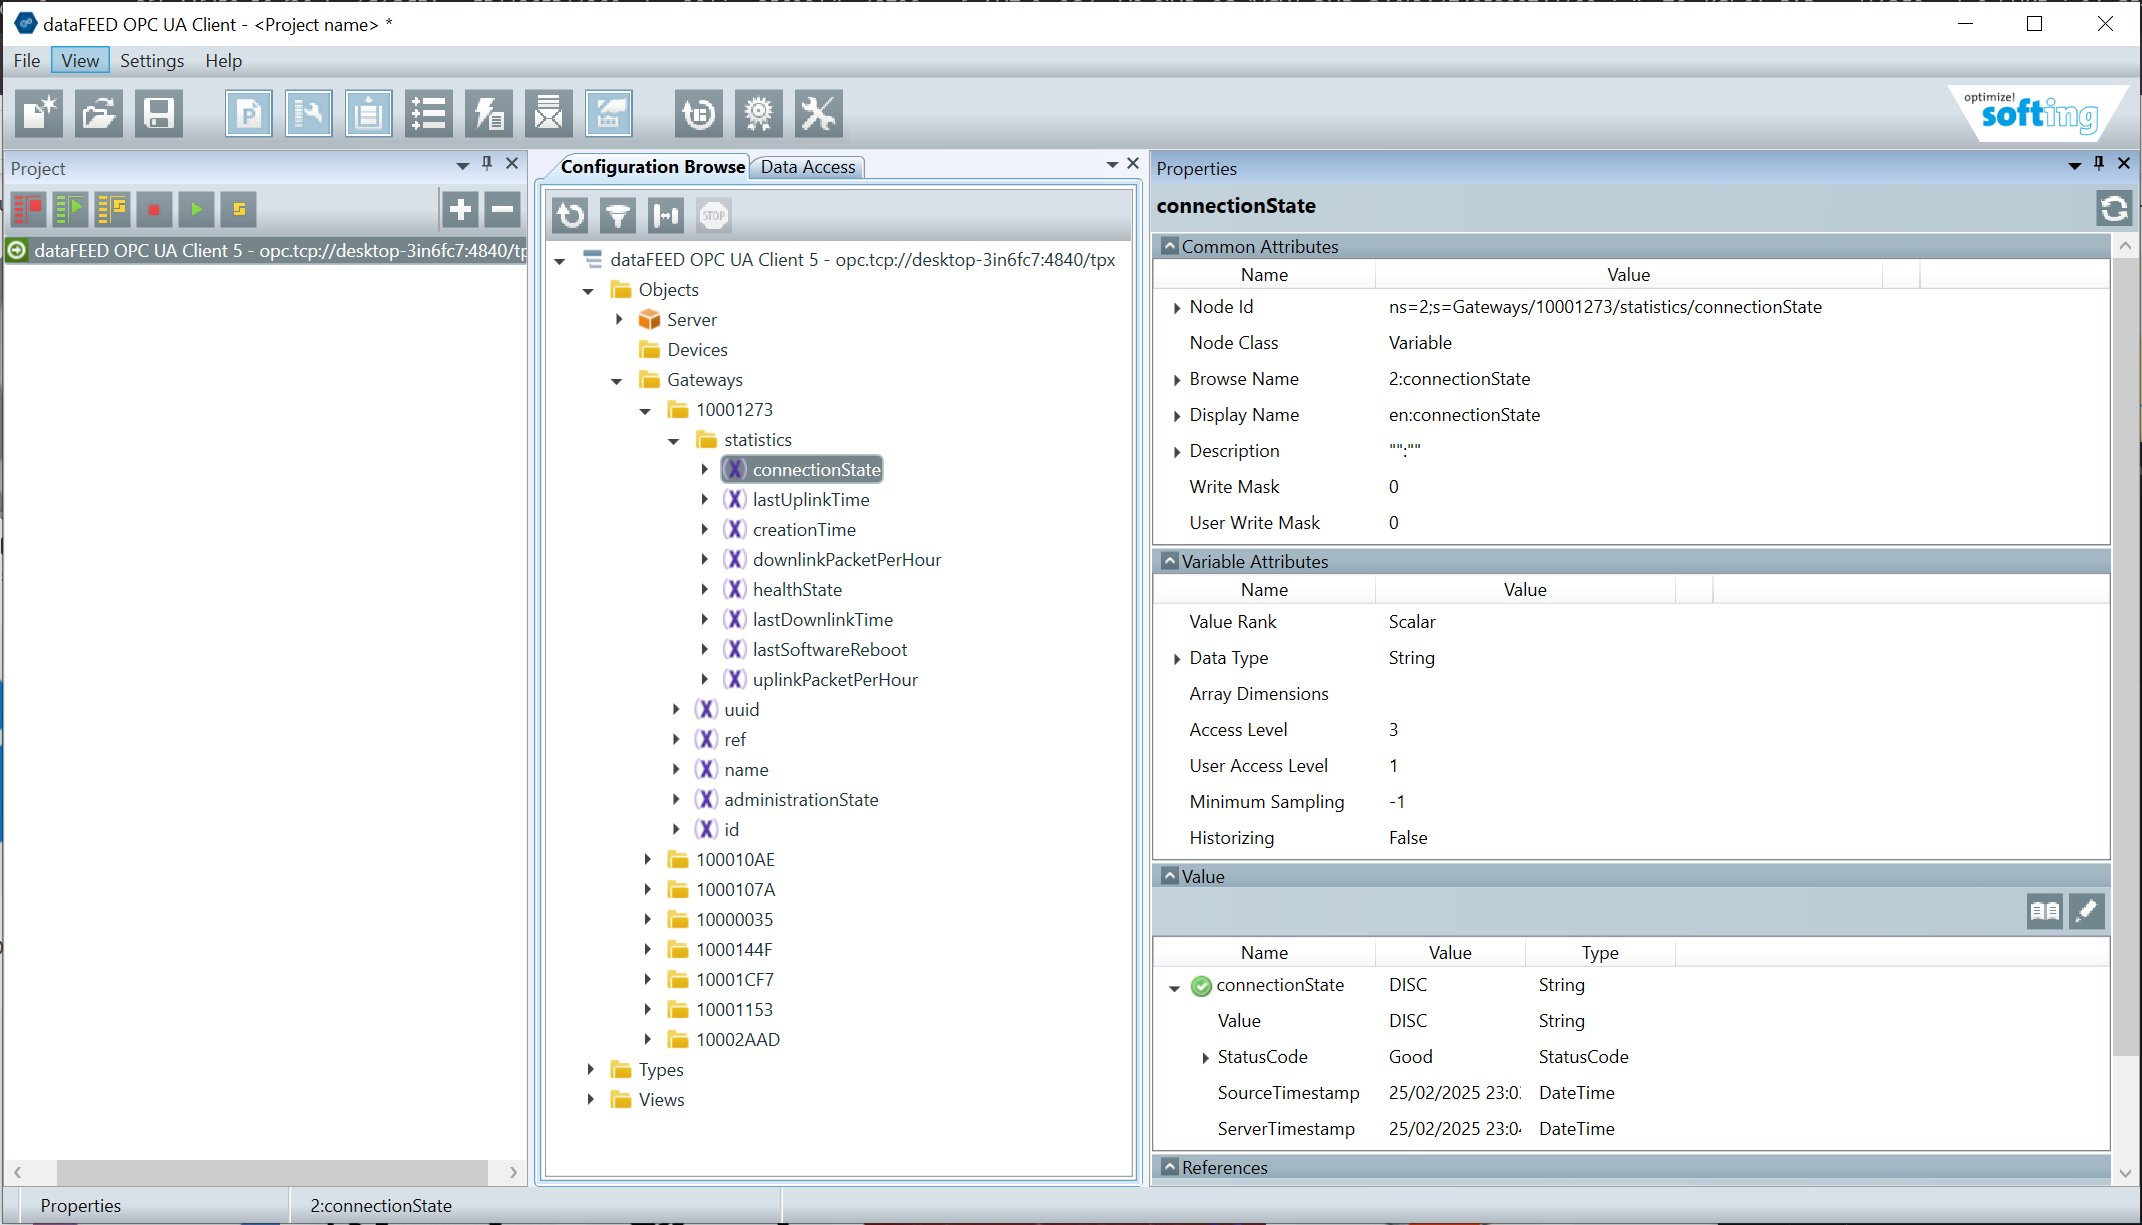
Gateways Folder
A scheduled job periodically runs to collect the base stations and creates folders corresponding to the id of each base station.
When you expand a Gateway subfolder, you can see the base station attributes listed;
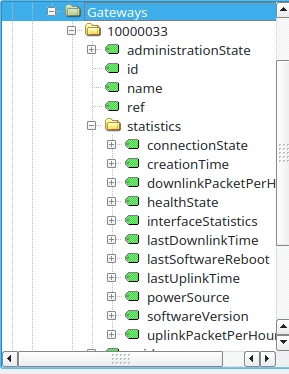
When you click on an attribute, you can see the type and value of the attribute (and many other information not specified here) from the Attributes tab on the right panel of your OPC-UA client.