CREATING A GEAR STUDIO CONNECTION
Collecting Expected Information
Parameters required
| Field | Description |
|---|---|
Instance hostname | URL used when connecting to Gear Studio instance. |
Access Token | Generated in your instance settings. |
Instance hostname
Instance hostname is the link used when you connect to your Gear Studio instance.
For example, if you are using the public Gear Studio instance, you can use the following link: https://gear.cloud.studio.
If you are using a private instance, it could be for example: https://my-instance.gear.host.
Generate Access Token
Access Token is a key that will offer you the possibility to authenticate you.
-
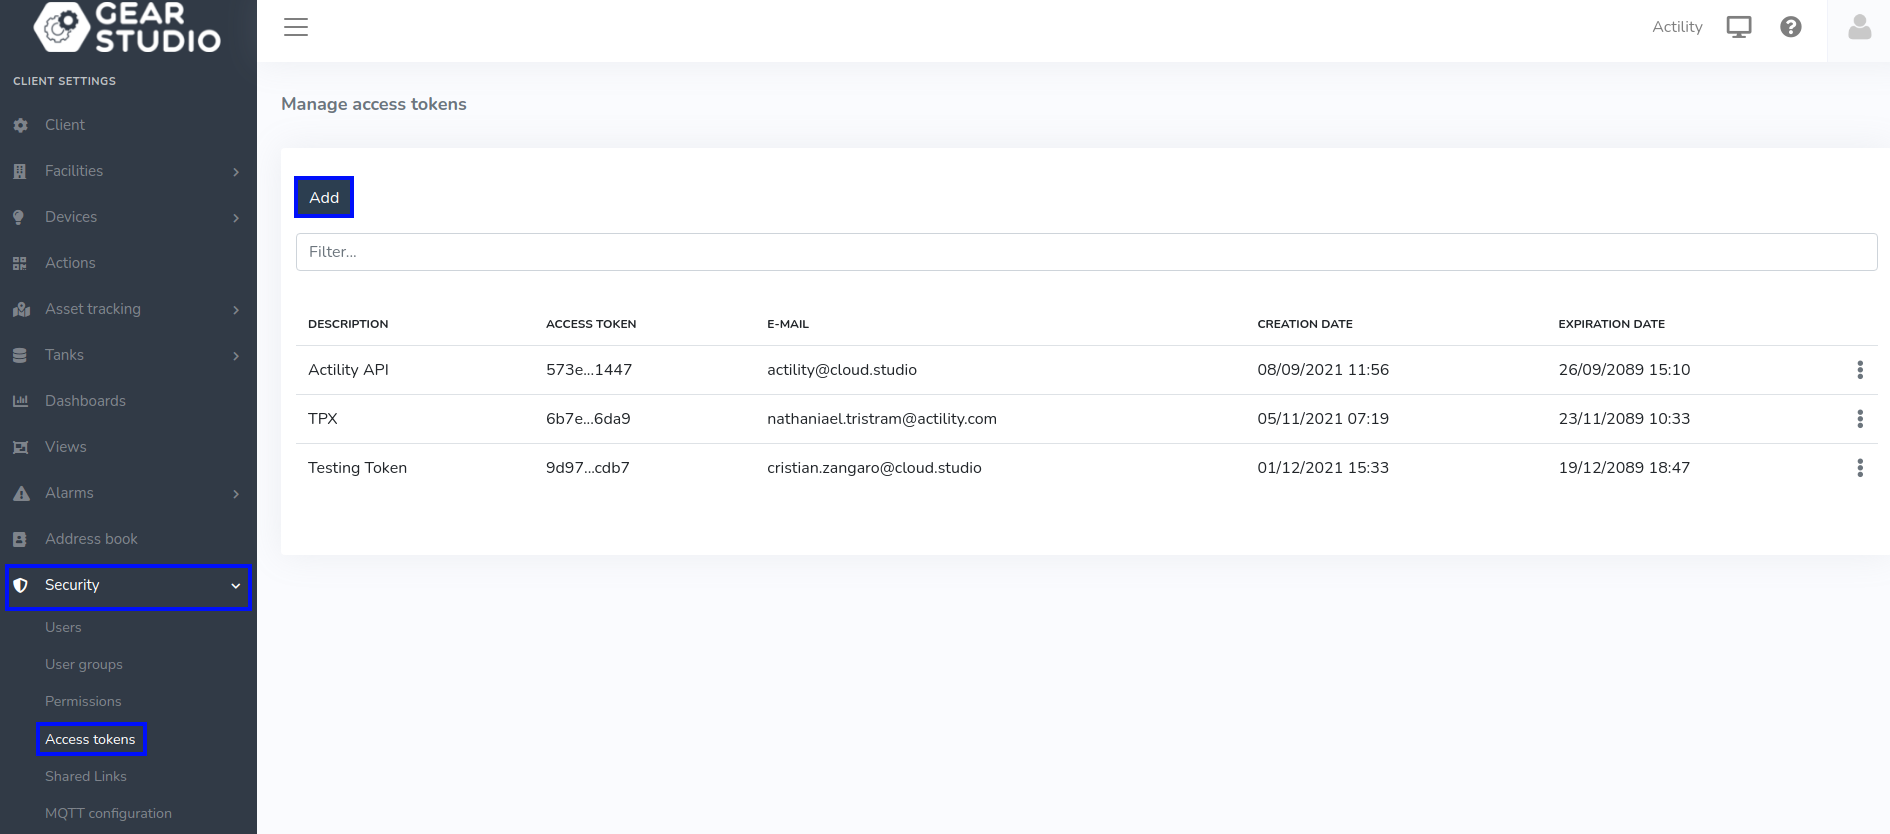
To get it, you must first go to your instance settings.

-
Then, click on Security menu, go to Access Tokens and press Add
-
Fill in the form with a Description, and your account credentials (E-mail & Password).

-
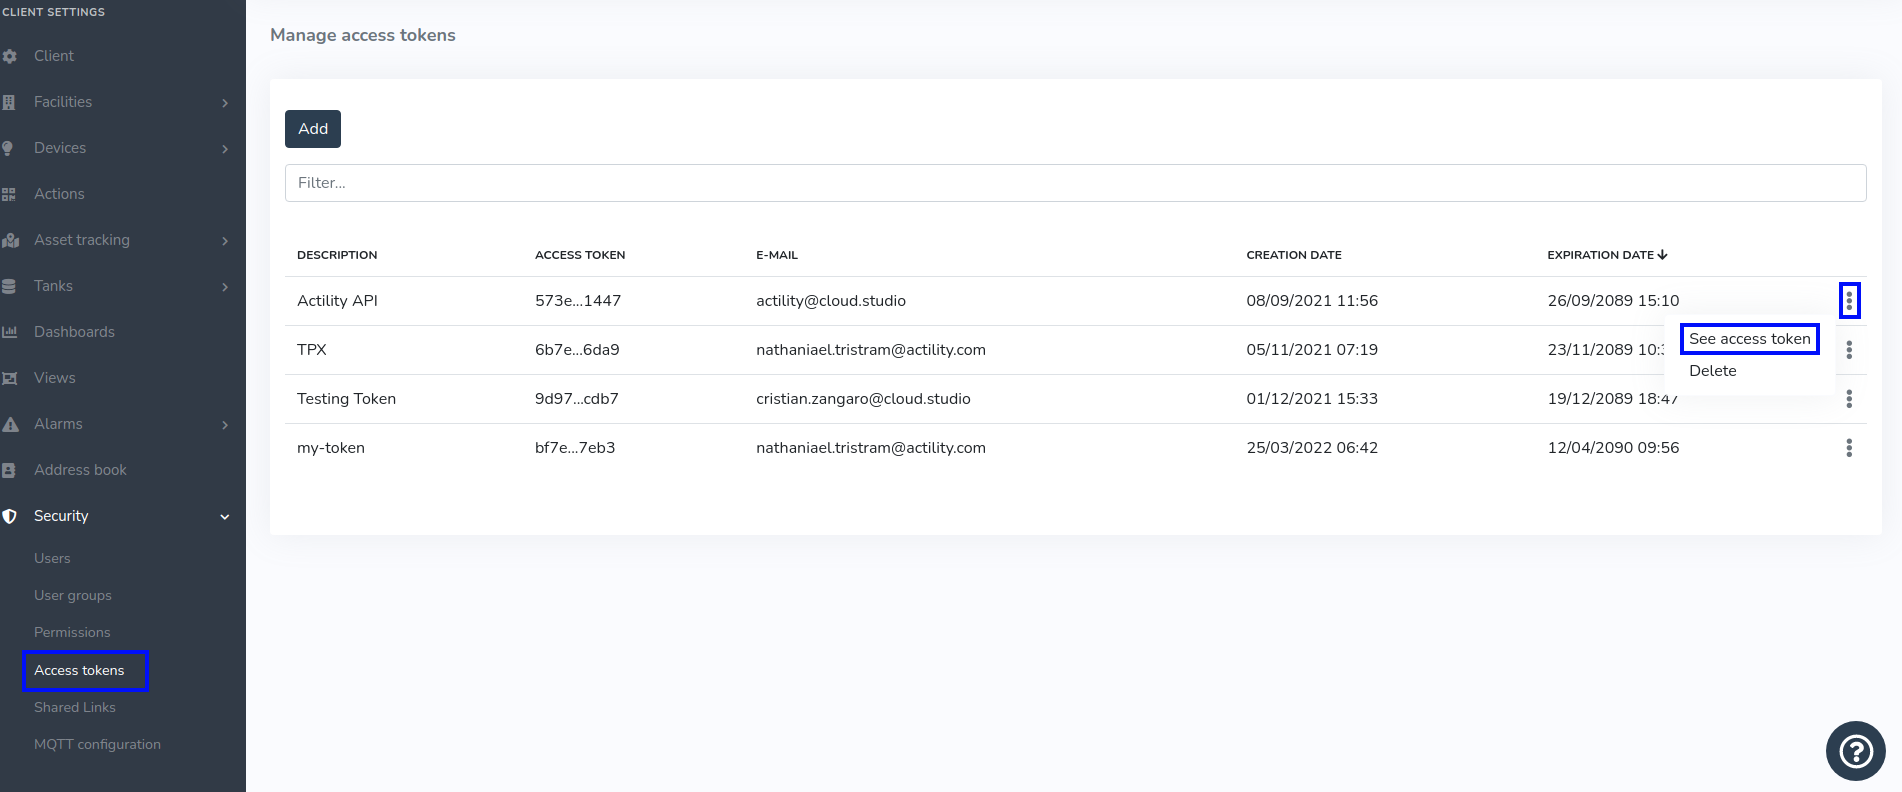
Your token will be shown after these steps. If you forgot it, you can get it again threw this list.
Creating a Connection With API
The creation of a connection establishes a unidirectional messaging transport link to the cloud provider.
To do this, you need to use the Connections group resource:
POST/connectionsto create a new Connection instancePUT/connectionsto update a Connection instanceDELETE/connectionsto delete a Connection instance
We follow the REST-full API pattern, when updating configuration properties for a connection resource. Thus, you must also provide the whole configuration again.
Example for creation of a new connection instance :
POST /connections
{
  "name":"Actility To GearStudio",
  "connectorId":"actility-http-iot",
  "configuration": {
      "destinationURL":"https://{YOUR-INSTANCE-HOSTNAME}/services/thingpark?accessToken={YOUR-ACCESS-TOKEN}"
  },
  "brand":"GEAR_STUDIO"
}
The following table lists the properties applicable to a connection instance.
| Field | Description |
|---|---|
connectorId | Must be set to actility-http-iot for Tago platform. |
configuration/destinationURL/instanceHostname | Must be replaced by your Instance hostname, used when you connect to Gear Studio. |
configuration/destinationURL/accessToken | Must be replaced by your Access Token created in your instance settings. |
brand | Must be set to GEAR_STUDIO. |
All properties are not present in this example. You can check the rest of these properties in the common parameters section.
Creating a Connection With UI
-
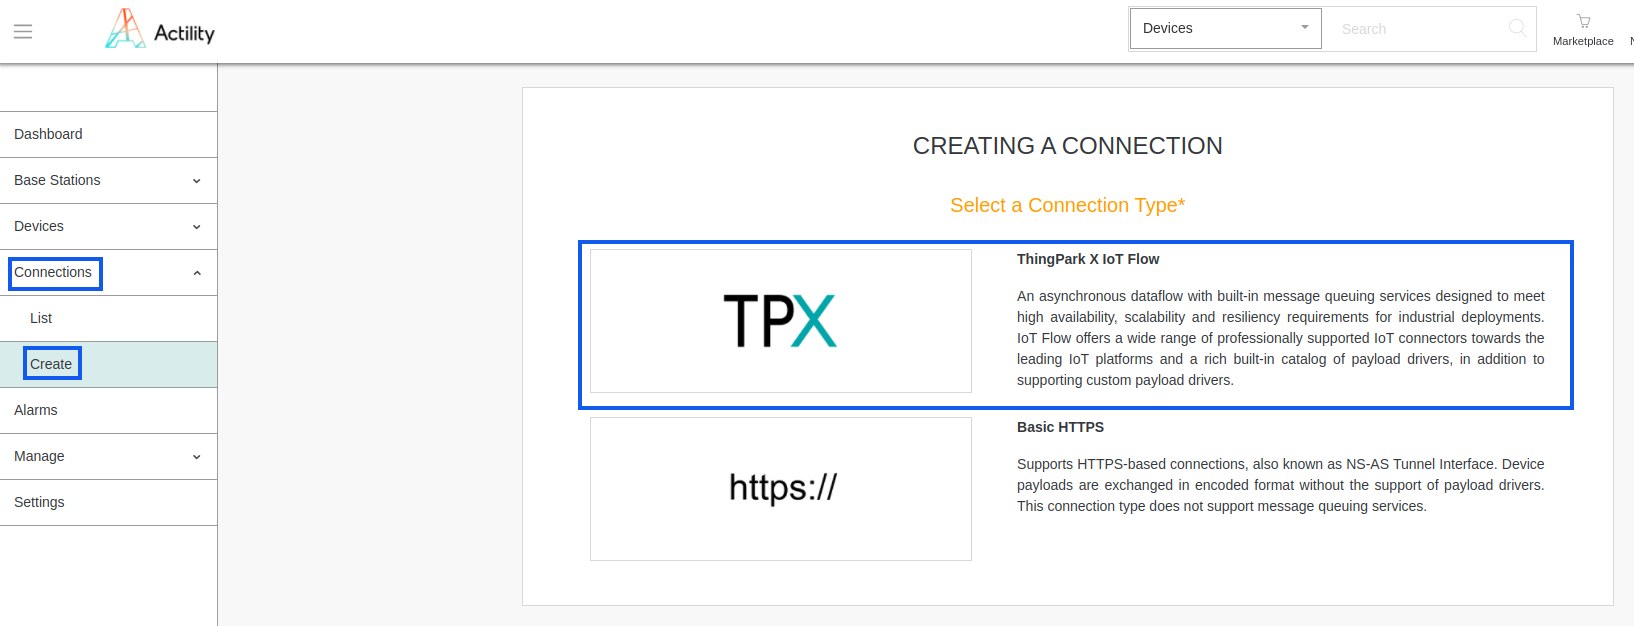
Click Connections -> Create -> ThingPark X IoT Flow
-
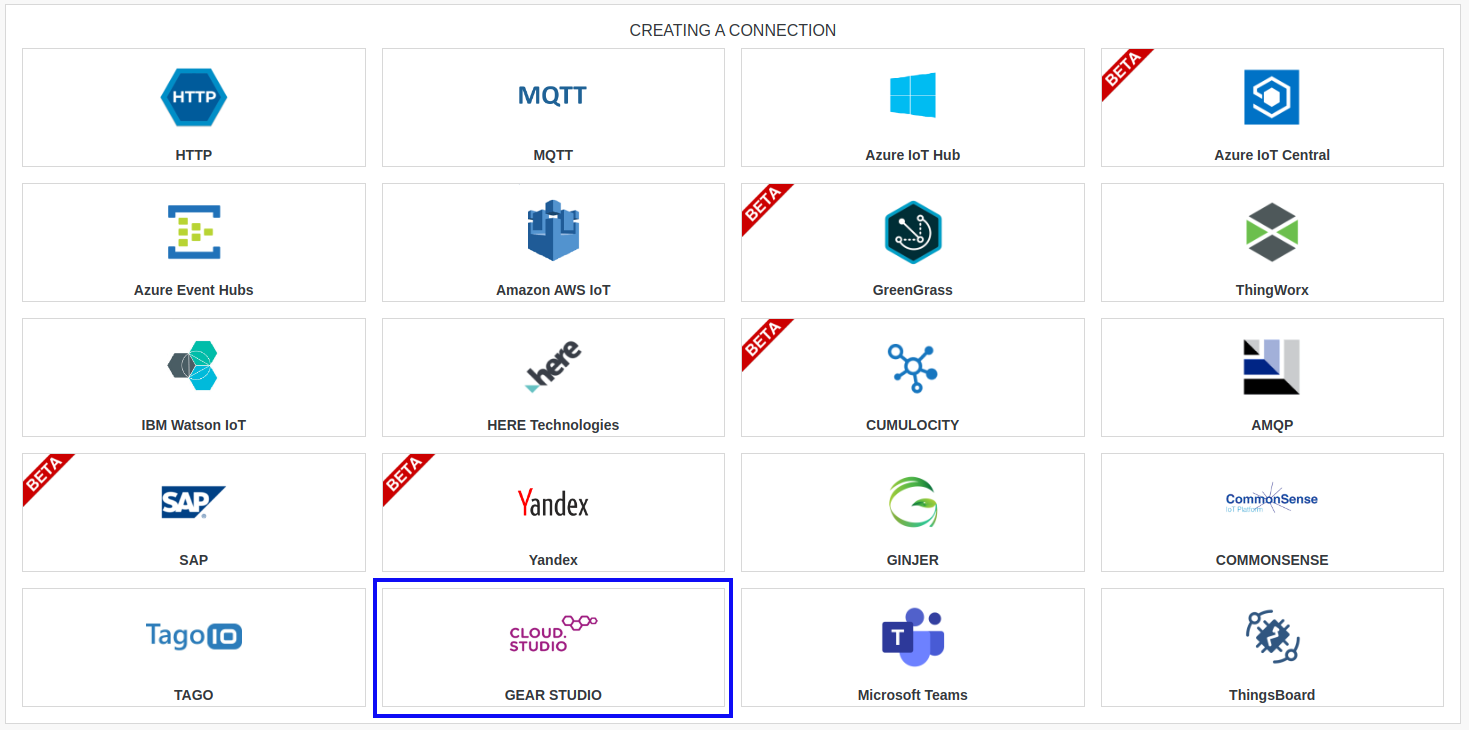
Then, a new page will open. Select the connection type: Gear Studio.
-
Fill in the form as in the example below and click on Create.
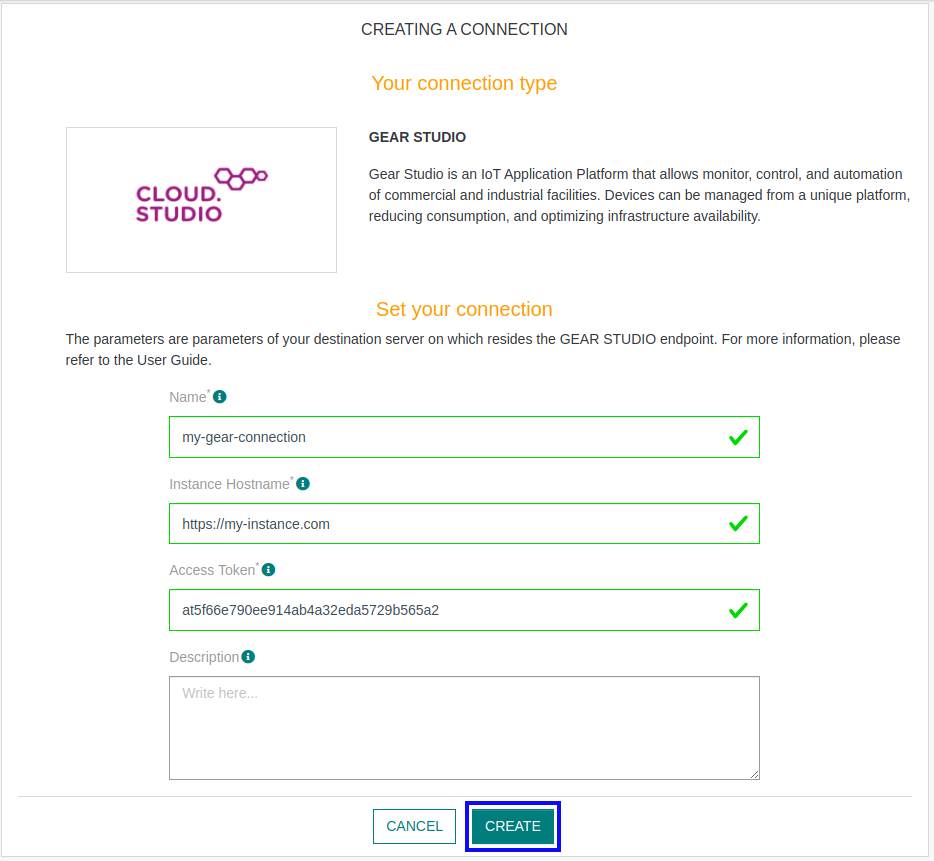
Parameters marked with * are mandatory.
-
A notification appears on the upper right side of your screen to confirm that the application has been created.
-
After creating the application, you will be redirected to the connection details.
Gear Studio device configuration
To make your device working in Gear Studio, you have to follow those few steps:
-
Go to your instance settings.
-
Enter in the Device models, under Devices section. And click the Add button.

- Fill in the form, using your device informations and click the Save button.

Your model will now appear in the Device models list.

- Now, edit this device, and go to the Scripts section.

-
Configuration section permits to create device endpoints, like temperature, humidity or whatever you need.
-
Payload parser section permits to parse uplinks TPX will send.
Here is an example for both script, for a device collecting Temperature, Humidity, Light intensity, and Motion.
Configuration script


function getConfiguration(config)
{
	 config.addressLabel = {en: "DevEUI", es: "DevEUI"};
}

function getEndpoints(deviceAddress, endpoints)
{
  endpoints.addEndpoint("1", "Temperature sensor", endpointType.temperatureSensor);
  endpoints.addEndpoint("2", "Humidity sensor", endpointType.humiditySensor);
  endpoints.addEndpoint("3", "Light sensor", endpointType.lightSensor);
  endpoints.addEndpoint("4", "Motion sensor", endpointType.iasSensor,iasEndpointSubType.motionSensor);
}

function validateDeviceAddress(address, result)
{
  if (address.length != 16) {
    result.ok = false;
    result.errorMessage = {
      en: "The address must be 16 characters long.",
      es: "La dirección debe tener exactamente 16 caracteres."
    };
  }
}

function updateDeviceUIRules(device, rules)
{
  rules.canCreateEndpoints = false;
}

function updateEndpointUIRules(endpoint, rules)
{
  rules.canDelete = false;
  rules.canEditSubtype = false;
}
Payload parser script

function parseUplink(device, payload)
{
    var data = payload.asParsedObject();
    var temperature = data.temperature;
    var humidity = data.humidity;
    var light = data.light;
    var motion = data.motion;

    //update temperature
    var e = device.endpoints.byType(endpointType.temperatureSensor);
    if (e != null)
        e.updateTemperatureSensorStatus(temperature);
    //update humidity
    e = device.endpoints.byType(endpointType.humiditySensor);
    if (e != null)
        e.updateHumiditySensorStatus(humidity);
    //update light
    e = device.endpoints.byType(endpointType.lightSensor);
    if (e != null)
        e.updateLightSensorStatus(light);
    //update motion
    e = device.endpoints.byType(endpointType.iasSensor);
    if (e != null)
        e.updateIASSensorStatus(motion);
}
- After setting up those two scripts, you can click on the Save button to register those settings. You can now create your first device from this model.
Limitations
Limitations depends on Account Plan you own.
Displaying information to know if it worked
-
Connect to your Gear Studio instance, and naviguate to settings.
-
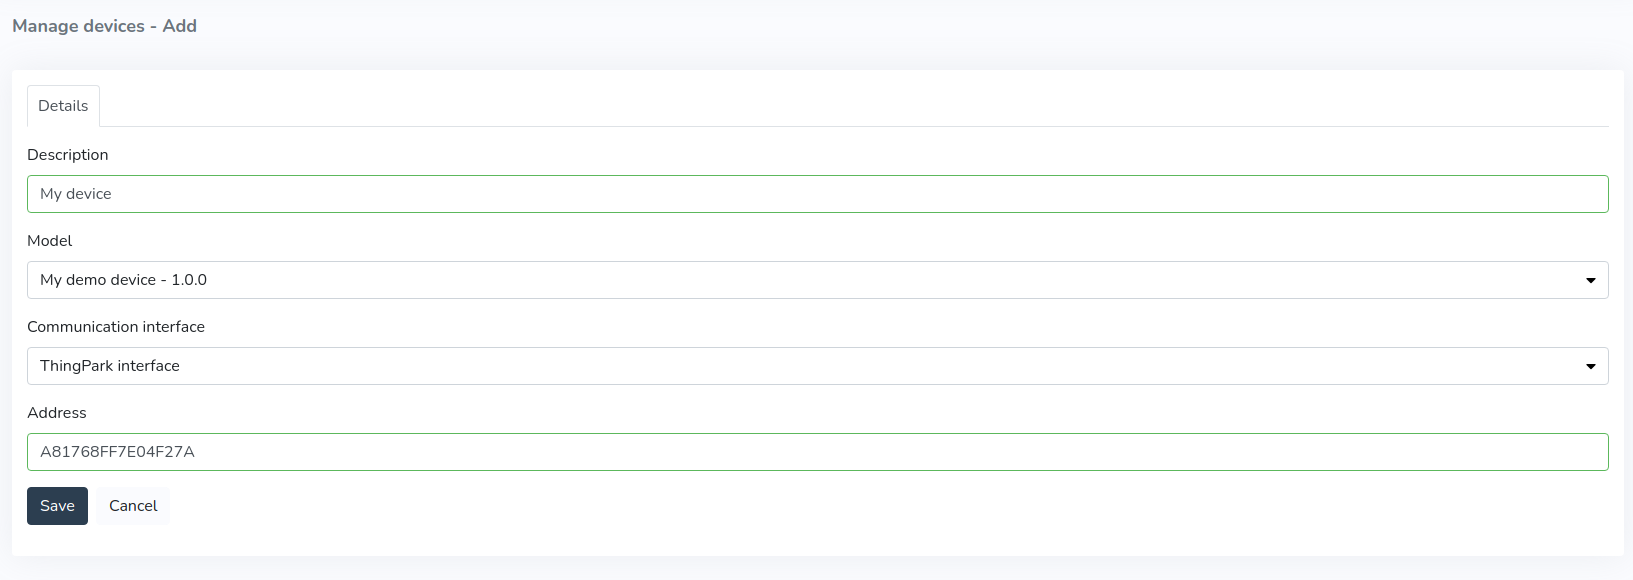
Go to Devices section and click the Add button to create a new Device.

- Fill the form using the device model created before, the Address field correspond to your Device EUI (find it on ThingPark device list)
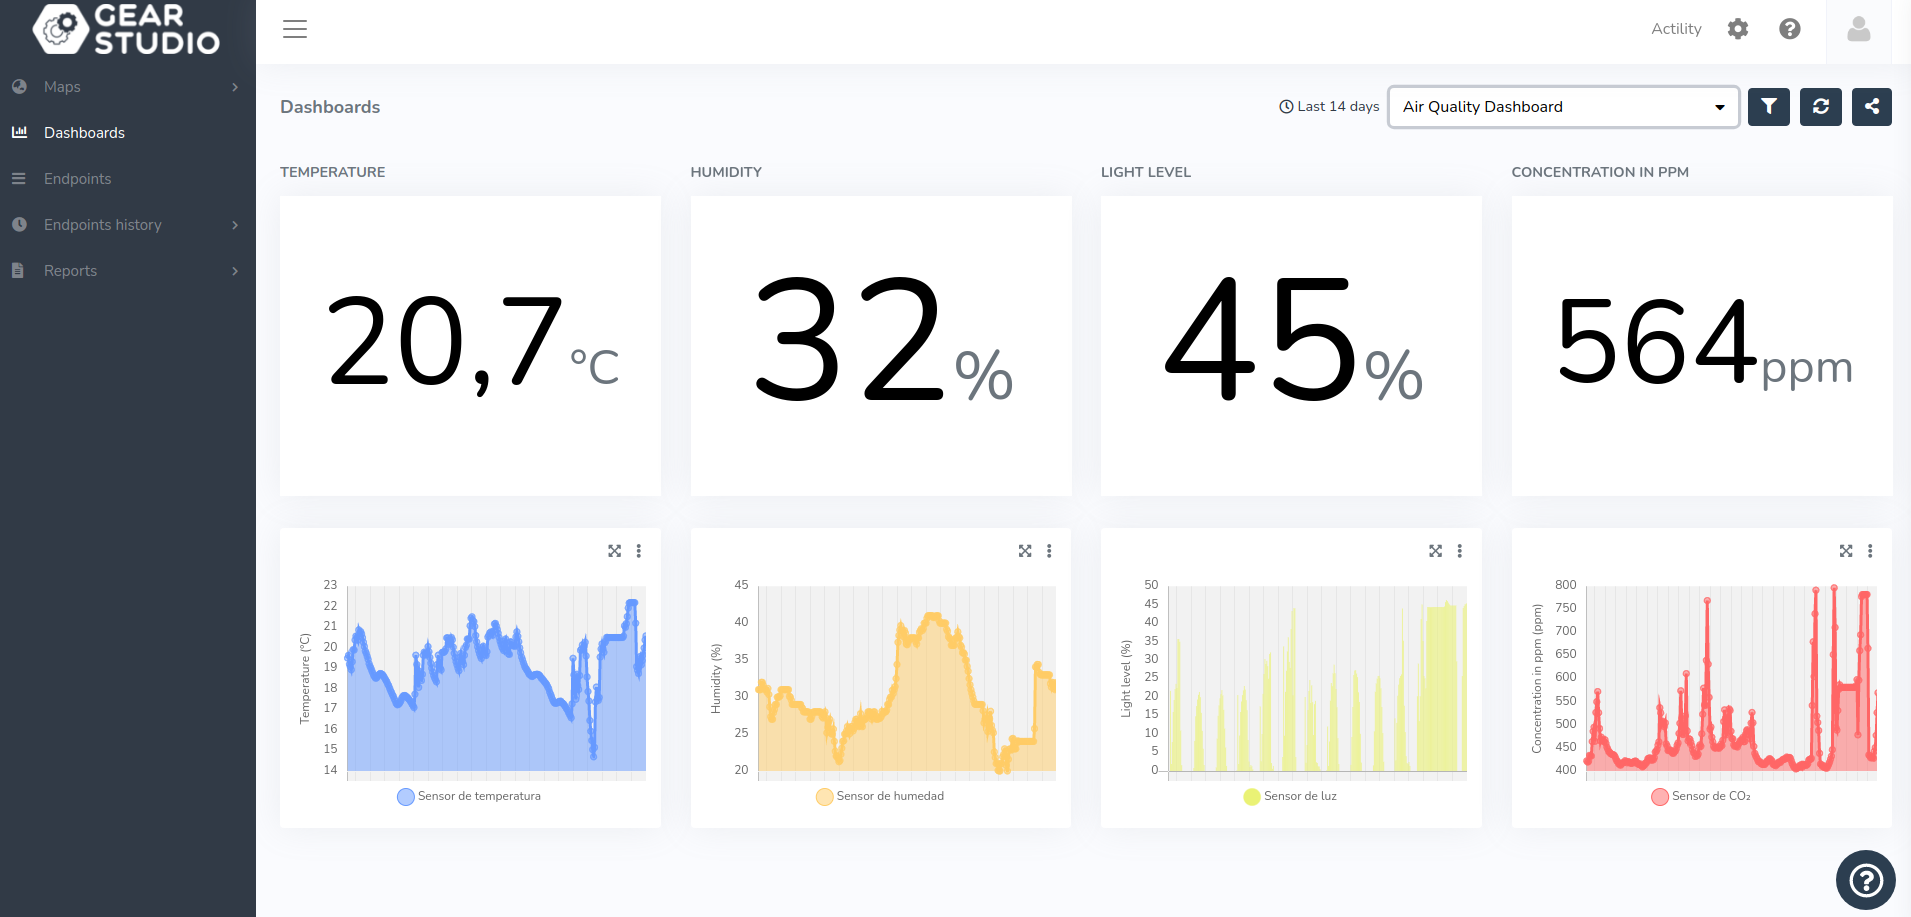
- Using dashboards(it's not automatically created, you must do it by your own), you'll be able to see if you're receiving uplinks from your device created.
Troubleshooting
As for now, there are no detected bugs.
- Cloud studio Wiki: https://wiki.cloud.studio/