Creating a Bosch Rexroth ctrlX Connection (v1.1.0)
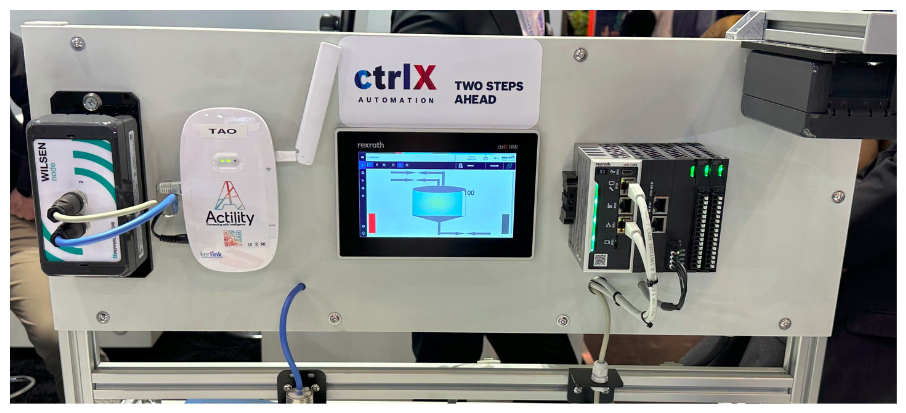
This guide explains how to connect a TAO gateway to a Bosch Rexroth ctrlX CORE using the Actility Data Layer Provider.
Version 1.1.0 introduces persistent configuration storage, ensuring that all settings are restored automatically after an application restart, crash, or device reboot.
Example Network Configuration
| Device | IP Address | Description |
|---|---|---|
| Network Subnet | 192.168.1.0/24 | Local /24 network |
| Bosch Rexroth ctrlX | 192.168.1.1 | Default ctrlX IP |
| TAO Gateway | 192.168.1.2 | TAO IP address |
| Workstation (PC) | 192.168.1.3 | Engineering workstation |
| Subnet Mask | 255.255.255.0 | Masks the /24 network |
Collecting Required Information
Before starting, ensure you have:
- MAC address of the TAO gateway (
aa:bb:cc:dd:ee:ff) - Static IP address planned for the TAO
- MQTT broker credentials (host, port, username, password)
- ctrlX CORE access credentials
1. Identify the TAO Gateway IP
Use the TAO MAC address to discover its IP address.
Linux
sudo nmap -sn 192.168.1.0/24 | grep -B 2 -i aa:bb:cc:dd:ee:ff
Windows
arp -a | findstr aa-bb-cc-dd-ee-ff
Note: Windows displays MAC addresses using - instead of :.
2. Configure a Static IP on the TAO Gateway
- Open
http://<TAO_IP>:1323/login - Log in and navigate to Local Base Station
- Scroll to Network Interface Configuration
- Disable DHCP
- Set the static IP, subnet mask, and gateway
- Apply the configuration

Verify connectivity using ping from your workstation.
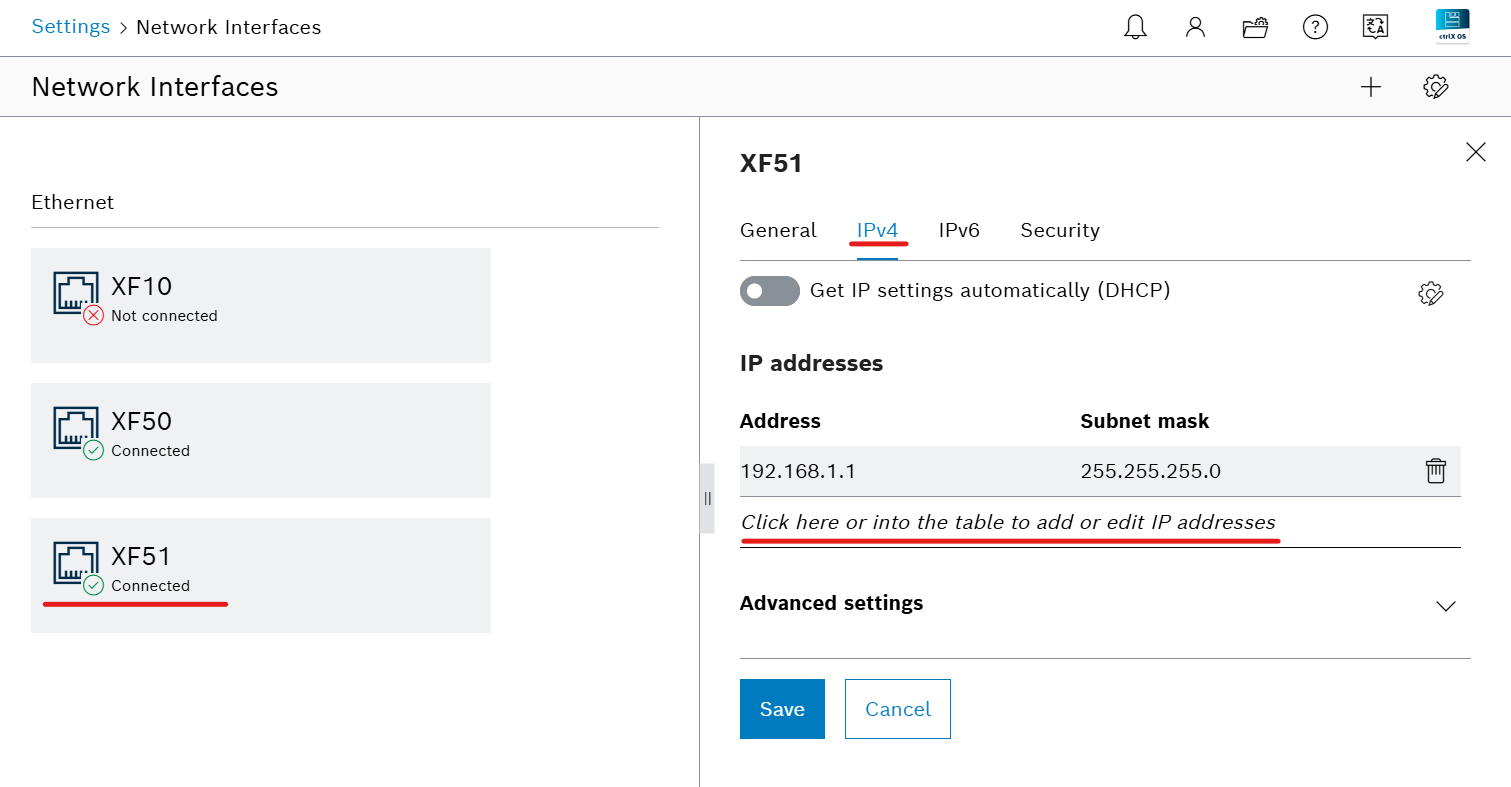
3. Configure a Static IP on the ctrlX CORE
- Connect to the ctrlX web interface
- Go to Settings → Network Interfaces
- Select the active interface (e.g. XF-50 / XF-51)
- Disable DHCP
- Assign a static IP and subnet mask
- Apply changes

4. Install the Actility App
App not published yet in ctrlX Store
Download the appropriate .snap file:
Installation steps:
- Go to Settings → Apps.
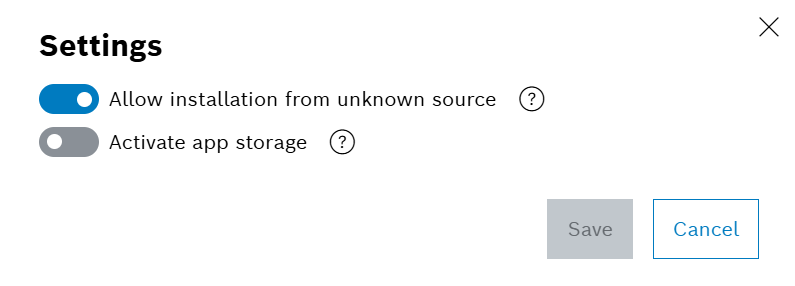
- Click the 3 dots in the top-right corner.
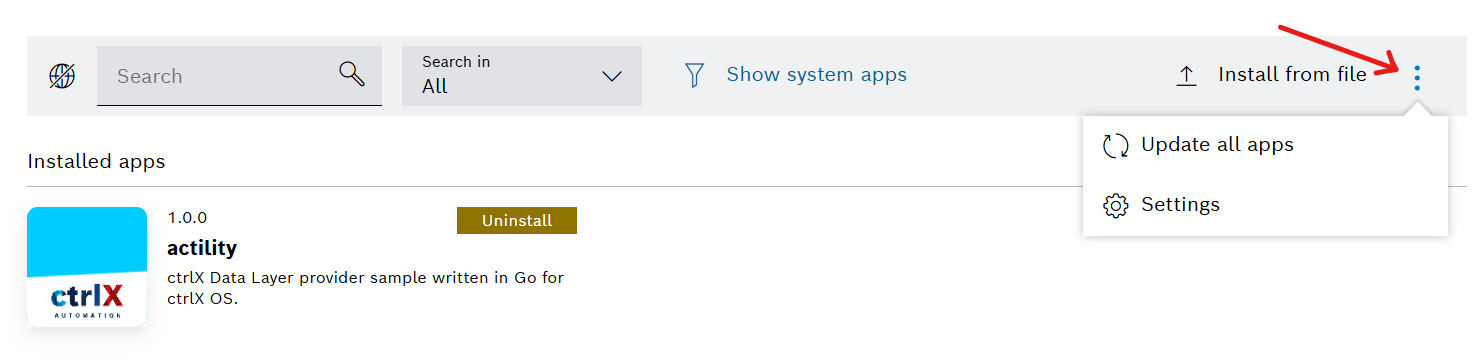
- Click Settings and check Allow installation from unknown source.
- Click Install from file and upload your
.snapfile.

5. Configure the Actility App (v1.1.0)
Follow this documentation
Alarm & Diagnostics
The following nodes are exposed:
actility/alarm/connected– MQTT connection stateactility/alarm/lastMessage– Last status or error message
These nodes help diagnose connectivity issues.
Limitations
- Ontology decoding is required on the TAO side
- No buffering of MQTT messages during ctrlX downtime
- Semantic validation of ontology fields is not performed
Troubleshooting
- Verify network connectivity and IP configuration
- Ensure MQTT messages are published by TAO
- Check
actility/alarm/*nodes for errors - Confirm correct MQTT credentials
Document version: v1.1.0
Key feature: Persistent configuration storage