The Things Stack LNS
The Things Stack is a LoRaWAN Network Server (LNS) provider allowing everyone to create a free account, then configure and provision several LoRa devices on it.
The Things Stack network is one of the recommended LNS to run the Demo examples.
Open The Things Stack
Open The Things Stack interface here and log in.
If you do not already have a user account, register.
Once you have signed up with your new account for the main interface atthethingsnetwork.org, expand the menu from your profile information and then, choose Console.
Select the Cluster located in Europe to open the console overview corresponding to the link above.
Provision a Gateway
Go to the Gateways section on the Console to add a gateway.

Follow the offical instructions on How to register a gateway.
Configure an Application
Then, click the Applications tab to create a new TTS Application, with the following settings.
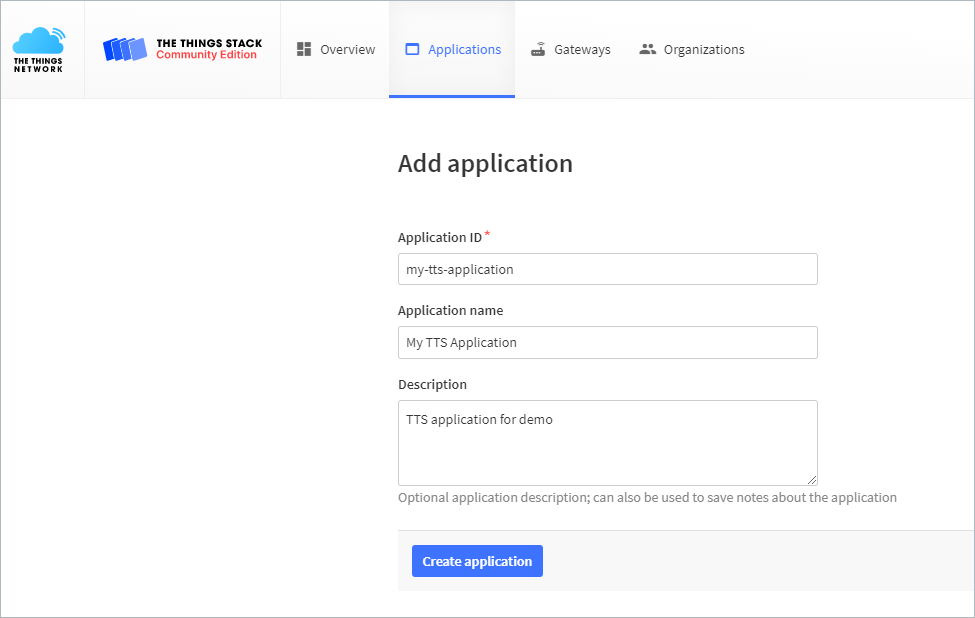
- Application ID: Specify
my-tts-applicationas ID. If the ID is already used, complete with some characters to have your own new ID. - Application name: Specify
My TTS Applicationto differentiate it from the ID. - Description: This field is not mandatory.
Click Create appliction to validate.
Provision a Device
The next step consists in provisionning this application with the device.
In the Applications tab, select my-tts-application and click the + Add end device button.
This opens the Register end device page. Click the Manually tab to configure the end device as illustrated below.
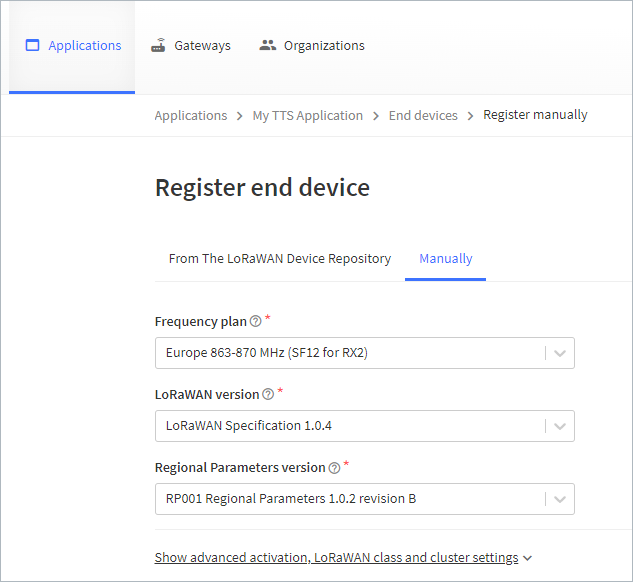
General Settings
Start with the general settings:
- Frequency Plan: Select the first item in the list.
- LoRaWAN version: Select the 1.0.4 specification.
- Regional Parameters version: Select the 1.0.2 revision B version for the RP001 region.
Get detailed information on the Regional Parameters by downloading this document from the LoRa Alliance.
Advanced Settings
Then, click Show advanced activation, LoRaWAN class and cluster settings to expand and display advanced parameters.
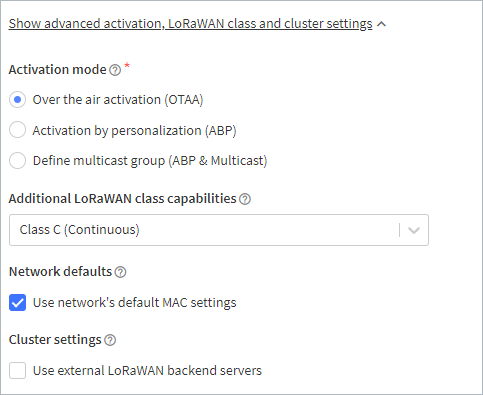
- Keep the default activation OTAA mode.
- Select Class C (continuous) from the Additional LoRaWAN class capabilities drop-down list.
- Keep the Network defaults option selected.
- Keep the Cluster settings option unselected.
Device Settings
Finally, specify the device.
The End device ID parameter must be filled with the DevEUI value, otherwise the connectivity with Acklio IPCore will fail.
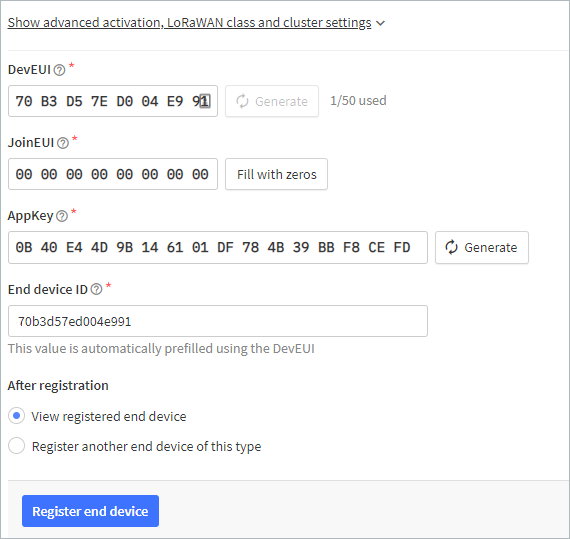
- DevEUI: Click the Generate button to get a new Device Identifier (you have up to 50 DevEUI).
Note that this value will have to be specified on Acklio IPCore side when provisioning the device. - JoinEUI: Click the Fill with zeros button to set the JoinEUI to
0000000000000000. - AppKey: Click the Generate button to get an encryption key.
- End device ID: This field must be set with the same value as the DevEUI, as illustrated above.
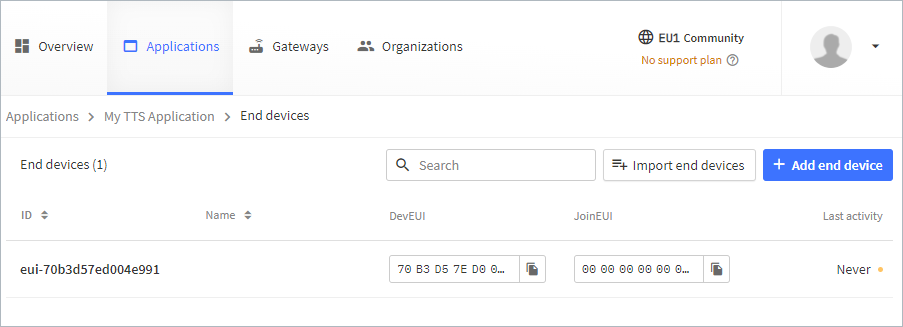
Keep the default View registered end device option, then click the Register end device button to validate and consult its settings.
The end device is now associated to your application.
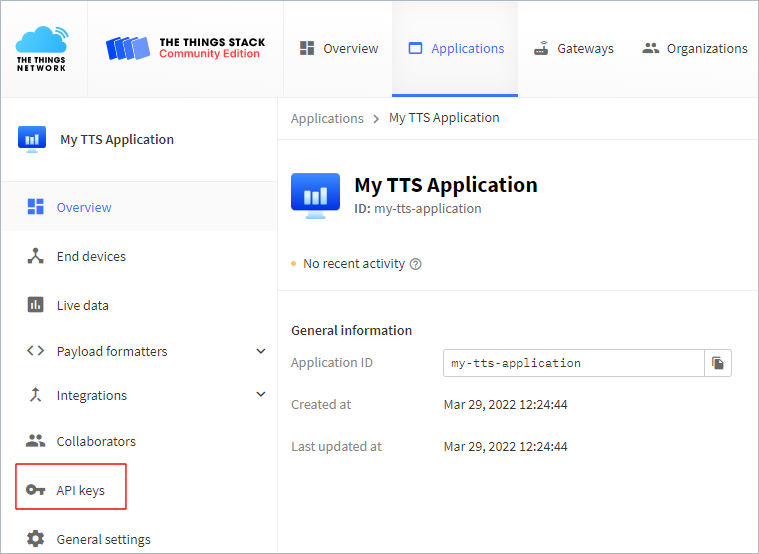
Create an API Key
Now you need to generate an API Key to allow IPCore to send the downlink packets to the LNS API.
Go back to your application (My TTS Application) and select API keys on the left menu.
The, click the + Add API key to start creating an API Key that you will name my-api-key.
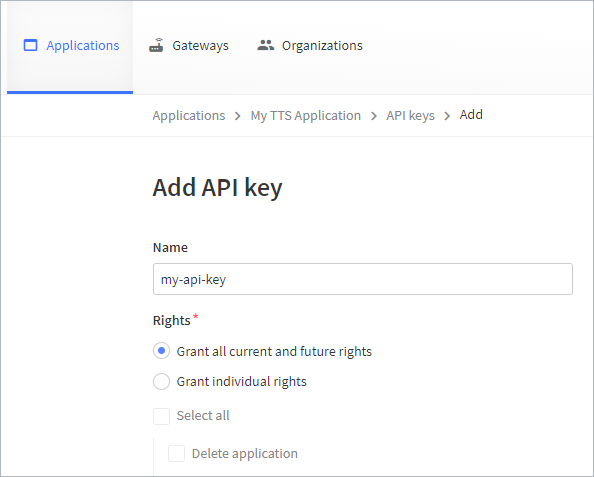
The creation page lists a great number of individual rights. You do not need to detail them for this Demo, so just select the Grant all current and future rights option.
Then, click the Create API key button below the list. This display a pop-in window that gives you the (only) opportunity to view then copy the API key and paste it where you want.
Read the text of the window carefully before clicking the I have copied the key button that will close the window.

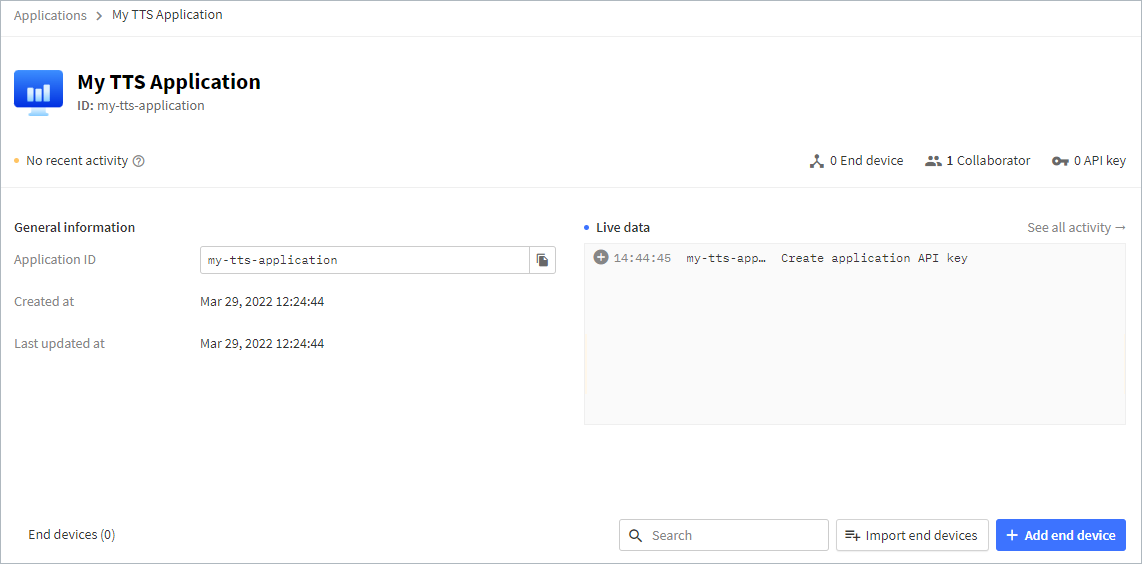
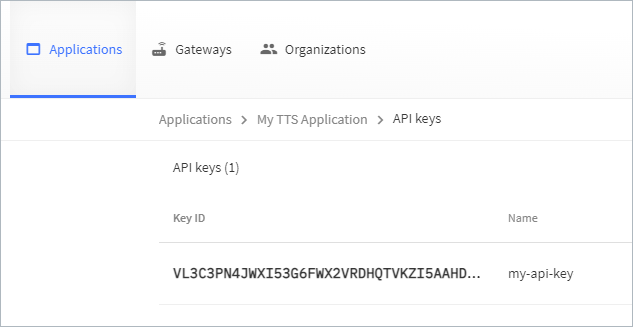
The API Key is now associated to your application.
Configure a Webhook
Before creating a Webhook, a Source must be created on IPCore side.
A Webhook has to be created inside the Application in order to connect the LNS to the IPCore.
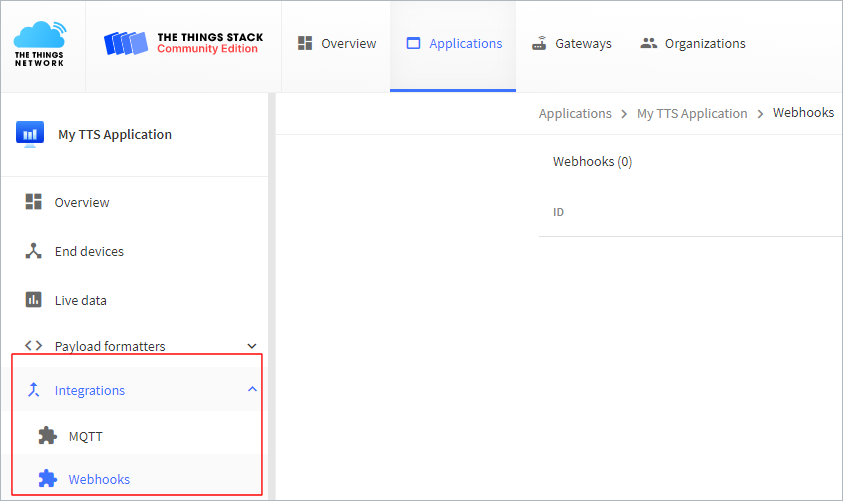
Go back to your application (my-tts-application) and expand Integrations on the left menu. Select Webhook.
Then, click the + Add Webhook button to display the page below:
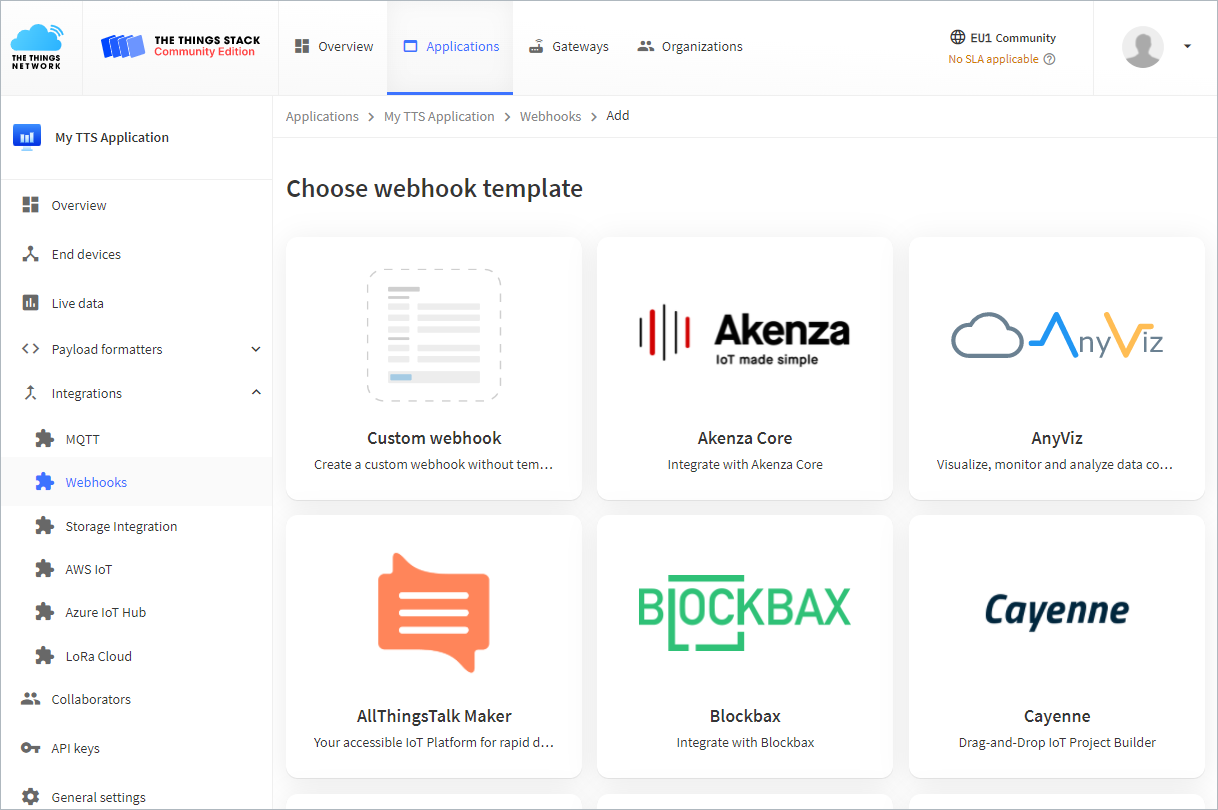
Select the first thumbnail for Custom webhook and fill it with the following settings.
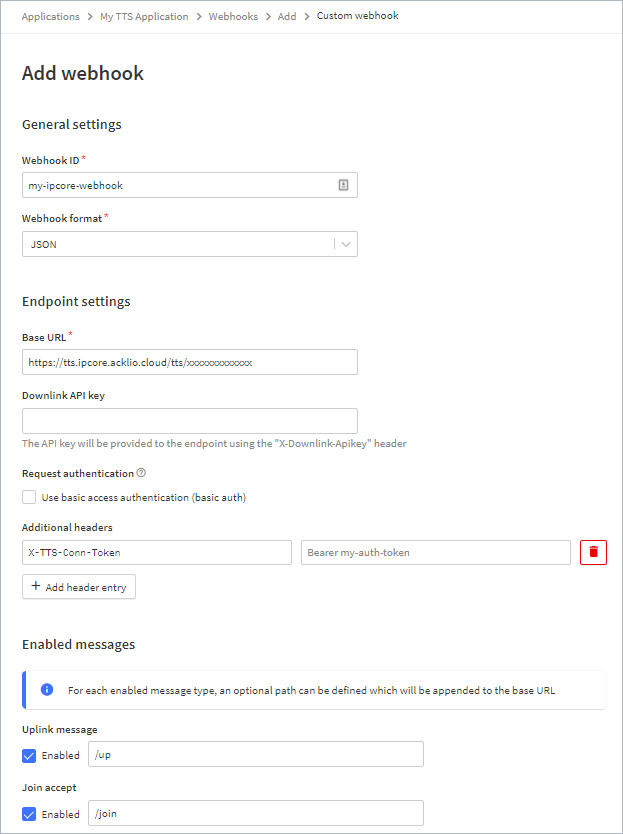
- Specify
my-ipcore-webhookas Webhook ID. - Select
JSONas Webhook format. - Copy in the Base URL field the value set as Callback URI in the Source settings.
- Click the + Add header entry button to specify an additional header with
X-TTS-Conn-Token. Then, copy in the Bearer my-auth-token field the value set as Token in the Source settings.
The Enabled message area lists many message types. For this Demo, just select the Uplink message (set to /up) and the Join accept (set to /join) options.
Then, click the Add webhook button to validate.
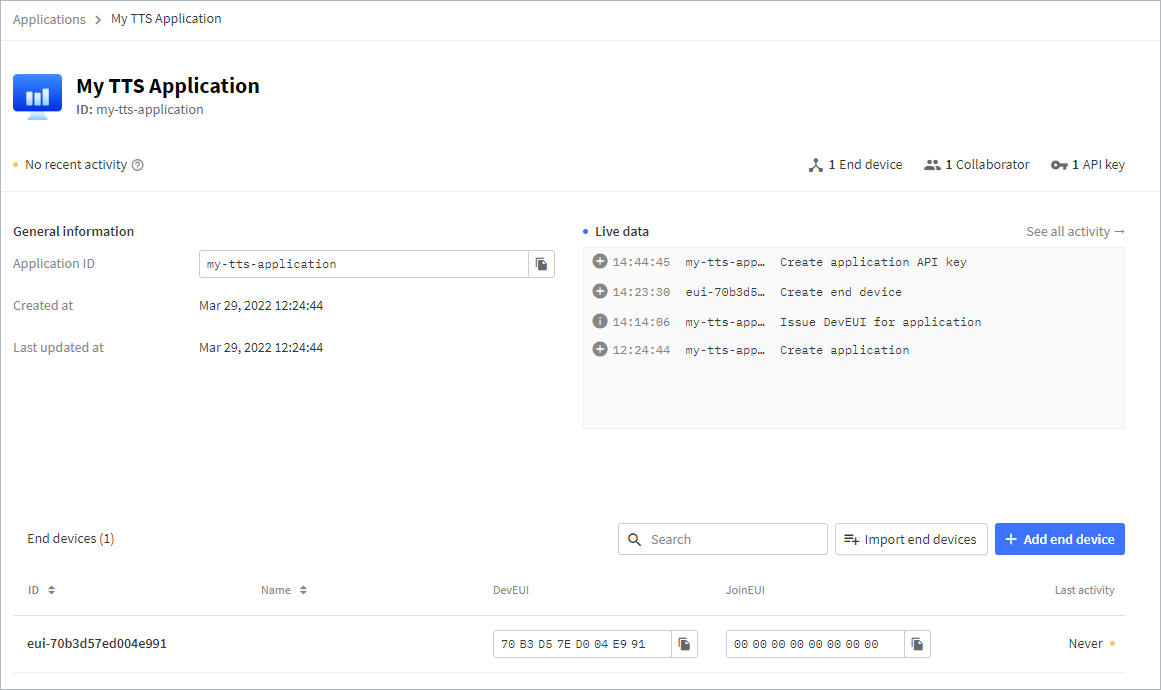
Check the Application Settings
Go back to your application (my-tts-application) by clicking Overview on the left menu and see the summary of the entire setting process.