ChirpStack LNS
ChirpStack Network Server is an open-source LoRaWAN Network Server (LNS) provided by Unicast. It can be used as source by Acklio IPCore to send and receive frames.
ChirpStack is one of the recommended LNS to run the Demo examples.
Open ChirpStack Application Server
This configuration page assumes that you already installed a ChirpStack Network Server and a ChirpStack Application Server.
Both are part of the ChirpStack stack: ChirpStack Network Server is required to communicate with the ChirpStack Application Server, which is required to provision the gateways and devices.
The screen shots below show the Dashboard of ChirpStack Application Server.
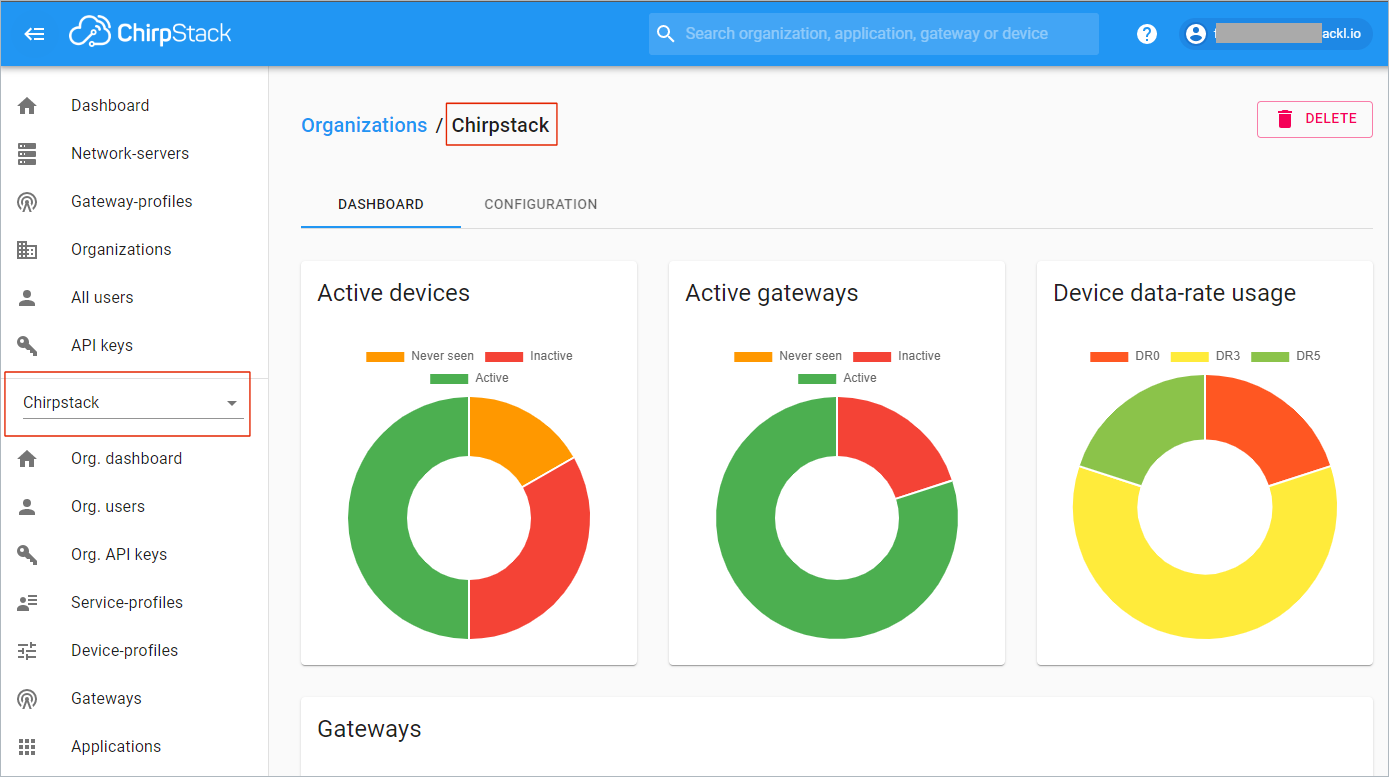
Click the URL to the ChirpStack Application Server and log in. The platform opens on a Dashboard that gives a view to your organization (gateways, devices, activity).
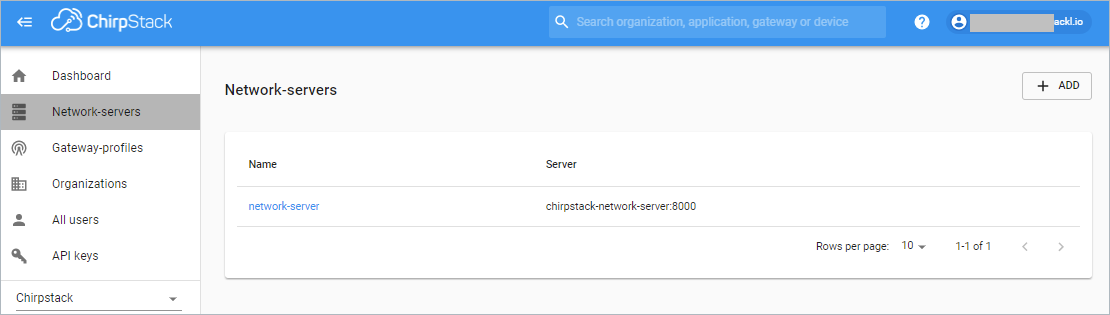
Click Organizations on the left menu to display the list of the organizations that are available for this account and click the name corresponding to the one you want to use for the Demo.
Each organization has its own menu on the left, as illustrated below.
Generate an API Key on ChirpStack Side
Configuring the source on Acklio IPCore requires an API Key. You can generate it globally by choosing API Keys from the main left menu, or for an organization specifically by choosing Org. API Keys from the organization menu.
For the Demo, we recommend to create an API Key at organization level.
Click Create on the Organization API Keys page.
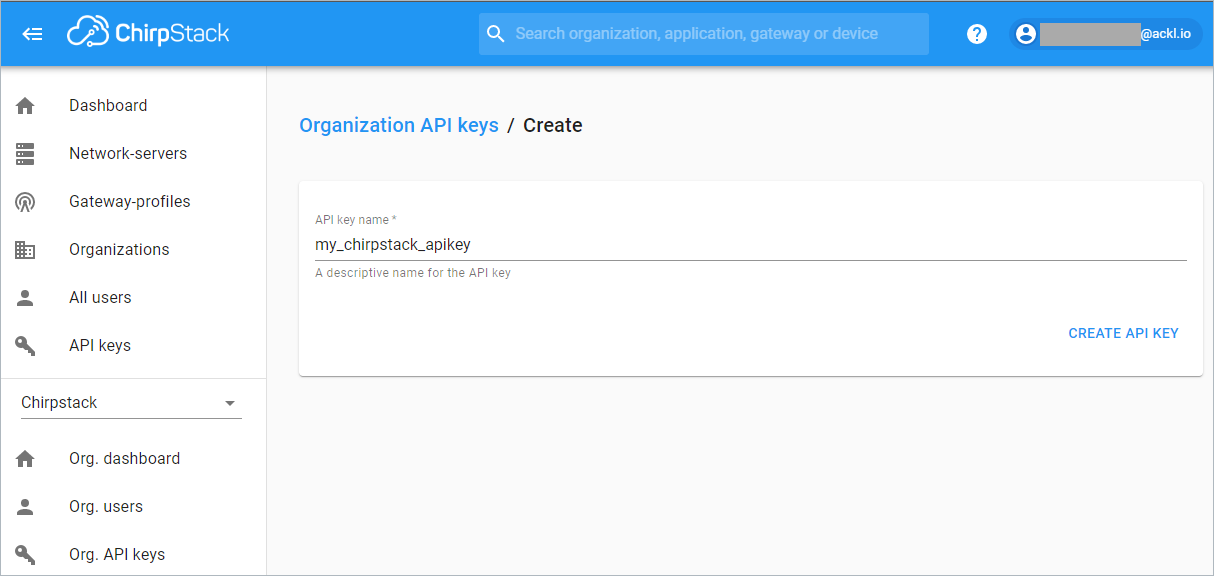
Enter a name for the API Key, then click Create API Key to generate an API Key.
The page is refreshed to display the API Key ID and the token.
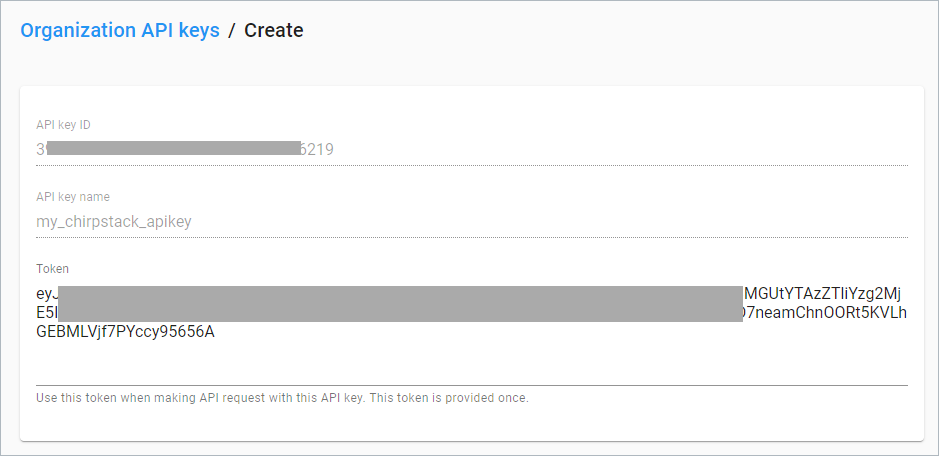
Because the token is provided once (as mentioned below the field), we recommend that you copy and paste the token into a file for further uses during its validity period.
As soon as you leave the page, the token is no longer visible in the list of organization API Keys.

Configure the Source on Acklio Side
Now open Acklio IPCore and create the source.
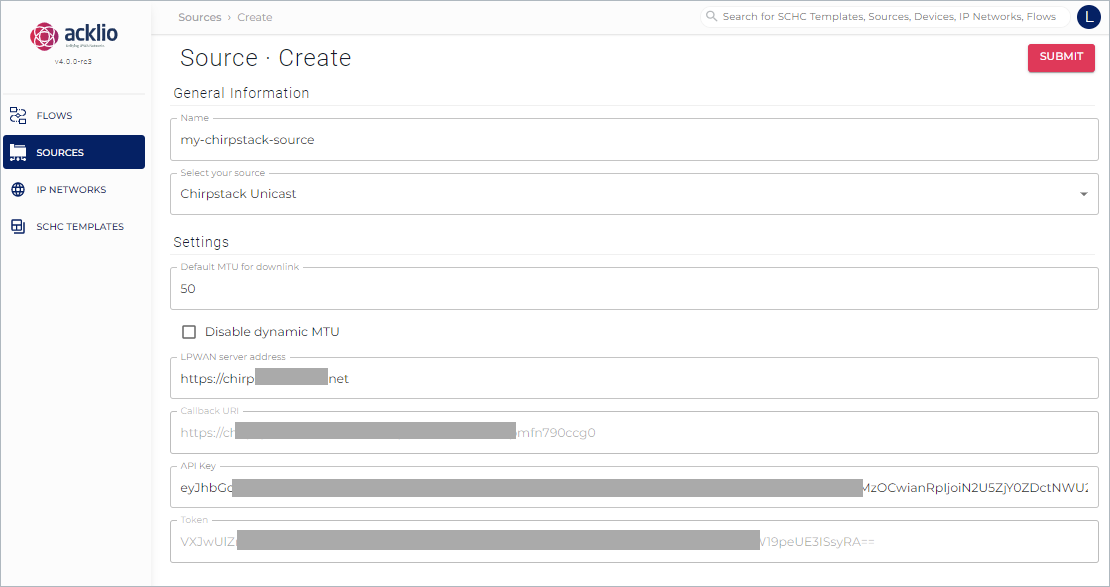
- Give a name to the source, for example
my-chirpstack-source. - Select the connector type
ChirpStack Unicastin the Select your source drop-down list. - Specify a size for the default downlink MTU.
- Enter the URL to your ChirpStack Network Server in the LPWAN server address field.
The connector appends this URL with/devices/<deviceID>/downlinkMessages(an URL based on the deviceID) to finalize the URL. - Paste the token into the API Key field.
The callback URI and the token generated by the backend are specified automatically.
Configure the Source on ChirpStack Side
Configuring the source on ChirpStack side implies to:
- Create a service profile for the network server defined at installation time.
- Declare a LoRa gateway that will use this service profile.
- Create a device profile.
- Create an application.
- Provision a device.
Click here to read more about the use of Network Servers in ChirpStack Application Server.
Create a Service Profile
Click Service-profiles on the organization menu (Chirpstack on the following illustrations), then click Create.
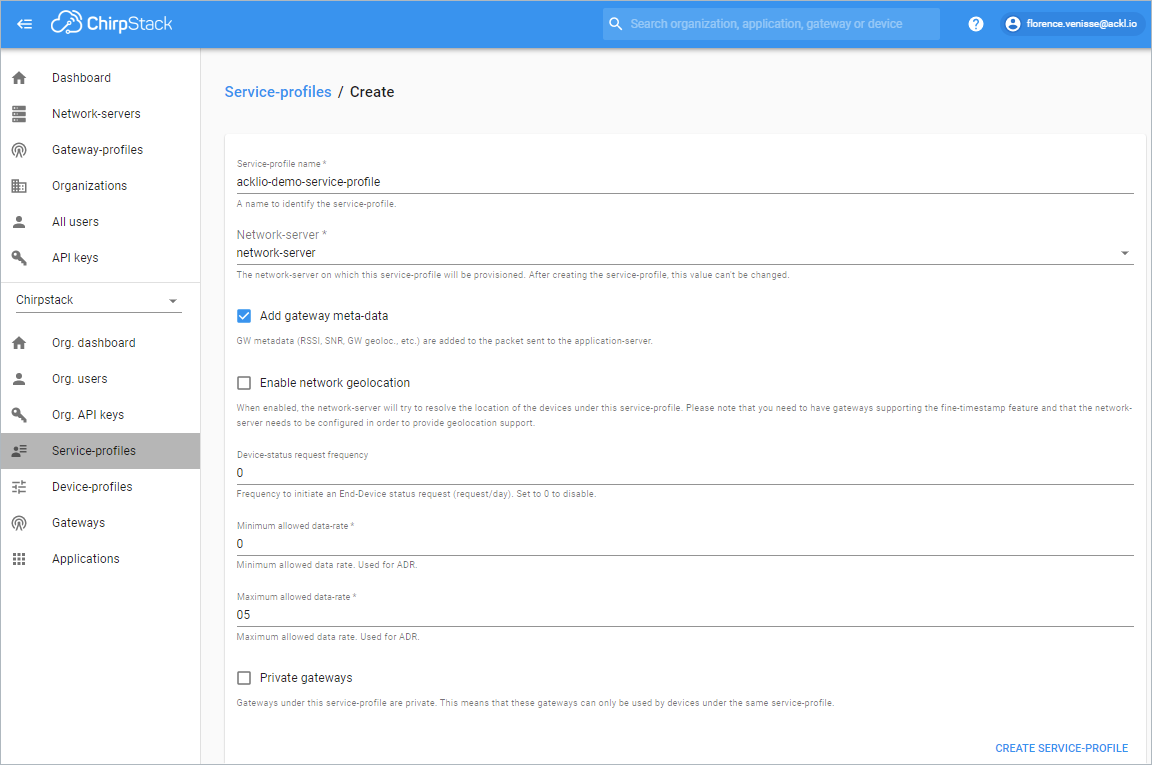
- Enter a name for your service profile to identify easily it when adding a gateway or a device profile.
- Select the network server on which the service profile will be provisioned in the drop-down list.
- Check the Add gateway meta-data option to send gateway metadata in addition to the packets.
- Check the Enable network geolocation only if your gateway and network server both comply with the recommendations displayed under the field.
Leaving this option blank will not prevent the geolocation of your gateway (see below). - Specify the frequency and data rate if relevant. The last option is not useful for the Demo.
- Click Create Service-profile to validate.
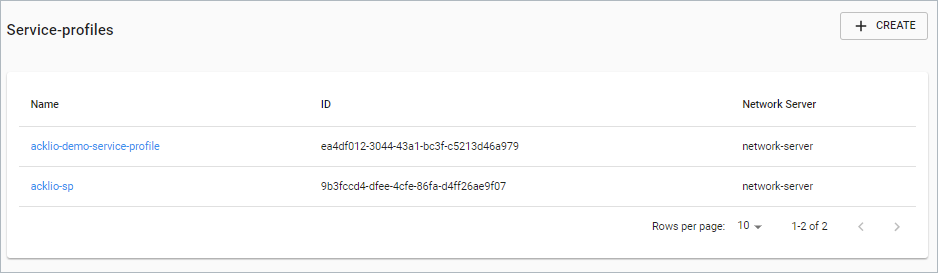
The service profile becomes an ID automatically and is added to the list of available service profiles.
Declare a LoRa Gateway
Make sure that the settings of your organization allow gateways, by clicking Organizations on the main menu as illustrated below.
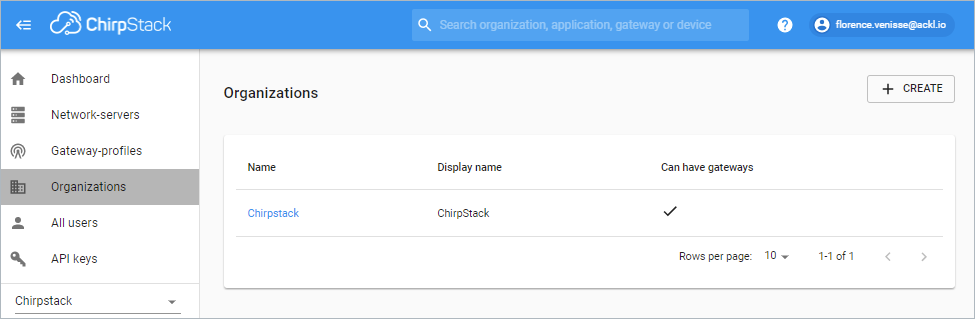
If not, click the organization name, then open the Configuration tab and select the Organization can have gateways checkbox. Validate by clicking Update organization.
Now click Gateways on the organization menu and then Create.
A message asks if you allow the application to get your GPS position: agree to locate your gateway on a map (even if the Enable network geolocation option is not selected on the service profile).
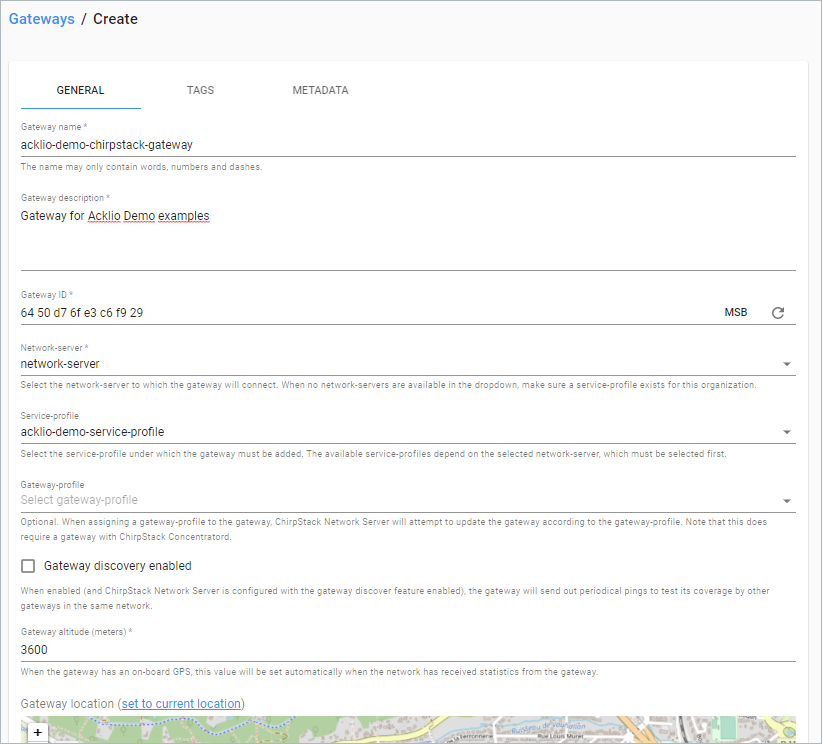
Fields followed by an asterisk are mandatory.
- Enter a name for your gateway and a description.
- Click the random
 button to specify the field Gateway ID automatically. Note that you have a choice for bit numbering between MSB or LSB by clicking the letters.
 - Select the network server to which the gateway will connect in the drop-down list.
- Select the service profile to which the gateway will be attached in the drop-down list. Selecting a gateway profile is an option that is not useful for the Demo.
- Check the Gateway discovery enabled option to enable the gateway to "ping" the other gateways in the same network.
Below the settings, a map displays the location of the gateway.
Click Create gateway to validate and add the gateway to the list.
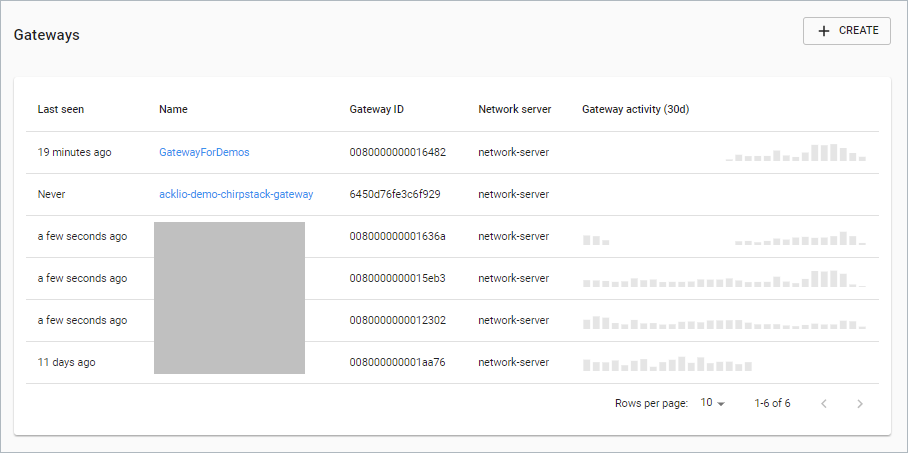
This list displays among others the activity of the gateway during the last 30 days.
Because our gateway has just been created, the Last seen column says "Never" and the Gateway activity (30d) column is empty.
The gateway will be activated as soon as the device will receive its first downlink.
Create a Device Profile
Click Device-profiles on the organization menu (Chirpstack on the following illustrations), then click Create.
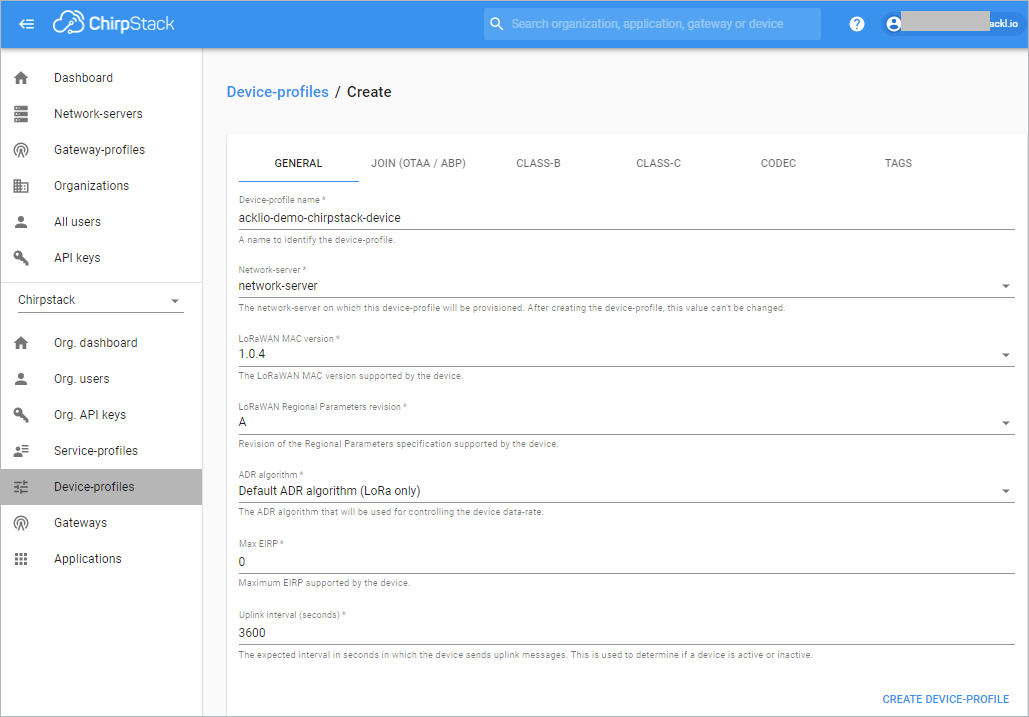
General Settings
Most of the settings useful for the Demo are in the General tab. Fields followed by an asterisk are mandatory.
- Enter a name for the device profile.
- Select the network server on which the device profile will be provisioned in the drop-down list.
- Select the LoRaWAN MAC version (see the Glossary) supported by the device in the drop-down list.
- Select the LoRaWAN Regional Parameters version that is supported by your device in the drop-down list;
- Select one of the two LoRa compatible ADR algorithm (see the Glossary to use for controlling the device data rate, or leave the field blank if not relevant for the Demo.
- Specify an interval in seconds between two uplink messages. Note that this interval will be used to determine whether the device is active or not.
Get detailed information on the Regional Parameters by downloading this document from the LoRa Alliance.
Join Procedure
Go to the Join (OTAA/ABP) tab to select the Device supports OTAA option to enable a join procedure from the device to the network server (Over-the-Air-Activation, OTAA).
As mentioned in the ChirpStack Documentation, "ChirpStack Network Server supports the activation of devices through an external Join Server".
This Join Server is useful for the Demo.
Class Settings
There is no Class A tab (but Class B and Class C) because the device profile assumes that the device class is A.
For the Demo purpose, open the Class C tab and select the Device supports Class-C" option.
Other Settings
No other settings are needed for the Demo.
Validation
Click Create device-profile on any of the tabs of the device profile creation pages to validate. The device profile is then accessible from the list of device profiles.
Create an Application
Adding a device to a device profile implies to first create an application on the Application Server.
Click Applications on the organization menu (Chirpstack on the following illustrations), then click Create.
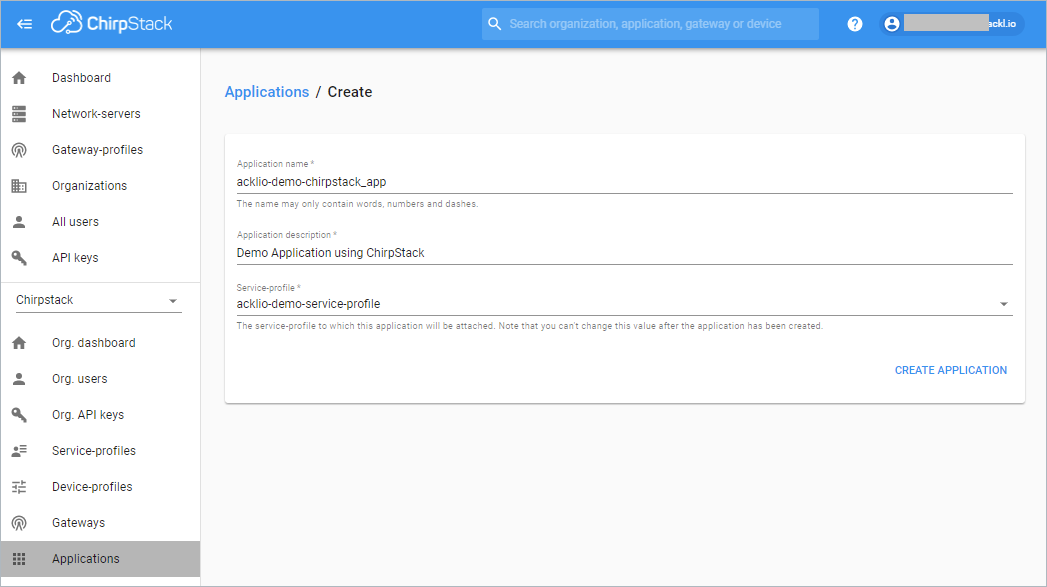
- Enter a name and a description for the application.
- Select the service profile to which the application will be attached.
- Validate by clicking Create application.
The application automatically gets an ID and is added to the list of applications. Click its name to start the device creation process.
Provision a Device
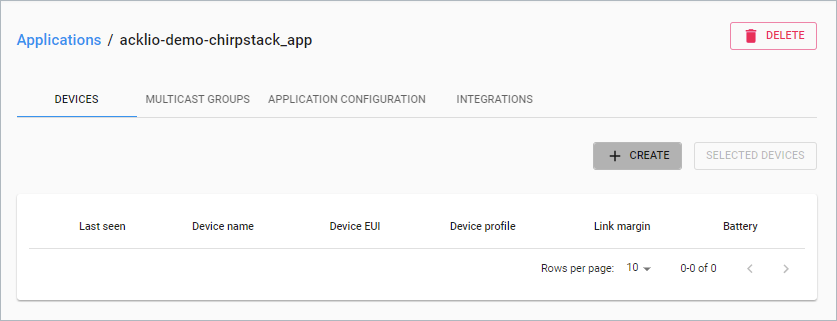
Click Create in the Devices tab to start adding a device to this application.
Note that the Application configuration tab resumes the information entered when creating the application. The Multicast groups tab is not useful for the Demo.
Create the Device
Specify the General tabs as illustrated below. The other tabs are not useful for the Demo.
The steps of the creation process are linked automatically when you validate.

Fields followed by an asterisk are mandatory.
- Enter a name for the device.
- Enter a description of the device (board, usage, etc.).
- Click the random button to specify the field Device EUI automatically. Note that you have a choice for bit numbering between MSB or LSB by clicking the letters.
- Select the device profile to which the device will be attached in the drop-down list.
- Check the Disable frame-counter validation option if relevant.
- Click Create device to validate.
Validating automatically opens a Keys (OTAA) tab where you have to specify an application key (because you have checked the Device supports OTAA option when creating the device profile).
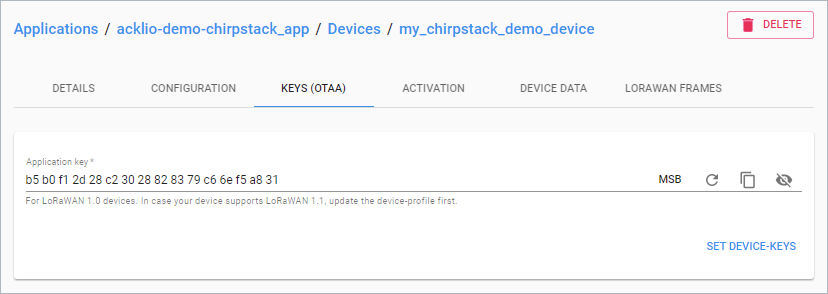
Click the random ![]() button to specify the field Application key automatically. Note that you have a choice for bit numbering between MSB or LSB by clicking the letters.
button to specify the field Application key automatically. Note that you have a choice for bit numbering between MSB or LSB by clicking the letters.
Create a Connection
Go back to the list of devices (use the access path on the top of the page) and choose the Integrations tab to create a connection between Acklio IPCore and the device.
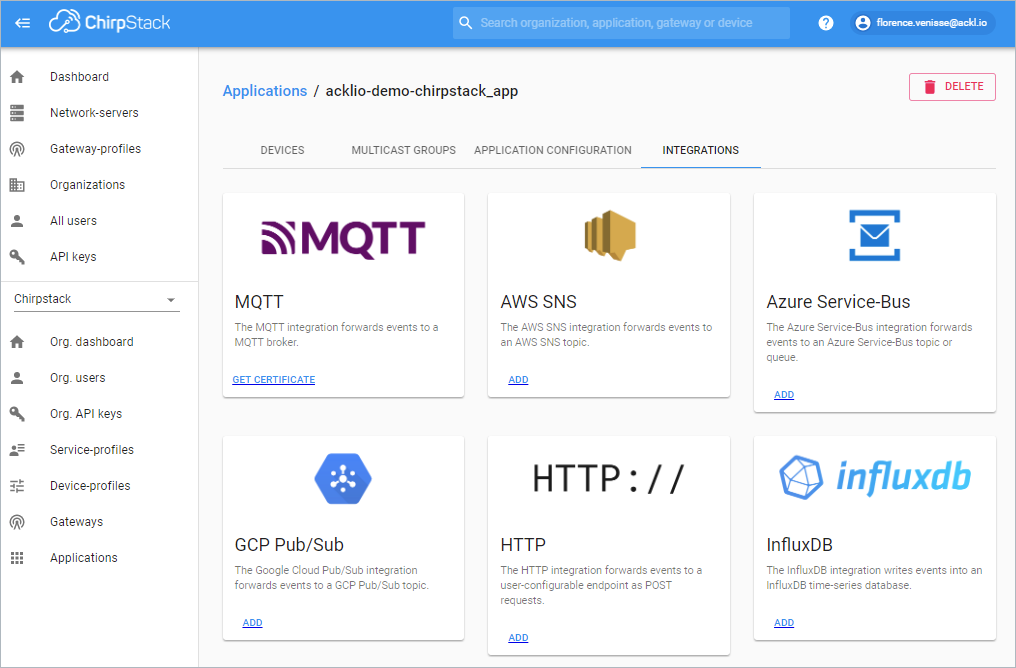
Choose a basic HTTPS-based connection, since the connector is designed to receive the packets via HTTPS on Acklio IPCore side.
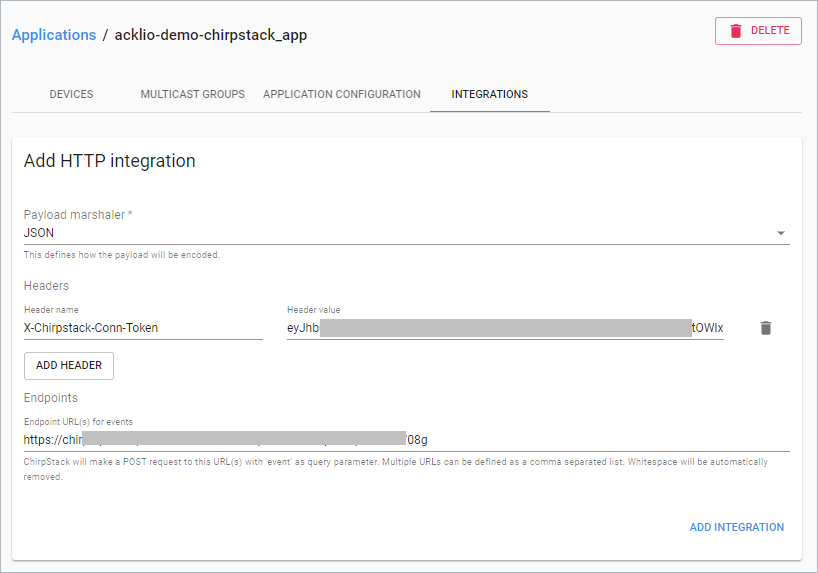
- Payload marshaler: Select JSON in the drop-down list.
- Headers: The HTTP requests from the ChirpStack Application Server are validated with the help of the token that is generated in Acklio IPCore (see the Token field on the illustration).
Click the Add header button and specify the following:- Header name:
X-Chirpstack-Conn-Token - Header value: The token generated when creating the source in Acklio IPCore.
- Header name:
- Endpoints: Enter the URL of the endpoint to which the application will send POST requests.
Click Add integration to validate.
The device will be activated as soon as it will receive its first downlink.