Managing the AS routing profile of a device
You must have read-write access to Device Manager. For more information, see Opening a panel and checking your read-/write access.
AS routing profile compatibility rules
When managing an AS routing profile associated with a device, you must apply the following rules:
| Rules | |
|---|---|
| AS routing profile and connectivity plan compatibility | Both the AS routing profile and the connectivity plan associated with the device must be compatible: - Use an AS routing profile that does not contain more destinations, summing up all types of application servers in it, than defined in the connectivity plan associated with the device, - Otherwise, change the connectivity plan if possible. For more information, see the Maximum allowed Application Servers parameter in LoRaWAN® unicast connectivity plan details and Cellular IoT connectivity plan details. |
| Cellular and HSM incompatibility | Important: Hardware Security Module (HSM) is not applicable to cellular devices. When creating a cellular AS routing profile, do not activate the Hardware Security Module (HSM), if available. |
Allocating an AS routing profile
If applying AS routing profile compatibility rules, you can allocate:
-
A LoRaWAN® AS routing profile to an existing LoRaWAN® device
-
A cellular AS routing profile to an existing cellular device.
Only one AS routing profile can be allocated to a device.
Before you begin
-
You must have read-write access to Device Manager. For more information, see Opening a panel and checking your read-/write access.
-
You must have created and provisioned at least two AS routing profiles.
For more information, see Managing local application servers and Accessing AS routing profiles.
-
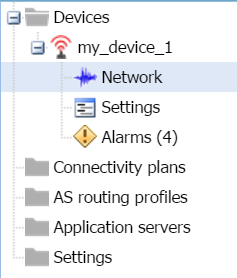
In the navigation panel, click Devices to display the Devices panel, then click the List or the Map tab.
-
Select the device you want to see the network settings, and click Edit.
-
In the device that appears in the navigation panel, click Network.
-
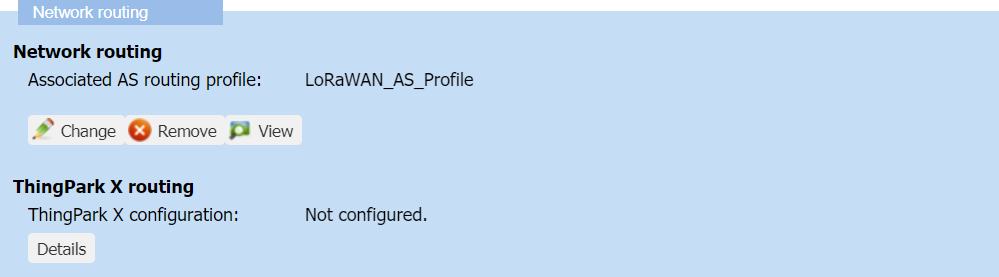
In the Network panel that opens, go to the Network routing frame, and click Allocate in the Network routing area.

-
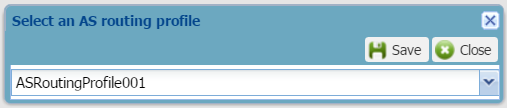
In the Select an AS routing profile dialog box that opens, select the AS routing profile you want from the list.
Notes
- The AS routing profile at the top of the list is the AS routing profile by default.
- If you are working with LoRaWAN® and cellular devices, ensure:
- Selecting a LoRaWAN® routing profile for a LoRaWAN® device
- Selecting a cellular routing profile for a cellular device.
-
Click Save.
-> The name of the associated AS routing profile appears in the Network routing area.
Changing the AS routing profile
Once allocated, you can change the AS routing profile of an existing LoRaWAN® or cellular device if applying AS routing profile compatibility rules.
Before you begin
-
You must have read-write access to Device Manager. For more information, see Opening a panel and checking your read-/write access.
-
You must have created and provisioned at least two AS routing profiles.
For more information, see Managing local application servers and Managing AS routing profiles.
-
In the navigation panel, click Devices to display the Devices panel, then click the List or the Map tab.
-
Select the device you want to see the network settings, and click Edit.
-
In the device that appears in the navigation panel, click Network.
-
In the Network panel that opens, go to the Network routing frame, and click Change in the Network routing area.
-
In the Select an AS Routing profile dialog box that opens, select the AS routing profile you want from the list.
Notes
- The AS routing profile at the top of the list is the default AS routing profile.
- If you are working with LoRaWAN® and cellular devices, ensure:
- Selecting a LoRaWAN® routing profile for a LoRaWAN® device
- Selecting a cellular routing profile for a cellular device.
-
Click Save.
-> The name of the newly associated AS routing profile appears in the Subscription area.
Removing an AS routing profile
If you do not want to use a device anymore, you can remove its AS routing profile.
You must have read-write access to Device Manager. For more information, see Opening a panel and checking your read-/write access.
WARNING This action deactivates the device on the network server
-
You can reactivate the device by associating a connectivity plan again.
-
To make the device work again, you must have direct access to the device to force outside Device Manager:
-
A join procedure for an OTAA device
-
A device reset for an ABP device.
-
If you want to replace an AS routing profile on a device you still want to use, apply Changing the AS routing profile.
-
In the navigation panel, click Devices to display the Devices panel, then click the List or the Map tab.
-
Select the device you want to see the network settings, and click Edit.
-
In the device that appears in the navigation panel, click Network.
-
In the Network panel that opens, go to the Network routing frame, and click Remove in the Network routing area.
-
In the message that appears, click Yes to confirm.
-> The AS routing profile is removed.