Deployment of the operating system
OS installation
-
Plug the installation media (or the ISO file for a VM) into the server.
-
Select Install.
The following window appears:

At this point you have 20 seconds to enable the serial console, on the first serial port, by typing y. If you do not want to enable the serial console, wait 20 seconds or type n.
Then the installation process is fully automated and the following message appears at the end of the installation:
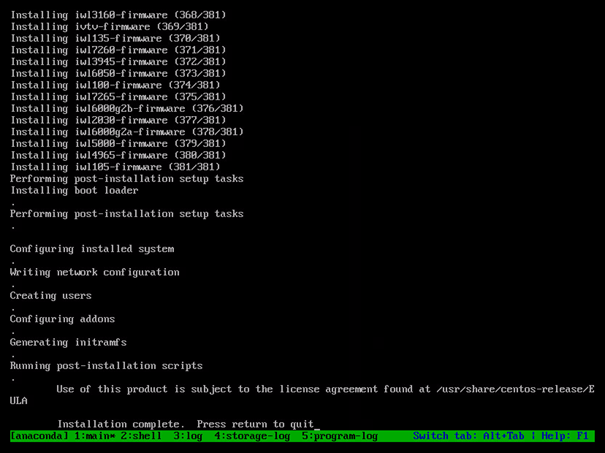
-
Remove your installation media.
-
Press the Enter key to reboot the machine.
-
Launch the operating system.
For High Availability (HA) deployment, this procedure must be done on three different servers.
First log in
In the next section, you may have to log in to the system to tune your installation (especially for network change). You may want to do so through the user console (if you plug in a monitor and a keyboard for instance) or through the TPE Cockpit Web application.
In both cases, you can use the support user account. On the very first login,
you must use the password support. Once logged in, you will be prompted to
change this password.
Network configuration
DNS server configuration limitation
The DNS server configured on the network configuration must be reachable by the TPE instance. If it is not the case, the installation will not work.
For an online installation, access to a DNS server is mandatory.
For an offline installation, if you do not have access to a DNS server, please do not configure it to avoid any installation issues.
Prerequisites
By default, the ethernet interface is configured with a static IP address (10.255.255.10), whatever the installation mode you choose, HA mode or standalone.
Ensure that you are provided with this address for accessing the TPE Cockpit configuration GUI.
Depending on your local network, proceed using the static or dynamic configuration.
Static default configuration
If you are installing a standalone instance, you can simply ensure that your computer is configured to use the same network (10.255.255.x).
If you are installing in High Availability (HA) mode, you will have to change manually the IP address of each instance before continuing with the installation process. To do so, please proceed as depicted hereafter on all the nodes you install:
-
Connect to the server console, log in with the support user
-
Launch the "nmtui" command line instruction
-
You will then access a blue-screened console asking you to choose among the following options:

-
Choose "Edit a connection"
-
Choose the Ethernet interface of your system, press the ⇥ Tab key and select ">Edit...>"
-
You will then be invited to change the network configuration for that interface:
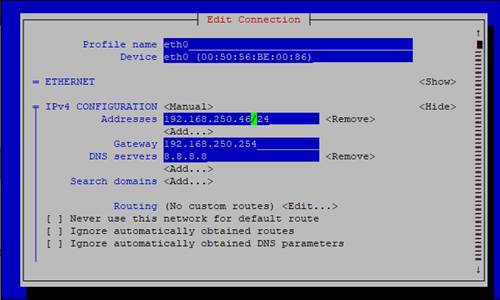
-
Quit the menu (press the Esc key), quit the application and restart the network service so that the network configuration becomes effective:
systemctl restart network -
Alternatively, you can do it all by editing the network configuration file that rules the Ethernet interface configuration on your system:
sudoedit /etc/sysconfig/network-scripts/ifcfg-<interface_name>
Dynamic (DHCP) configuration
If a DHCP is available on your local network, change to a dynamic (DHCP) configuration.
-
Connect directly to the server's console.
NoteIf you need to change the keyboard layout, proceed as follows:
To set French, for example:
localectl set-keymap frThe list of available settings can be displayed as below:
localectl list-keymaps -
Open this file:
sudoedit /etc/sysconfig/network-scripts/ifcfg-<interface_name>(interface name will vary depending on the hardware)
-
Comment the following lines with a « # » character:
ONBOOT=yesIPADDR="10.255.255.10"PREFIX="24"GATEWAY="10.255.255.254"
-
Change this line:
BOOTPROTO="dhcp"
-
Restart the network interface.
systemctl restart network -
Note the new IP address that is given by the DHCP:
ifconfig <interface_name>
For High Availability (HA) deployment, a different IP address must be configured on each server.
Advanced routing configuration
Depending on your infrastructure, the default behavior of the Linux kernel to forward network packets based on the destination address using a routing table may not be sufficient. For complex routing scenarios, the policy-based routing must be enable to route packets based on various criteria, such as the source address or protocol.
You can find here an example of policy-based routing implementation.