Step 4 – Connecting your Abeeway Micro-Tracker with AWS IoT
In this step, you will connect your Abeeway Micro-Tracker on ThingPark Enterprise and ensure sensor data is delivered to your AWS IoT account.
Provisioning your device & associate it to AWS IoT
To achieve that:
-
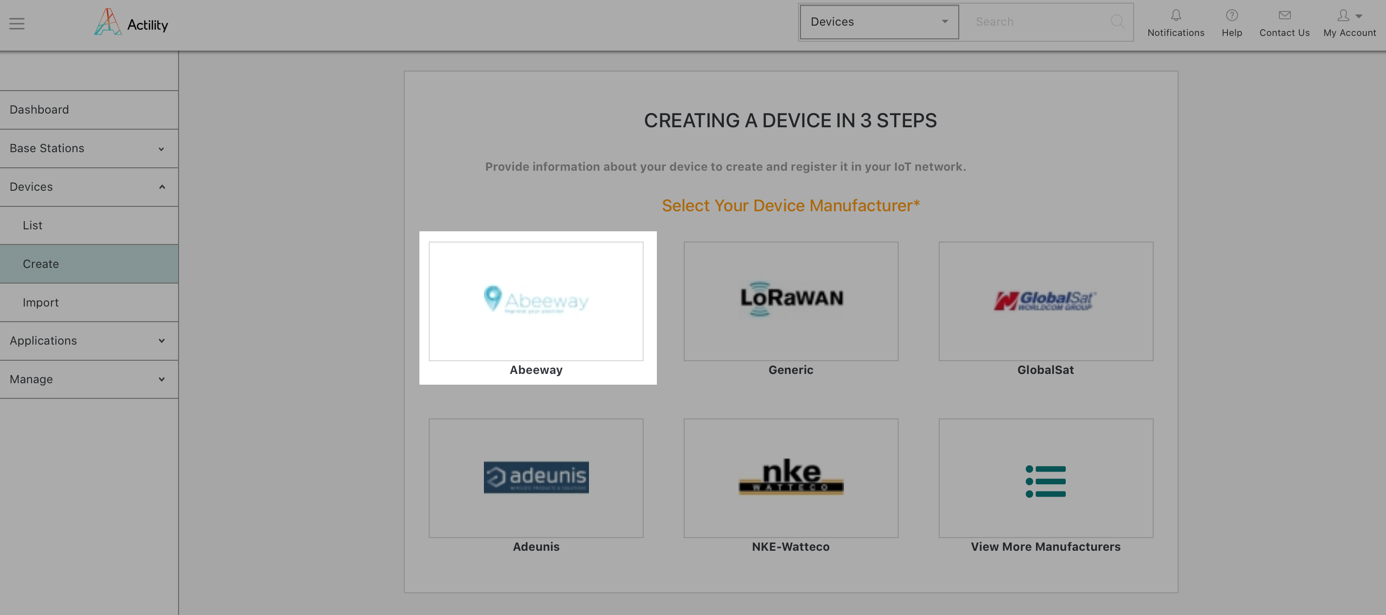
Select Devices, click ADD DEVICES, and select Abeeway as Device Manufacturer.
-
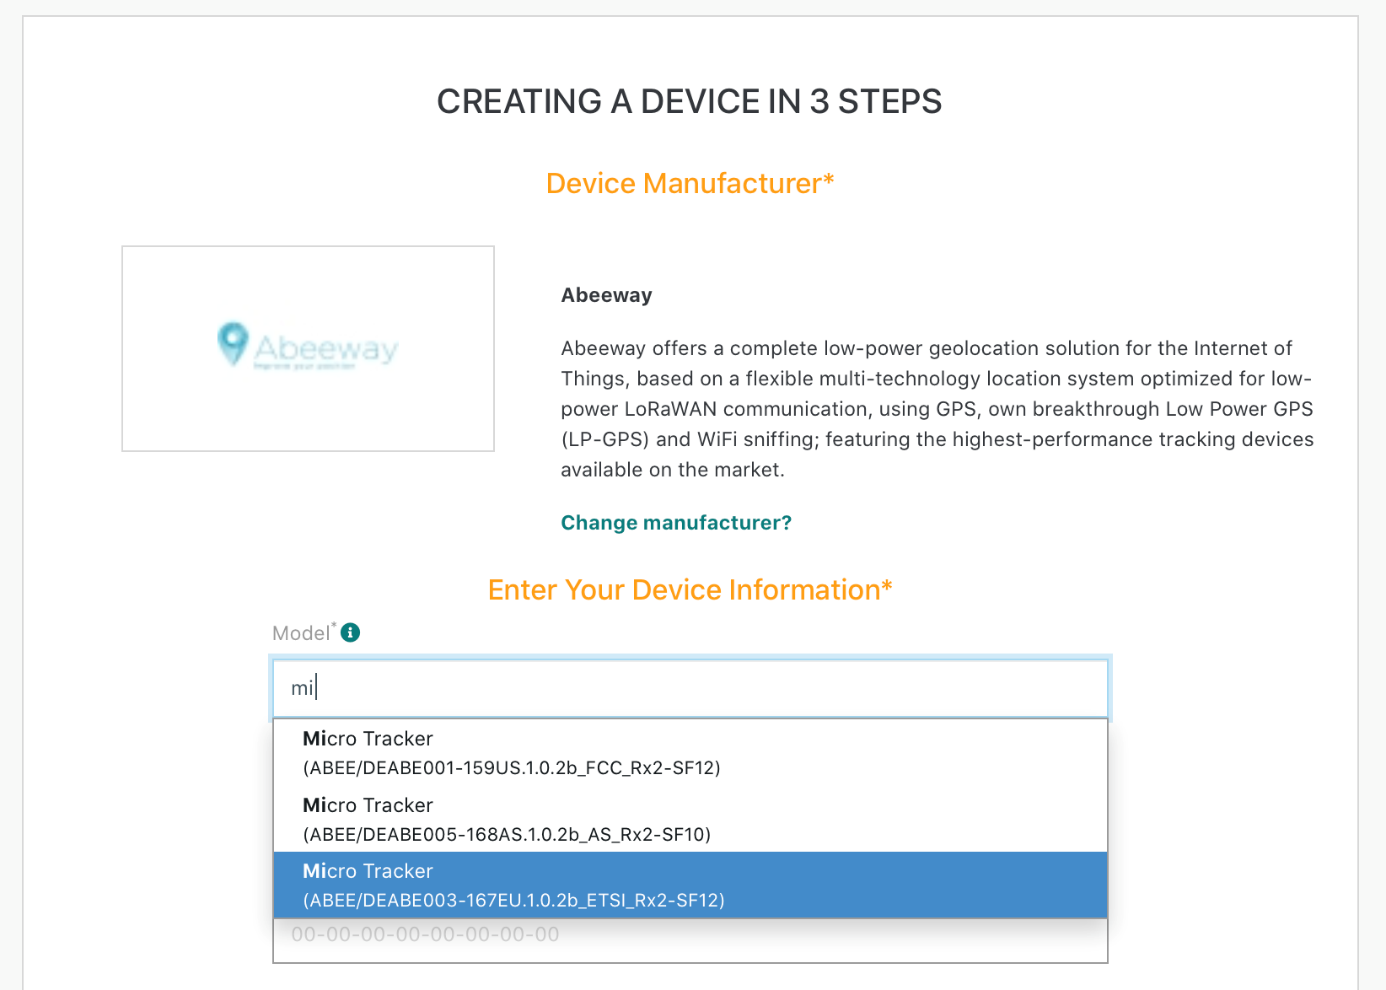
Complete the device provisioning form with the required information.
-
Model – Choose "Micro-Tracker", paying attention to the select the right ISM Band (EU/AS/US).
-
Name – Friendly name to conveniently identify your tracker in ThingPark Enterprise portal.
-
DevEUI – Unique identifier of your LoRaWAN® device, provided by Actility in the Evaluation Kit Delivery Note.
-
Activation mode – Select Over-The-Air-Activation.
-
JoinEUI, AppKey – Enter the values provided by Actility in the Evaluation Kit Delivery Note.
-
-
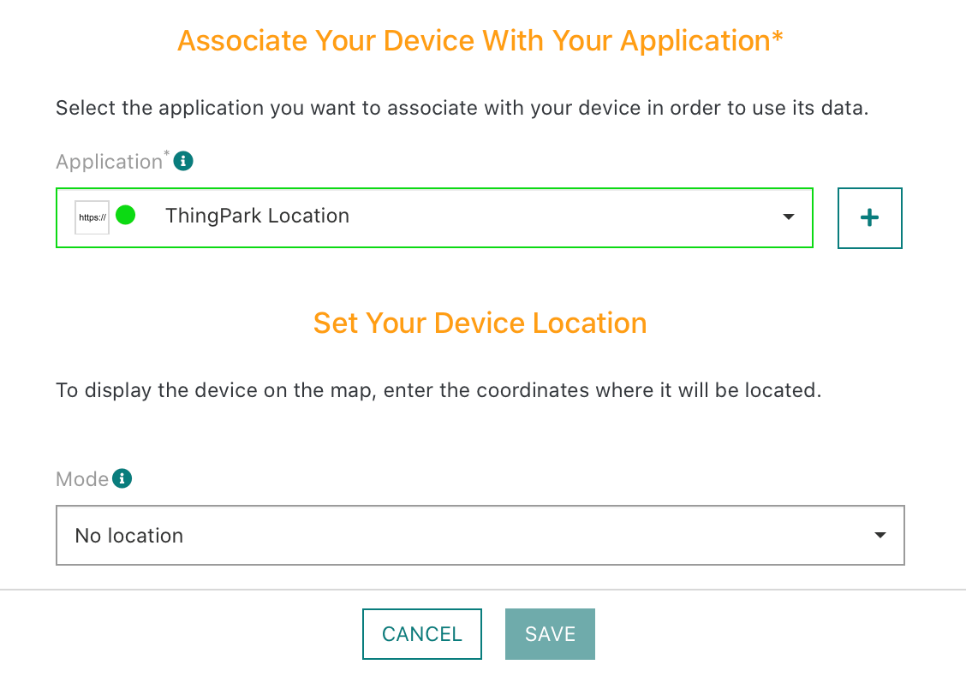
Associate your device with the previously created ThingPark Location application.
-
Submit the form.
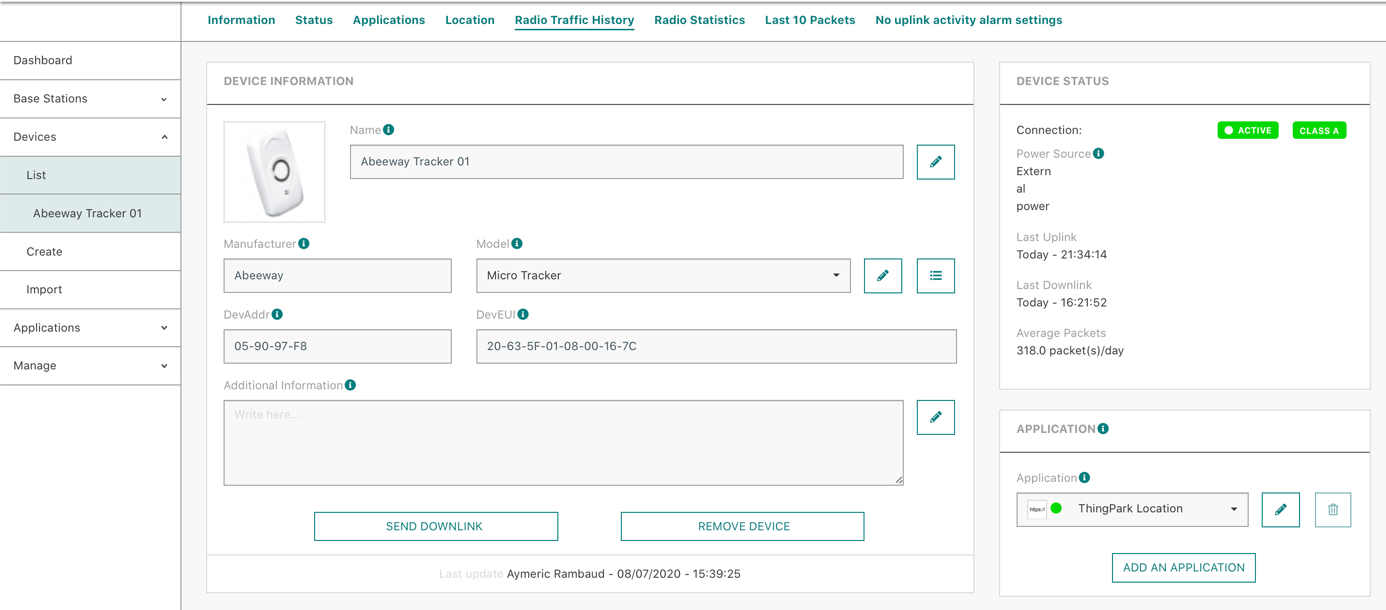
- The device is now ready to communicate and associated to ThingPark Location.
Note
-
In order to store & analyze positions computed in ThingPark Location within AWS IoT services, Actility service has been configured to re-route all its traffic to your AWS IoT Core service.
-
No provisioning of the device is required on AWS IoT Core service; the Things will be automatically provisioned by ThingPark Enterprise application when the first message is delivered.
Switching on your Abeeway Micro-Tracker
If the button of your micro tracker does not blink when pressed, either the micro tracker is switched off or its battery is out-of-charge. When not in testing, switch off the micro tracker to save battery.
-
If necessary, plug in the USB charging cable.
-
On the button of the micro tracker:
- Press once lengthily (more than five seconds) until you heard a melody.
The micro tracker will now join your private LoRaWAN® network; this can take a couple of minutes until the join procedure completes.
-
Your tracker shall now appear as Active on ThingPark Enterprise Portal.
Checking sensor data is delivered to AWS IoT
From your AWS Management Console
-
Go to AWS IoT Core, and select the Test menu.
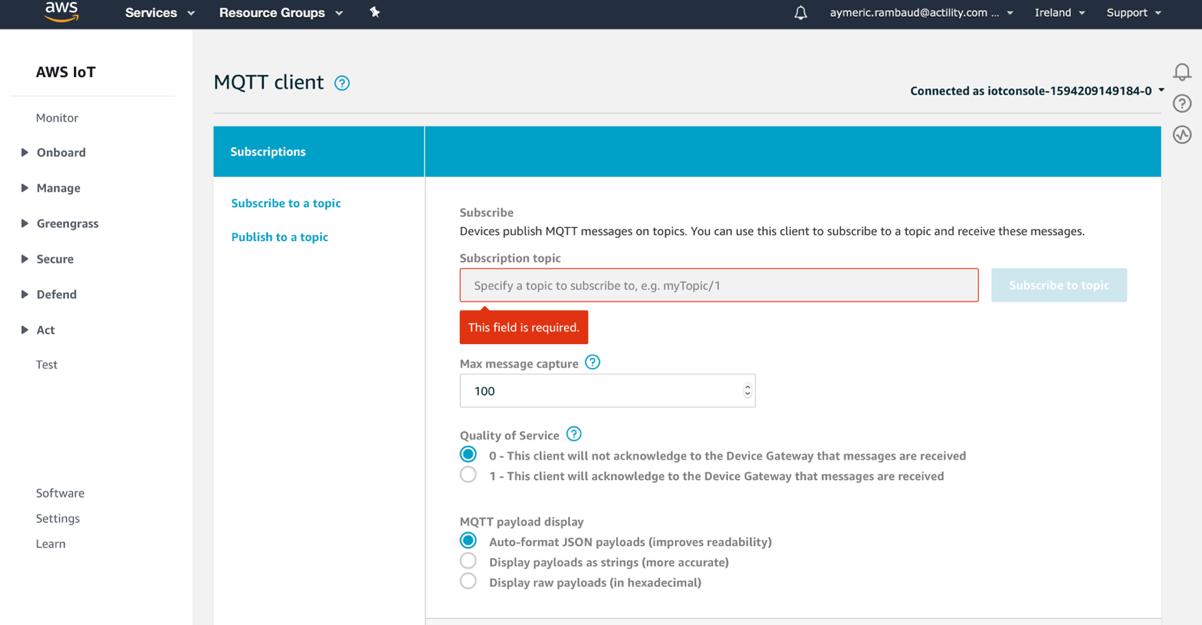
-
Subscribe to the MQTT topic corresponding to all uplinks message received:
-
Topic format: aws/things/+/uplink, for example,
-> The next uplink of your tracker will be displayed.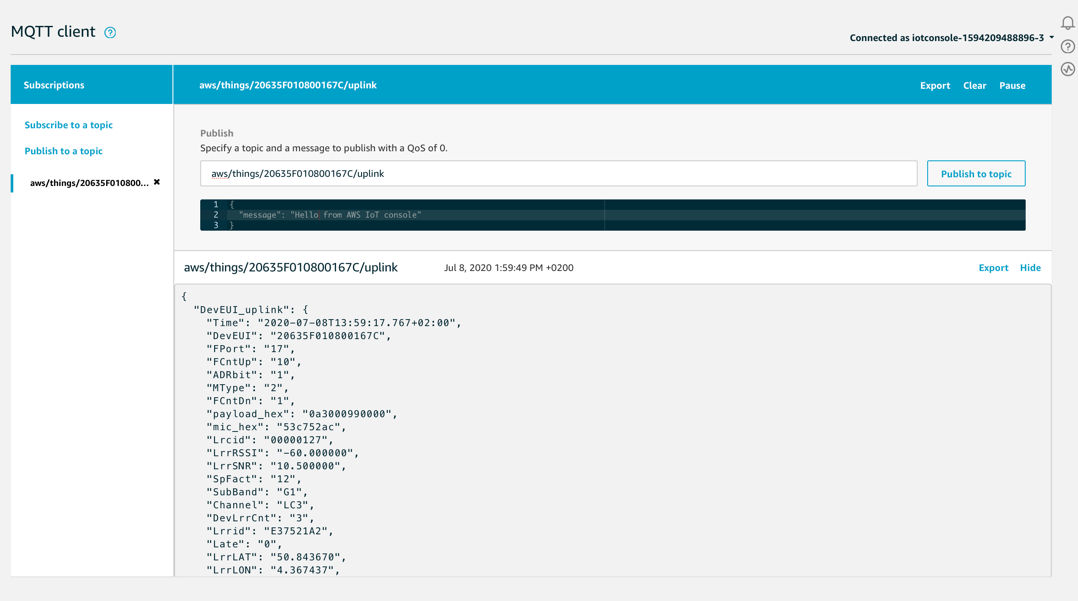
-
More resources
- To know more about ThingPark Enterprise device management capabilities, have a look to our Activating a device to your IoT network.