Managing custom drivers
A custom driver is an editable driver that decodes payloads, created by the user in the ThingPark X IoT Flow interface. The custom driver is opposed to the built-in system drivers which are directly imported from the catalog of drivers. For more information about built-in drivers, see Managing catalogs of drivers.
Creating a custom driver
-
In the left menu, click Drivers.
-> You are redirected to ThingPark X IoT Flow interface.
-
Click ADD DRIVER.
-
In the JS editor, implement the following methods:
-
decodeUplink.
-
encodeDownlink.
-
decodeDownlink.
-
-
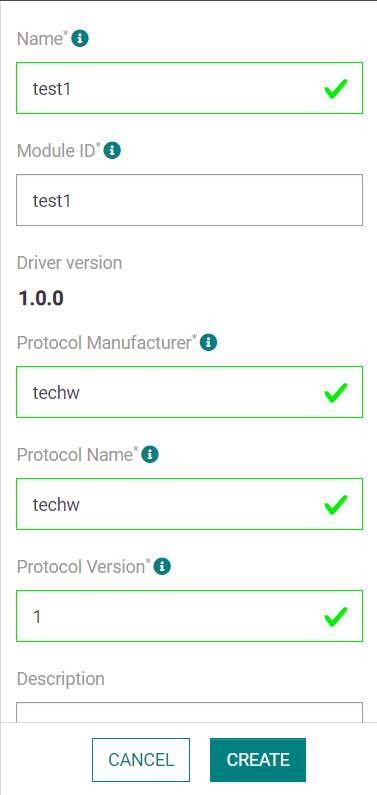
Enter the required information as follow:
-
Click Create.
-> Your custom driver has been successfully created. The driver information window opens.
Viewing custom driver details
You can view custom driver details by searching drivers or by listing drivers.
Searching custom drivers
-
In Drivers, type the driver's name.
-
Click the driver you searched.
-> The driver information window opens.
Listing custom drivers
-
In Drivers, click Custom to list all custom drivers.
-> All custom drivers are listed.
-
Click any custom driver.
-> The driver information window opens.
Duplicating a custom driver
-
In the driver information window, click ..., then Duplicate.
-
The JS code implemented in the custom driver used for duplicating is automatically implemented in the duplicated driver.
-
Enter the required information as in Creating a custom driver.
-
Click Create.
-> Your duplicated driver has been successfully created.
Updating a custom driver
You can update the version of your custom driver.
-
In the driver information window, click ..., then Edit.
-
Modify the JS code to add a feature or fix a bug.
-
Select the purpose of your modification by following this table:
Purpose of the modification Older version New version Fix a bug 1.0.0 1.0.1 Add a feature without breaking changes 1.0.0 1.1.0 Add a feature with breaking changes 1.0.0 2.0.0 -
Click Update.
-> A warning window appears
-
Click Confirm.
-> Your custom driver has been successfully updated.
Deleting a custom driver
-
In the driver information window, click ..., then Remove.
-
Click Delete.
-> A deletion note appears. Your custom driver has been successfully deleted.