# CREATING A MICROSOFT AZURE CONNECTION
This setup is intended to be a minimal setup example to get the Azure IoT Hub connector working. The Azure IoT Hub connector requires the creation of an Azure IoT Hub account upfront. This account can be either a free or a paid account. Check Azure IoT Hub pricing (opens new window) and IoT Hub limits (opens new window) to decide which subscription fits your needs.
# Creating an Azure IoT Hub
Go to the Azure Portal (opens new window).
In the Web portal page that opens select Create a resource as displayed in the following screen.

Search/select IoT Hub.
Click Create.
In the screen that displays choose a value for:
| Resource | Definition |
|---|---|
| Subscription | Subscription to use for your IoT hub. |
| Resource Group | New resource group or use an existing one. |
| Region | Region in which you want your hub to be located. Select the location closest to you |
| IoT Hub Name | Name for your IoT Hub. This name must be globally unique |
Click Next: Size and scale.
In the screen that displays choose a value for:
| Resource | Definition |
|---|---|
| Pricing and scale tier | Choose from several tiers depending on how many features you want and how many messages you send through your solution per day. |
| IoT Hub units | The number of messages allowed per unit per day depends on your hub's pricing tier. For example, if you want the IoT hub to support ingress of 700,000 messages, you choose two S1 tier units. |
| Advanced/Device-to-cloud partitions |
|
The number of units plays an important role in quotas and throttling.
# Example
| Throttle | S1 | S2 | S3 |
|---|---|---|---|
| Device-to-Cloud sends | 12 /sec/unit | 120 /sec/unit | 6,000 /sec/unit |
| Number of messages per day | 400,000 | 6,000,000 | 300,000,000 |
The number of devices depends on the subscriptions that you buy. For more information, see https://azure.microsoft.com/en-gb/pricing/details/iot-hub/ (opens new window).
This means that in order to reach a throughput of 300 uplinks/sec you need a minimum S1 subscription with 25 units (25 x 12 = 300).
The minimum D2C is 100 msg/sec, so even with S1 and 1 unit you can send 100 uplinks/sec. Starting with S1 and 9+ units, you can get above 100 msg/sec.
Another limitation is on the registry operation. Devices can be dynamically created on the first uplink they send to the Actility Azure connection. If there are many runtime create operations, it could take time to register the Devices.
For example, to register 10k Devices at runtime simultaneously, it can take 100 min using a S1 subscription with one unit (10,00/100) and 4 min on a S1 subscription with 25 units (10,000/(25*100)).
The following table shows the enforced throttles. Values refer to an individual hub.
| Throttle | S1 | S2 | S3 |
|---|---|---|---|
Pricing and scale tier NOTE This implies on individual or bulk import/export operations | 1.67/sec/unit (100/min/unit) | 1.67/sec/unit (100/min/unit) | 83.33/sec/unit (5,000/min/unit) |
Click Review + create.
Wait until the Hub deployment is complete.
Click Go to resource in the screen that displays.
➡️ The IoT Hub is created. You can see the details of your configuration as displays in the following screen.
# Creating an Azure IoT Connection
The Actility Azure connection uses AMQPS protocol.
You need to create the connection prior to creating the flow.
The creation of a connection establishes a link from ThingPark Wireless to the cloud provider that you want to associate a Device with. The link can be used to transport any Uplink regardless the DevEUI parameter.
Note
The DevEUI must be always in upper case.
The DevEUI must be always in upper case.Azure IoT Hub allows only one active connection per device.
To do this, you need to use the following endpoints.
POST/connectionsfor creationPUT/connectionsfor modificationDELETE/connectionsfor deletion
Note
When you update a configuration property on a connection, you must provide the whole configuration properties again.
Example of the creation of a connection
POST /connections

{
	"connectorId": "actility-azure-iot",
	"name": "Azure Demo Connection",
	"configuration": {
		"description": "Azure Datacenter",
		"hostName": "actilityDemoHub.azure-devices.net",
		"sharedAccessKeyName": "iothubowner",
		"sharedAccessKey": "ZNPDmKyUc54xgSG8LWNIiPZ9YRE46ezaeUtiAXYImA4=",
		"iotHubTier": "S1",
		"iotHubUnits": 25
	}
}
The following table lists the expected results of the properties when applied:
| Property | Expected results |
|---|---|
|
|
|
|
|
|
|
|
|
|
|
|
# Collecting Expected Information on Azure
Login to the Azure Portal (opens new window).
On the main page you should see all the resources that you have created. This looks like the following screen.

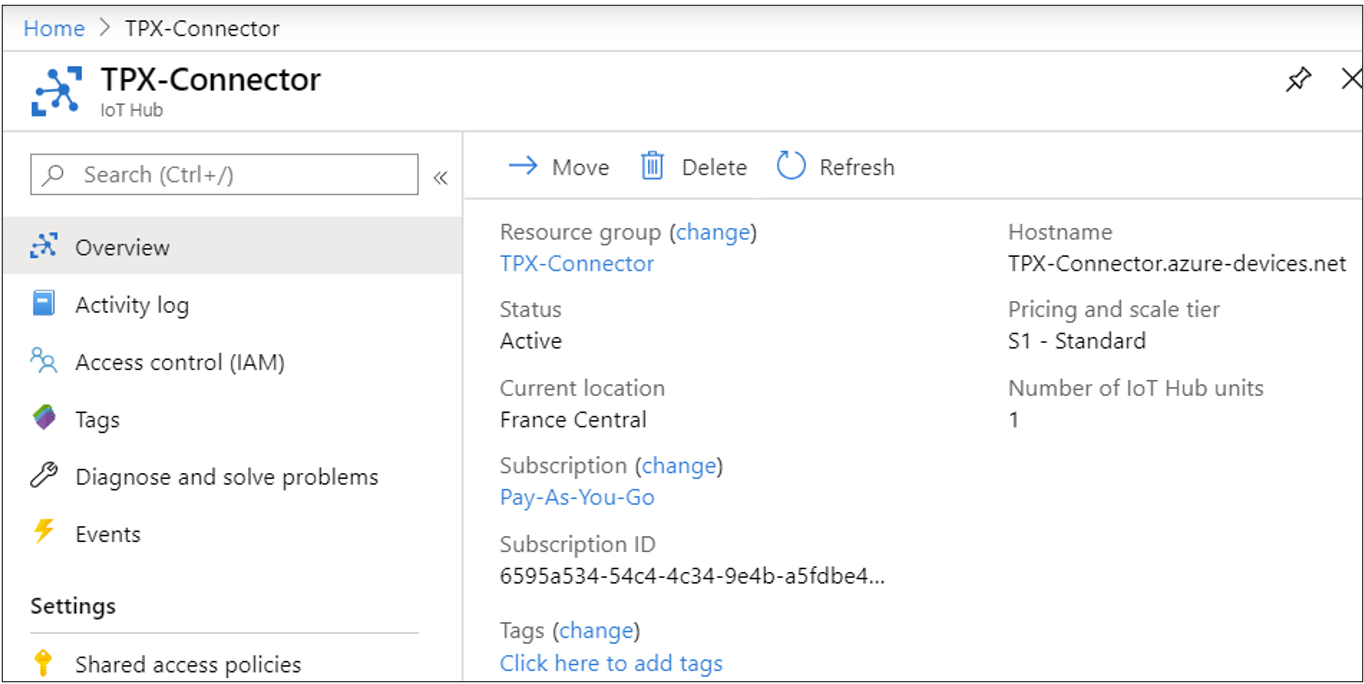
Select the IoT Hub that you have created, that is “contoso_2-test-hub”.
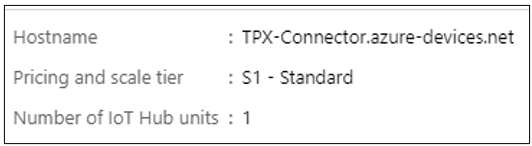
On the Overview page you should see the “Hostname”, “Pricing and scale tier” and “Number of IoT Hub units”. This looks like the following screen:
- Go to the “Shared access policies” page in Settings.
Using an existing one.
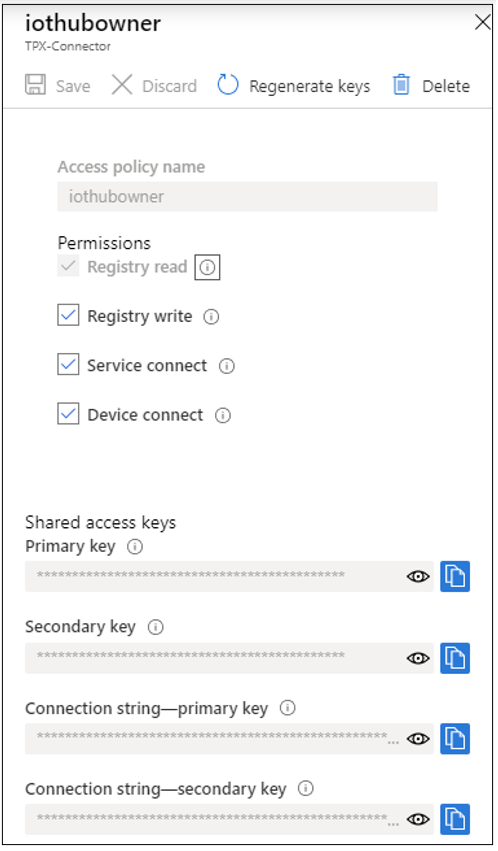
- Select “iothubowner”.
➡️ A screen displaying the “iothubrowner” shared strategy appears on the right side of your screen:
Creating a new one.
Select Add.
In a similar screen as in the previous procedure that displays, choose a name for the Shared strategy. Type “contoso3-test-hub-strategy”.
Ensure that the following permissions are allowed:
Registry read/write.
Device connect.
Ensure that the following permissions are allowed:
➡️ Your new strategy is displayed in the Strategy list.
- Ensure that the following permissions are allowed:
➡️ In the screen that appears on the right side of your screen the Shared Access Policy displays the “sharedAccessKeyName and Primary/Secondary key”. You will apply these keys to set the connection. See Verifying that the connection is successful.
# Limitations
Currently, the Actility Azure connection supports up to 100k Devices, all in the same IoT Hub.
At start-up, all Devices in the selected IoT Hub will be listed and AMQP connections/links will be opened. We support only Device-to-cloud sends telemetry (D2C) for uplinks and Cloud-to-device sends (C2D) for downlinks.
Other Azure operations like File upload, Direct methods or Device Twin are not supported.
All other limits are imposed by Azure based on the subscription and the number of units.
To select the subscription that fits your case check the IoT Hub limits (opens new window) documentation.
The Device Identifier (DevEUI) must be in uppercase on the Azure IoT Hub side.
In case you try to use the same IoT Hub (same hostname) at the same time while using multiple connections, those connections will collide on downstream links. (Azure allows only one active downstream link per device).
A “Link errors” event will be stored in the Event table. Each connection will retry to acquire downstream links each 1 min, but the collision will happen until only one active connection per IoT Hub is left. We strongly recommend that you disable the downlink mechanism (set downlinkEnabled=false).
Another downside of this collision is that upstream links will not be able to enforce proper rate limiter when sending uplinks.
The reason is that the rate limiter is not shared between connections and each connection will push uplinks at a maximum possible rate according to the IoT Hub subscription.
However, at some point it may exceed the global IoT Hub rate per minute and uplinks may start to be Rejected by Azure.
A way to avoid downstream links collision would be to set downlinkEnabled = false on most of the concurrent connections, and leave it set to true (default value) only on one connection. Thus, uplinks can be pushed with many connections, and downlinks can be received on one connection only.
In case of setting downlinkEnabled = false, Azure Connection will not list any existing devices in the IoT Hub and will create lazy upstreams on first incoming uplink from a device.
# Common error codes returned by Azure IoT Hub AMQP Broker
The following table lists the common error codes returned by Azure IoT Hub AMQP Broker:
| Error code | Error description | Comments |
|---|---|---|
| amqp:internal-error | Another AMQP Client has opened a Receive Link | Device used by another AMQP client. The latter tries to solve this by closing the link to the device.
Setting Check ‘Link errors’ events in the events log. |
| amqp:not-allowed | Device used by another AMQP client, like the above error code | |
| amqp:not-found | Device not found due to case sensitive device id or because it is not anymore on the IoT Hub. There is no action to perform. The device links will be closed and removed from the Azure Connection. IoT-Flow uses uppercase deviceEUI / device id. | |
| amqp:internal-error |
Device Not Found \n ErrorCode:DeviceNotFound ...
| Device deleted manually from the Cloud side. Azure will close the device links after 1-2 minutes. There is no action to perform. The device links will be closed and removed from the Azure Connection. |
| amqp:link:detach-forced | Server Busy. Please retry operation | When Azure is overloaded, it will detach the device links. The device links will be retried automatically every 1 min. |
| amqp:resource-limit-exceeded | Total number of messages on IotHub '...' exceeded the allocated quota. Max allowed message count : '...', current message count : '...'. Send and Receive operations are blocked for this hub until the next UTC day. Consider increasing the units for this hub to increase the quota ... | When the daily quota of messages is reached, the Azure IoT Hub rejects new message exchange. The Azure connection will close. The supervisor will retry the connection based on reconnectStrategy. However, until the next day this connection will not be able to re-open it successfully. If you need to send more messages until the next day, you need to manually increase the hub units from your IoT Hub Dashboard. Update the connection configuration with the new iotHubUnits number. |
# Verifying that the connection is successful
Install the latest Azure CLI (opens new window).
Install the Azure IoT Extension for Azure CLI (opens new window). Type:
az extension add --name azure-iot
In the Welcome page choose the latest resource that you have created: “contoso2-test-hub”.
In the “Shared access policies” page, choose the latest policy that you have created:“contoso2-test-hub-strategie”.
Copy the IoT Hub connection string of the primary key.
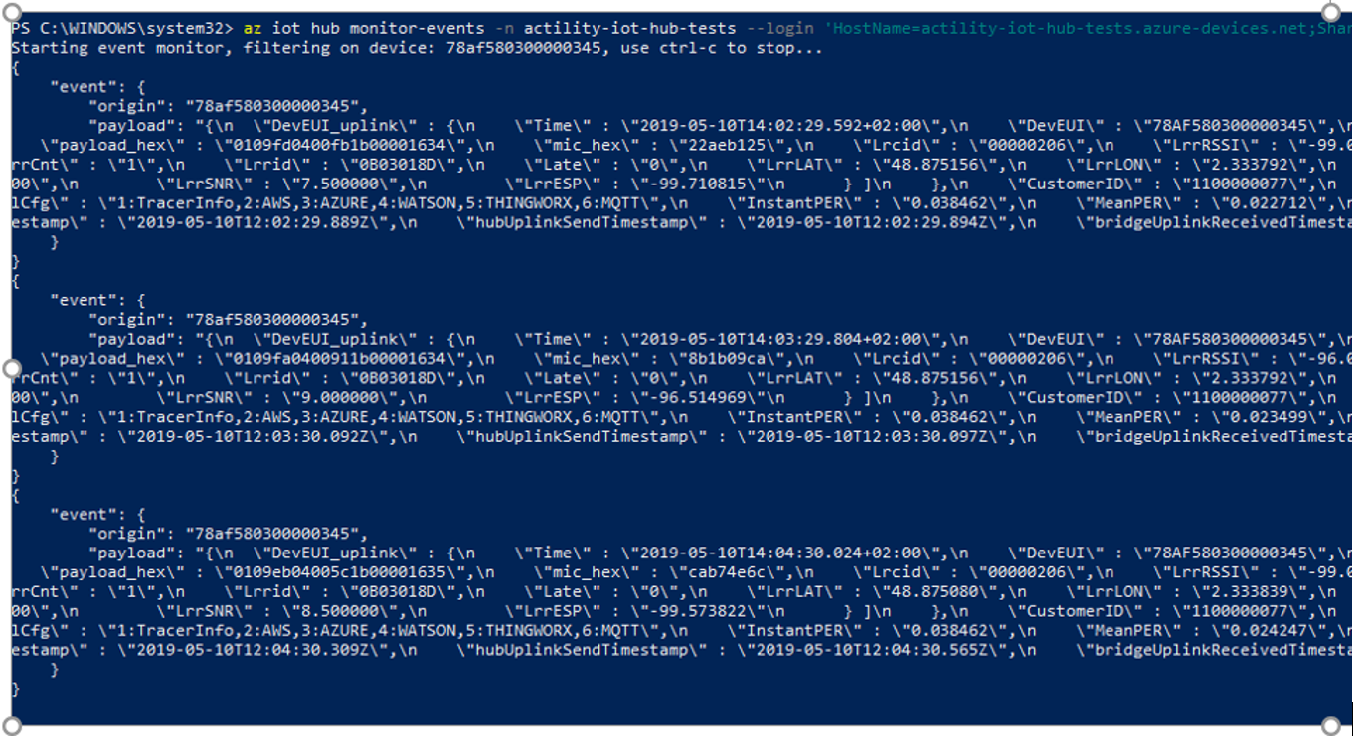
Run the following command to monitor Device events:
az iot hub monitor-events -n {iothub_name} --login {iothub_connection_string} -d {device_id}
# Example
az iot hub monitor-events -n actility-iot-hub-tests --login HostName=actility-iot-hub-tests.azure-devices.net;SharedAccessKeyName=iothubowner;SharedAccessKey=u8OCaO4nfJR4DAe8bHjWaGXzA3D4PPb2d8+pWwzIfyQ= -d 78af580300000345
➡️ You should see something like this: