Pre-commissioning Devices on ThingPark Activation
The major benefit of ThingPark Activation is that it allows the Device Manufacturer to have a fully generic personalization chain, independently from where the devices are sold, and on which connectivity IoT platform they are activated.
ThingPark Activation provides a centralized and a secure Key Management System, also handling the association between the key and the device through the ownerToken.
This chapter describes how the device creation in ThingPark Activation is performed.
Information to collect
First, get a ThingPark Activation account and generic AppEUI/JoinEUI.
Through your Actility support account, request a ThingPark Activation Manufacturer account and AppEUI / JoinEUI:
- Default ThingPark Activation JoinEUI: F0-3D-29-AC-71-01-00-01
- Dedicated JoinEUI: can be provided on-demand
The JoinEUI that is assigned to a set of devices allows to route the activation procedure to the home Join Server. Migrating from one home Join Server to another is done on a per-JoinEUI basis, not per device. We advise that you use a JoinEUI per device batches or models, so the migration can be done with this granularity.
Next, collect the association between DevEUI and TKM_INFO (when using Secure Element) or AppKey (if no Secure Element is used), as described in ThingPark Activation pre-commissioning overview..
Pre-commissioning calls are done before or during personalization, and can use 2 different methods:
- ThingPark Activation API integration (recommended)
- Import in Key Manager GUI (mass import or manual import)
Using ThingPark Activation APIs for factory integration
Using Manufacturer account, the server holding keys can pre-commission them in ThingPark Activation through OSS API.
OSS API integration
Device can be pre-commission on ThingPark Activation using:
POST /kmSubscriptions/{kmSubscription}/devices
With parameters
- EUI
- appEUI
- hsmGroupID
- tkmInfo
More support can be found in OSS API documentation.
Check the Tutorial for OSS API example.
Using Key Manager UI
The Device Manufacturer can also use the ThingPark Wireless Key Manager User Interface to pre-commission devices in her/his ThingPark Activation account.
Once logged in, the Device Manufacturer can pre-commission device using Create in the Devices menu.
One device creation
-
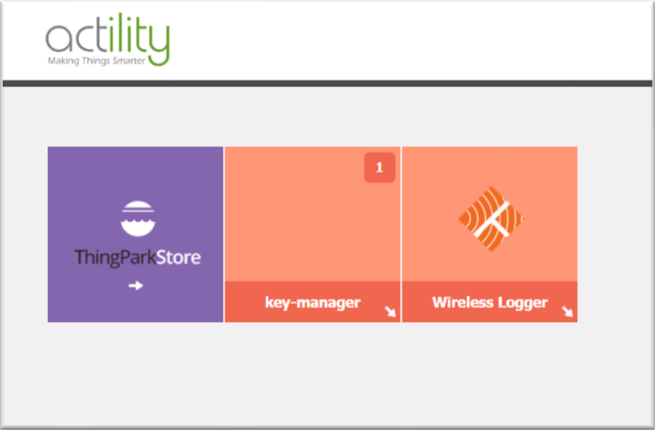
Connect to subscriber portal of the right JS instance. Then, access to the key-manager application: https://activation.thingpark.com/portal/web/.
-
In the Devices tab, click Create. Check the Pre-commissioning only box then fill in the required information below depending on the presence of a Secure Element.
-
With Secure Element:
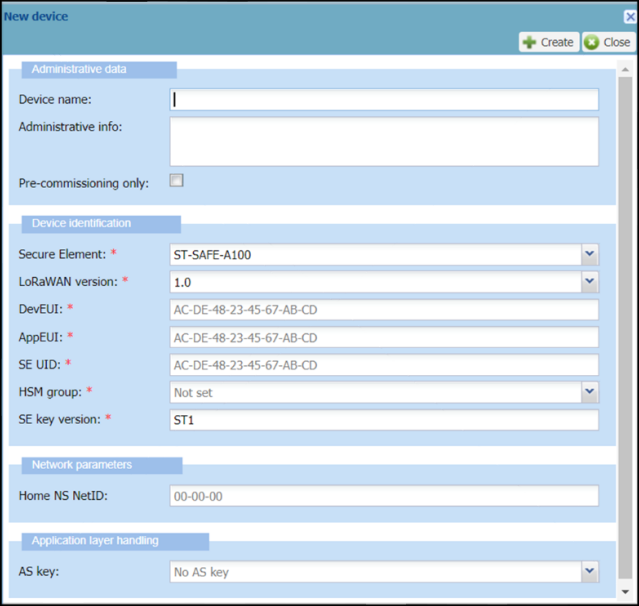
-
Without Secure Element:
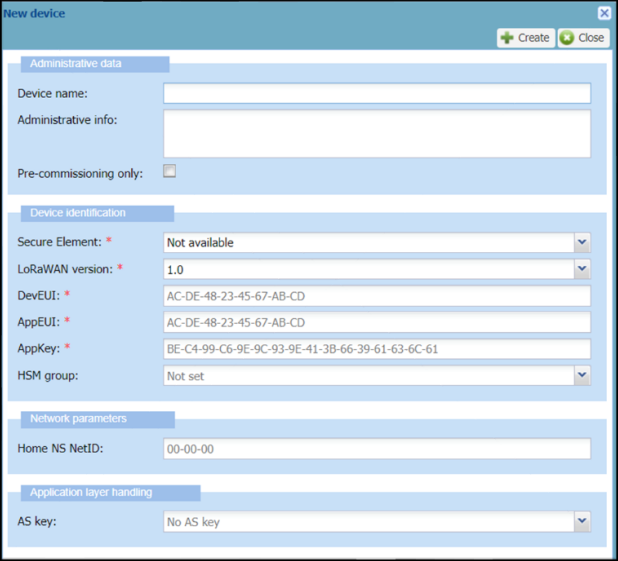
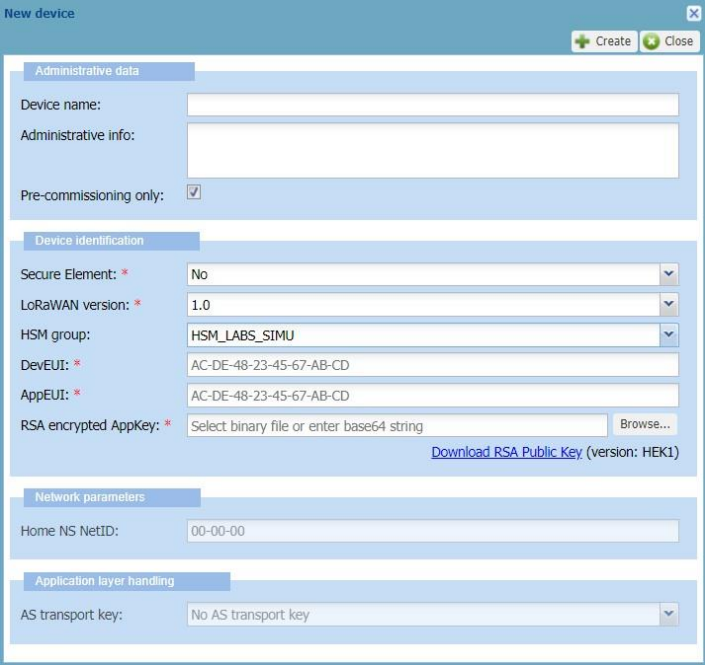
The AppKey provisioning can be done with clear text or with the RSA encryption. Involving HSM (selecting HSM group) will necessarily require RSA encryption with HEK.
For encryption case with HSM, download the RSA Public Key (HEK), then use following command to encrypt AppKey binary:
openssl rsautl -encrypt -in appKey.bin -inkey hek.pem -pubin -pkcs -out encryptedAppKey.binProvide encrypted AppKey binary using Browse.
As another option, use the following command to encrypt the AppKey using RSA Public Key (HEK), then convert to base64 (in example bellow, AppKey = 5E586E1D4E7136ADB174ADB07F2A6034).
echo '5E586E1D4E7136ADB174ADB07F2A6034' | xxd -r -p | openssl rsautl - encrypt -inkey hek.pem -pubin -pkcs | base64Provide resulted string.
-
-
Click Create.
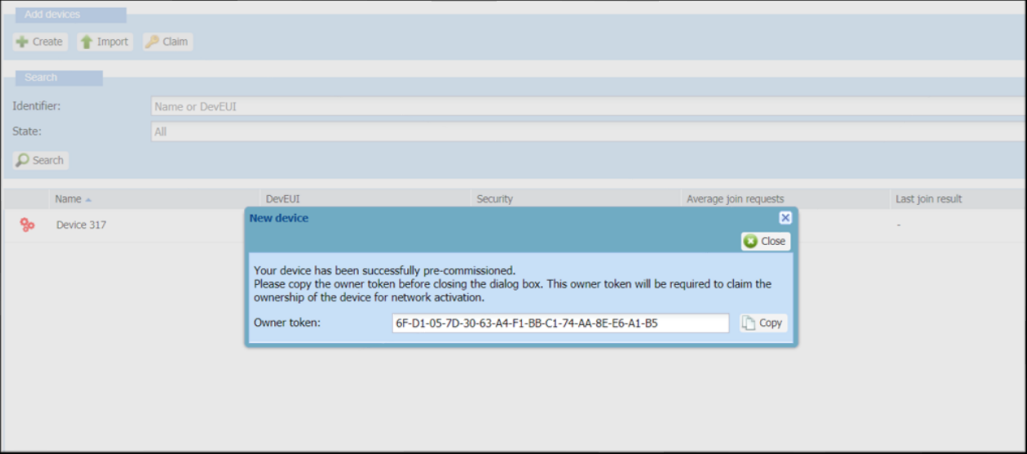
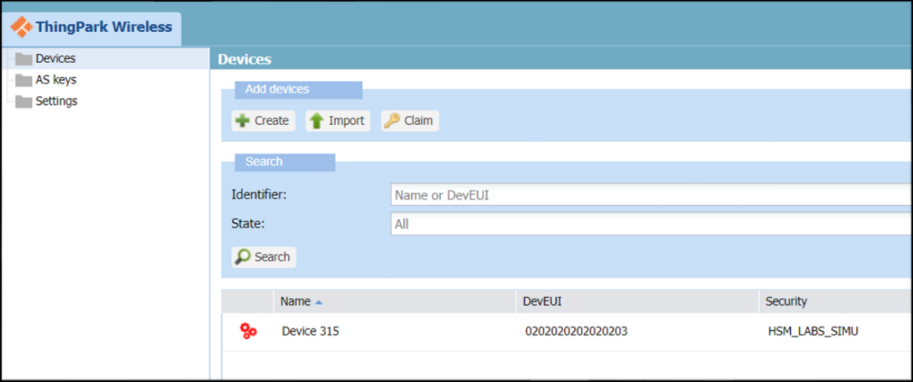
-> The device is now pre-commissioned and appears in the devices list as illustrated in the following capture.
-
When a Secure Element is used, the ownerToken value is TKM_INFO. When no Secure Element is used, an ownerToken is returned in a pop-up window as illustrated in the following capture.
