Reset the beacon and re-join the LoRaWAN network
Your beacon is a LoRaWAN® OTAA device that needs to do a join request to attach the LoRaWAN® network and get a join accept from it.
If necessary, you can force a new join request for a beacon that is already joined for example to attach it to a new network. You can also use this procedure to troubleshoot and reset the beacon.
Resetting the beacon with the magnet
The beacon is equipped with a magnet-activated reed switch (see figure below on the placement of reed switch on the beacon) which requires the end user to place and remove a magnet (with a specific sequence), next to the arrow to exit the shipping mode and trigger the LoRaWAN Join procedure. Once, the beacon has joined the LoRaWAN network, the same sequence can also be used to reset the beacon.
However, it requires that the value of firmware parameter reed_switch_configuration=1, before the sequence below is carried out to reset the tracker. For more information, please refer to Reed switch interface.
![]()
Key precautions for activation of the beacon with a magnet
- Do not attempt to activate the beacon when in proximity of strong magnetic fields (ie, magnetic mounts)
- Use a strong enough magnet, and make sure you know where are the poles. A magnet that has been successfully tested with the reed switch can be purchased from here
- You should always start the sequence with the magnet far away from the beacon to avoid false detection of the reed switch
Magnet sequence to activate the beacon
- The sequence below can be carried out multiple times without any interruption. However, each time the sequence is successful, the device will undergo a reset.
- You can check whether the sequence is successful by scanning the device with any Bluetooth scanning application, such as Bluetooth Scanner or Abeeway tracking app. The beacon will advertise itself as ABWXXXXXXX (Where XXXXXXXXX are the last 9 digits of LoRaWAN DevEUI). The Bluetooth advertisement of the device is about 10 minutes (default configuration) if the beacon is not Bluetooth bonded.
For MCU FW 2.2 and above, you need to carry out the following sequence with the magnet next to the reed switch:
- A long activation of the reed switch (between 3 to 6 seconds)
- A long time without activation of the reed switch (between 3 to 6 seconds)
- A long activation of the reed switch (between 3 to 6 seconds)
The example video below demonstrates the operation.
Resetting the beacon with LoRaWAN downlink
For more information on resetting the device with downlink, visit Abeeway trackers Reference Guide: Debug commands, Section: Resetting the device.
If you wish to reset the beacon with LoRaWAN downlink, there are three options:
- Reset the device (keeping the current configuration): Send the downlink ff010100 on LoRaWAN port=2
- Reset the device (revert to the original config file that was flashed in the beacon): Send the downlink ff010101 on LoRaWAN port=2
- Reset the device (revert to the original config file that was flashed in the beacon and also remove Bluetooth bond): Send the downlink ff010102 on LoRaWAN port=2
Resetting the beacon with Abeeway Updater
- This method requires opening of the casing to access the USB port.
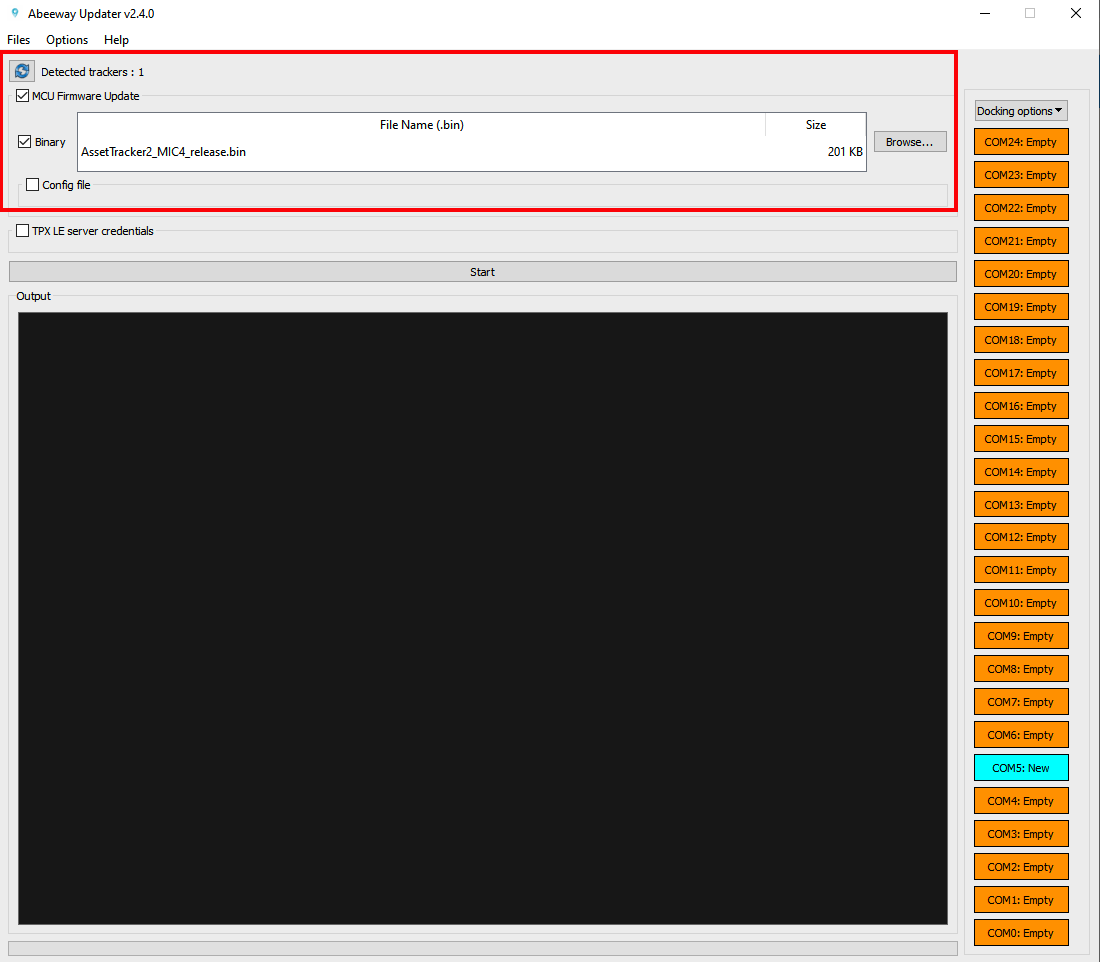
The beacon can be reset to the factory default using Abeeeway updater. The factory default configuration can be found in the Abeeway trackers Reference Guide, Chapter: Factory default Configuration.
Abeeway Updater can be used to reset the beacon to factory default if the MCU firmware update is carried out without the config file. The beacon is reset to factory default settings.

Resetting the beacon over CLI with beacon connected to USB port
The beacon can be reset over Command Line Interface (CLI) with the beacon connected to computer using USB port.
- This method requires opening of the casing to access the USB port.
- The instructions below are for MCU FW 2.2 and above. For older firmware versions or to know more about CLI feature, please visit CLI Usage
Here are the steps:
- Connect the beacon to the USB port and open Tera Term to connect to the serial port on which the beacon is connected.
- The beacon will prompt for the password. The default password is 123.
- If the password is successful, the CLI will show the traces and can be used to interact with the beacon.
- Enter the command system reset on the CLI console to reset the beacon without changing its existing configuration saved in the flash. The beacon will re-join LoRaWAN network.