Executing bulk operations
You can add, update or remove devices in bulk, by importing a CSV file, instead of unitary addition, update or deletion. The CSV file must not exceed 50K lines in TPE SaaS, 20K in self-hosted TPE, and 20MB.
Make sure that your CSV file has the right format prior to doing the task. A sample file is downloadable from the user interface.
-
Fom the left panel, select Devices, then click BULK OPERATIONS from the top-right corner of the page.
You can also expand BULK OPERATIONS and select Add, update and delete devices from CSV file. -
Prepare your .csv import file, guided by the SAMPLE FILE downloadable from the user interface. To learn more about how to build your .csv file, see About import file.
noteYou will need to fill the Device Model ID for each imported device. Use the downloadable MODEL LIST file to get the mapping between each model and its ThingPark Model ID.
For LoRaWAN® devices, only device models compatible with the list of enabled ISM bands are returned. -
Optional: In case you do not want to import the keys of your LoRaWAN® devices in clear-text format, you may import RSA-encrypted keys by applying the following steps, leveraging asymmetric cryptography:
-
In the user interface, click the public key to download the RSA public key that you should use to encrypt the keys of your devices. The downloaded file includes the public key in JWK (JSON Web Key) format.
-
Convert the
JWKformat toPEMformat. Let's denote the resulting keypubkey.pem.tipTo do this conversion, you may use an online converter such as https://8gwifi.org/jwkconvertfunctions.jsp
-
Using
pubkey.pem, encrypt your device keys, for instance using OpenSSL, then convert them to base64 format.tipAs an example, to encrypt a hexadecimal AppKey, you may use the following OpenSSL commands in a shell terminal:
xxd -r -p AppKey.hex > AppKey.bin

openssl pkeyutl -encrypt -in AppKey.bin -out encryptedAppKey.bin -pubin -inkey pubkey.pem -pkeyopt rsa_padding_mode:pkcs1

base64 encryptedAppKey.bin > encryptedAppKey.b64 -
Add your encrypted keys, in base64 format, to your CSV file and fill column X of this CSV file with the key ID provided by the
kidfield of the JWK file downloaded in step-1 above.
-
-
When your CSV file is ready, click
 to upload it.
 -
Click IMPORT.
-> The whole CSV file is scanned to check its consistency: for each line, the number of columns and the content of each column are verified. If at least one error is detected at this stage, the CSV file is not processed at all and the mass import immediately fails. Otherwise, the processing of the CSV file is started.
Colored toasters display on your screen to inform you about the progress. The progression follows this sequence:
-
The import is pending (grey) then progressing (dark green).
-
When the import is complete, a notification displays in the Top Bar indicating the result. It can be one of the following:
-
The mass import is successfully done: the whole file has been completed with success.
-
The mass import has succeeded with errors: the file has been partially processed successfully, some lines were not processed due to errors.
-
The mass import has failed: the file has not been imported successfully, no device successfully processed.
-
-
-
From the top-right corner of the user interface, click
 to access the Notifications list. To
learn more, see About device notifications.
to access the Notifications list. To
learn more, see About device notifications.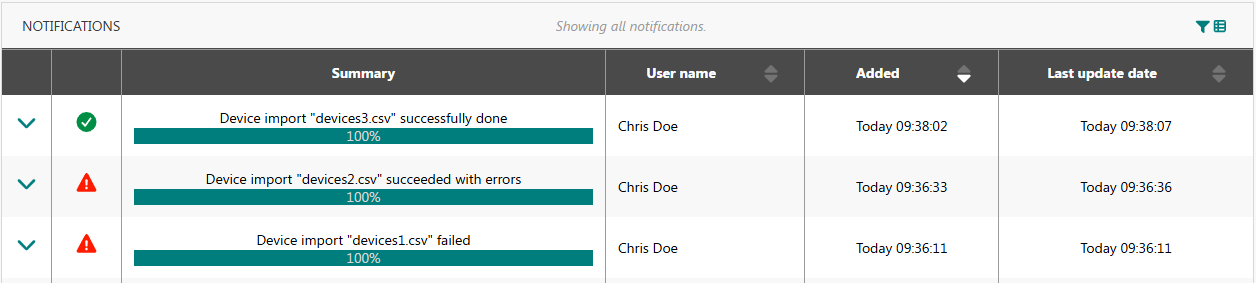 tip
tipThe summary of each device import notification contains the name of the imported CSV file. To help you identify and track import sessions more easily, we recommend importing CSV files with distinct file names. Reusing the same file name may make it harder to determine which notification relates to which import.
-
If the mass import has not succeeded, analyze and correct errors in the .CSV file then re-import the file.
noteA device addition matching a DevEUI already existing and belonging to the same subscriber does not trigger an error and is counted in the "Already existing" counter.
-
After a successful mass import, go to the device list to view all imported devices.