Step 7 - Managing your devices
Checking the device state
A color code is used to identify the health state of each device, as described in the following table:
| Health state | Color | Description |
|---|---|---|
| Active | Green | The device is properly commissioned and it successfully exchanges packets with the network server. |
| Initialization | Orange | The device has not completed its activation or reactivation process. |
| Connection Error | Red | The device is commissioned and has communicated in the past, but has not recently exchanged packets with the network, for the last 3 days or more. Check if the device battery is defective or there is a coverage issue. If the device is no longer used, you can decommission it. |
Visualizing sensor data
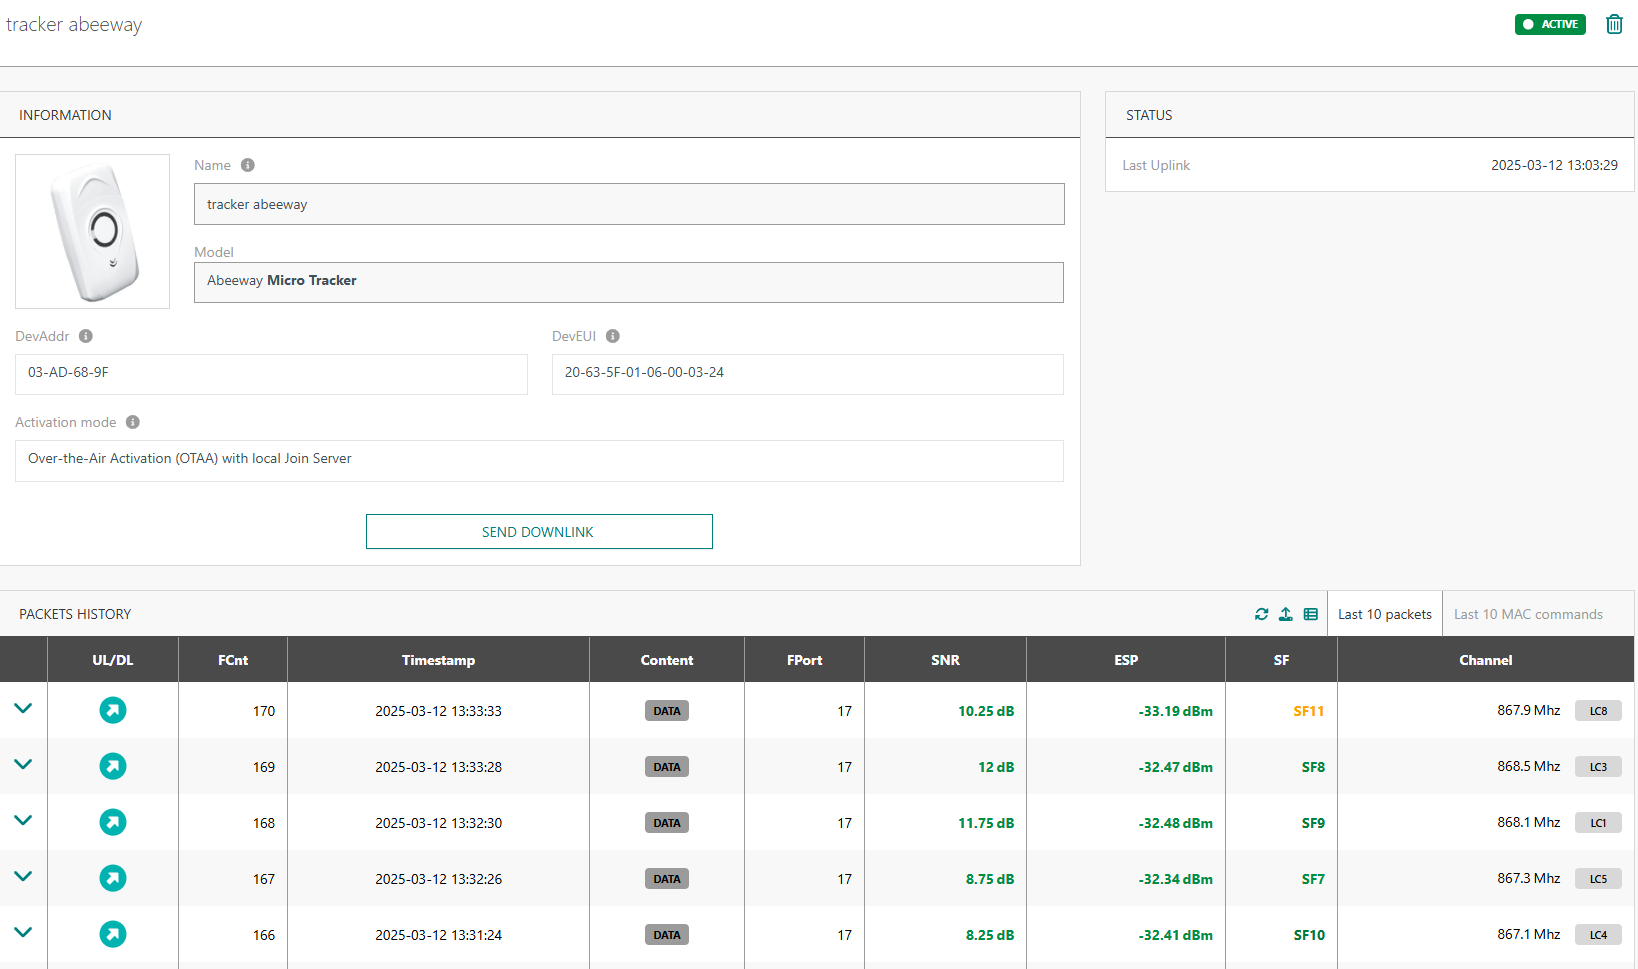
From the device list, you can click on the device name to access the device information and last 10 packets history panel:

The list can be refreshed , and exported
in csv file.
You can select which columns to display on your table view :

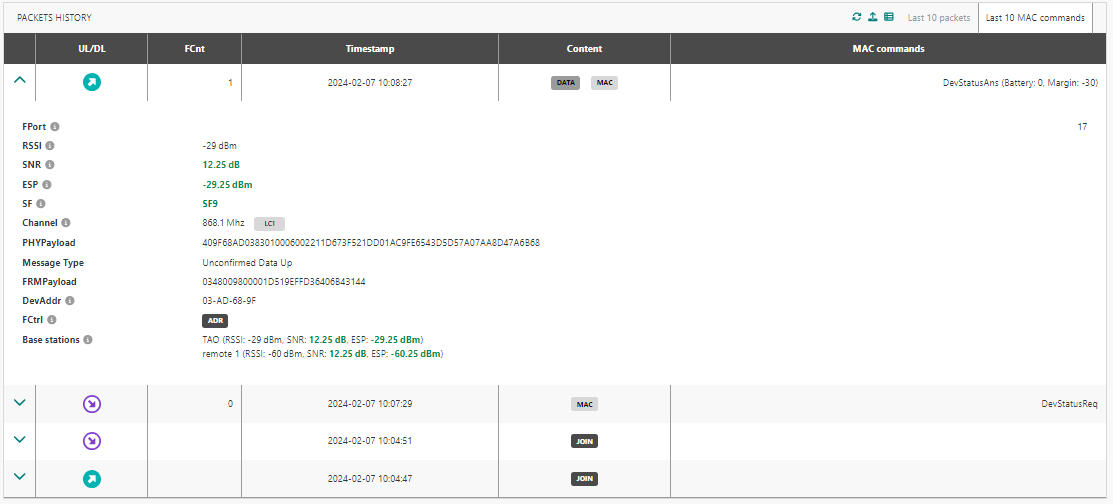
You can expand a history line to get more information on each packet:

The LoRaWAN MAC header is displayed in decoded format, e.g. the DevAddr, the Frame Control (FCtrl) flags…
You can switch to the last 10 MAC commands panel:

This tab shows the last 10 UL/DL MAC commands even if they are older than the latest 10 UL/DL frames. The aim is to allow ThingPark Enterprise All-in-one administrators to access the history of the device's MAC commands (even if many UL/DL packets have been exchanged afterwards) to simplify troubleshooting of radio issues.
Sending a downlink packet
Besides sending downlink packets to your devices from your application server over HTTP, MQTT or BACnet protocols, you may use the user interface to occasionally send downlink packets to a given device.
This feature is supported from version 2.3.0 onwards.
-
From the device list, Click on the device name to access its detailed page.
-
In the INFORMATION widget, click Send Downlink.
-> A Send Downlink box opens.
-
Enter the desired Payload (FRMPayload in LoRaWAN® specification) that you want to send to the device in a downlink packet, in hexadecimal format. The maximum size is 242 bytes (484 hexadecimal digits), but the actual payload size depends on the LoRaWAN® downlink data rate of your device.
-
Enter the LoRaWAN® Port. This corresponds to the FPort in LoRaWAN® specification, associated with the payload, with an integer value between 1 and 223.
-
If you want to request an acknowledgement of this downlink packet by the device, check the box "Send confirmed data downlink frame". In this case, upon the reception of this data frame by the device, it should acknowledge its reception in the next uplink packet (LoRaWAN® ACK bit set to 1).
-
You may flush the current content of the device's downlink queue before adding the new packet. Check the "Flush downlink queue" box if you want to do so.
noteThe downlink queue is only relevant for class A devices. It allows queuing up to 5 downlink packets per device.
-
Click Validate.
-> A notification appears at the bottom right of the screen to inform you of eventual errors. If the downlink packet is accepted, its effective transmission is scheduled according to the device class and radio conditions. For class A devices, downlink transmission can only happen after the reception of an uplink packet.
You may check the effective transmission status of your downlink packets in the "Packet History" widget. The column "Delivery Status" is hidden by default in this table, you may unhide it as needed.